

Intro to Watercolor!
Materials 101 in the newsletter, Watercolor Techniques 101 in the GUT Gathering LIVE today at 12pm PST

Helllooo my GUT peeps.
HAPPY BIRTHDAY, US!! TODAY WE ARE ONE.
Can’t wait to celebrate our bday in person this afternoon at the GUT Gathering. I’m eager to see all the creative and personal questions, leaps, accomplishments, mistakes, changes, and growth that you’ll draw your way through in the year ahead.

Our first LIVE GUT Gathering/watercolor lesson starts at 12pm PST TODAY, Sunday, August 20. It’s FREE for subscribing GUT members - the link to register is in the subscribers section below.
Don’t forget to bring a delight to paint!
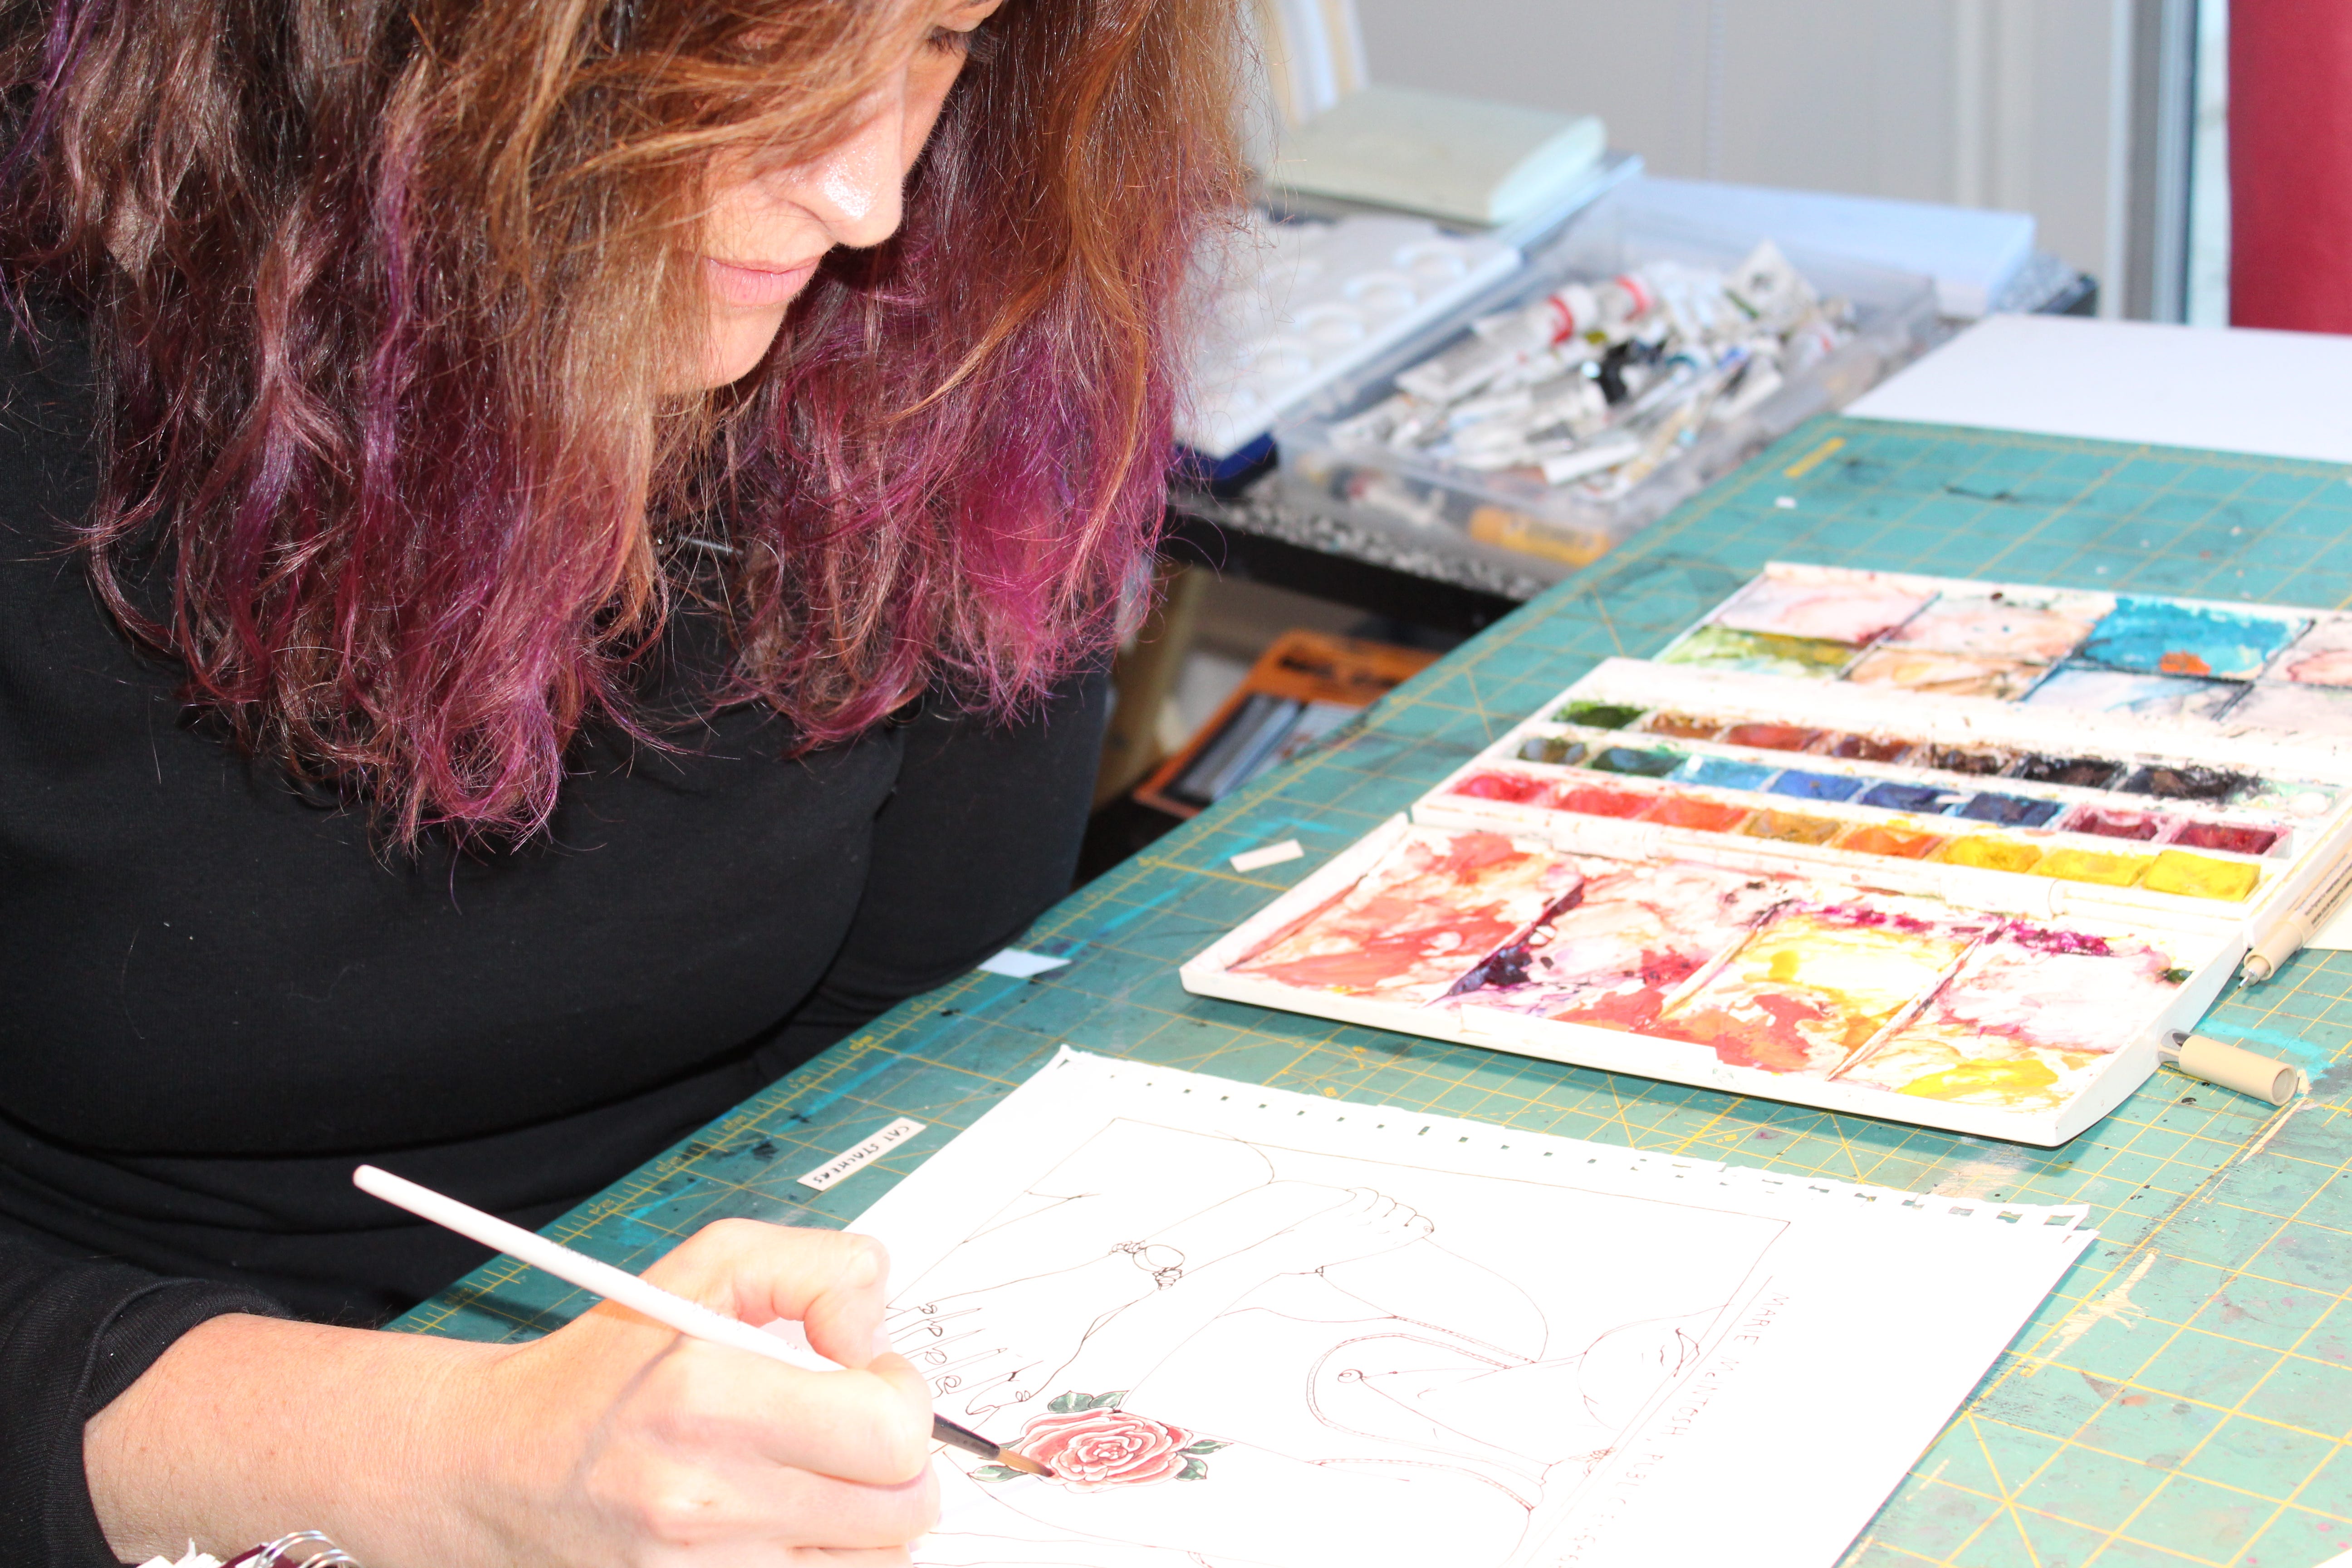
Since we’re doing a “Watercolor Techniques 101” on the zoom, I thought it’d be fun to do a little “Watercolor Tools 101” here in the GUT pub. So without further ado…. Let’s take a little dive into my favorite medium. The same medium when I was younger I swore I would never use…
Watercolor
The whole world in a box of paints.
What the heck IS watercolor, anyway?
Great question. Watercolor is the word for a specific kind of paint and the artwork made with those paints. (To say “Van Gogh made watercolors with watercolors” sounds silly, but it’s accurate.)
Watercolor paint is a translucent paint that gets mixed with water and applied to a surface, usually paper. Translucent means that you can see through it. What’s so special about that nature of watercolor as opposed to opaque paints like gouache or oil paint is that that translucency allows light to penetrate the paint, hit the white paper below, and reflect back into the viewers eye, creating a luminous effect with the color.
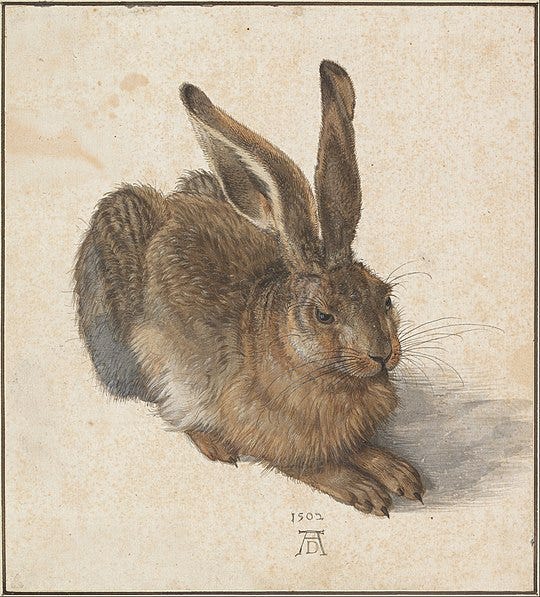
One could argue the oldest paintings are watercolors. Cave drawings were created by mixing pigments (raw color) with water and then that mixture was applied to a surface. While technically that would be more of an ink, we can call still call that watercolor. So let’s. Flash forward through the Egyptians’ ink on papyrus, and Chinese masters’ ink landscapes, all the way to the 15th century, when what we now call watercolor splashes on the scene. Artists start to create sketches using the medium in preparation for their oil paintings, and then along comes a German artist named Durer. He starts making watercolor drawings so detailed, so refined, and he considers them finished artworks. Others agree, and watercolor as a defined, revered medium was born.
Since Durers’ days, watercolor has become the first painting medium we introduce to kids, and the medium often adults returning after a long time away from the arts. Why is that?
Well, it’s simple, safe, portable, and easy to clean. It dries fast. It’s approachable. At the same time, it also has limitless possibilities. High art, low art, kids art, grown-ups art. It’s the every-person’s paint. But to push it to its full potential takes years of practice.
No matter what, it’s super fun.
So what IS watercolor paint??
Watercolor Paint
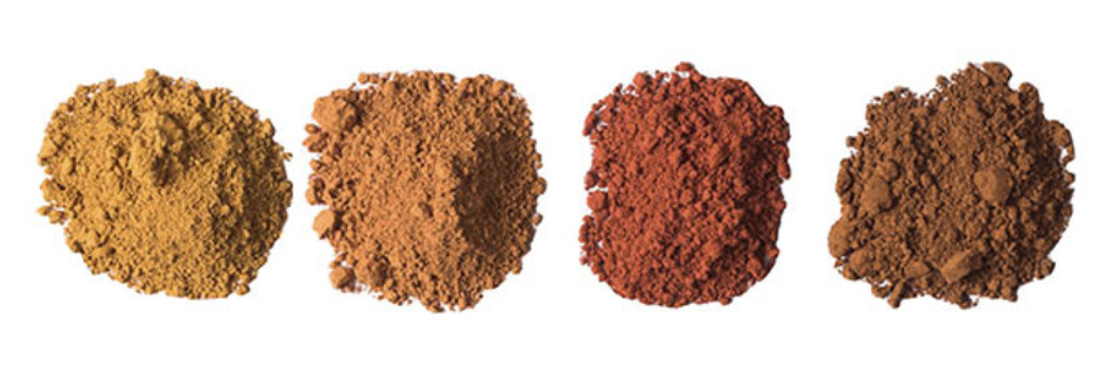
Watercolor paint is made from four simple ingredients: pigment (that’s the raw color - often rocks and minerals of some sort), a binder that holds everything together (like gum arabic), additives that help it last and stay in good shape (like glycerin or honey), and water.
Mixed together, these ingredients become watercolor paint. That paint can take two forms: dry and liquid. AKA a cake and a tube.
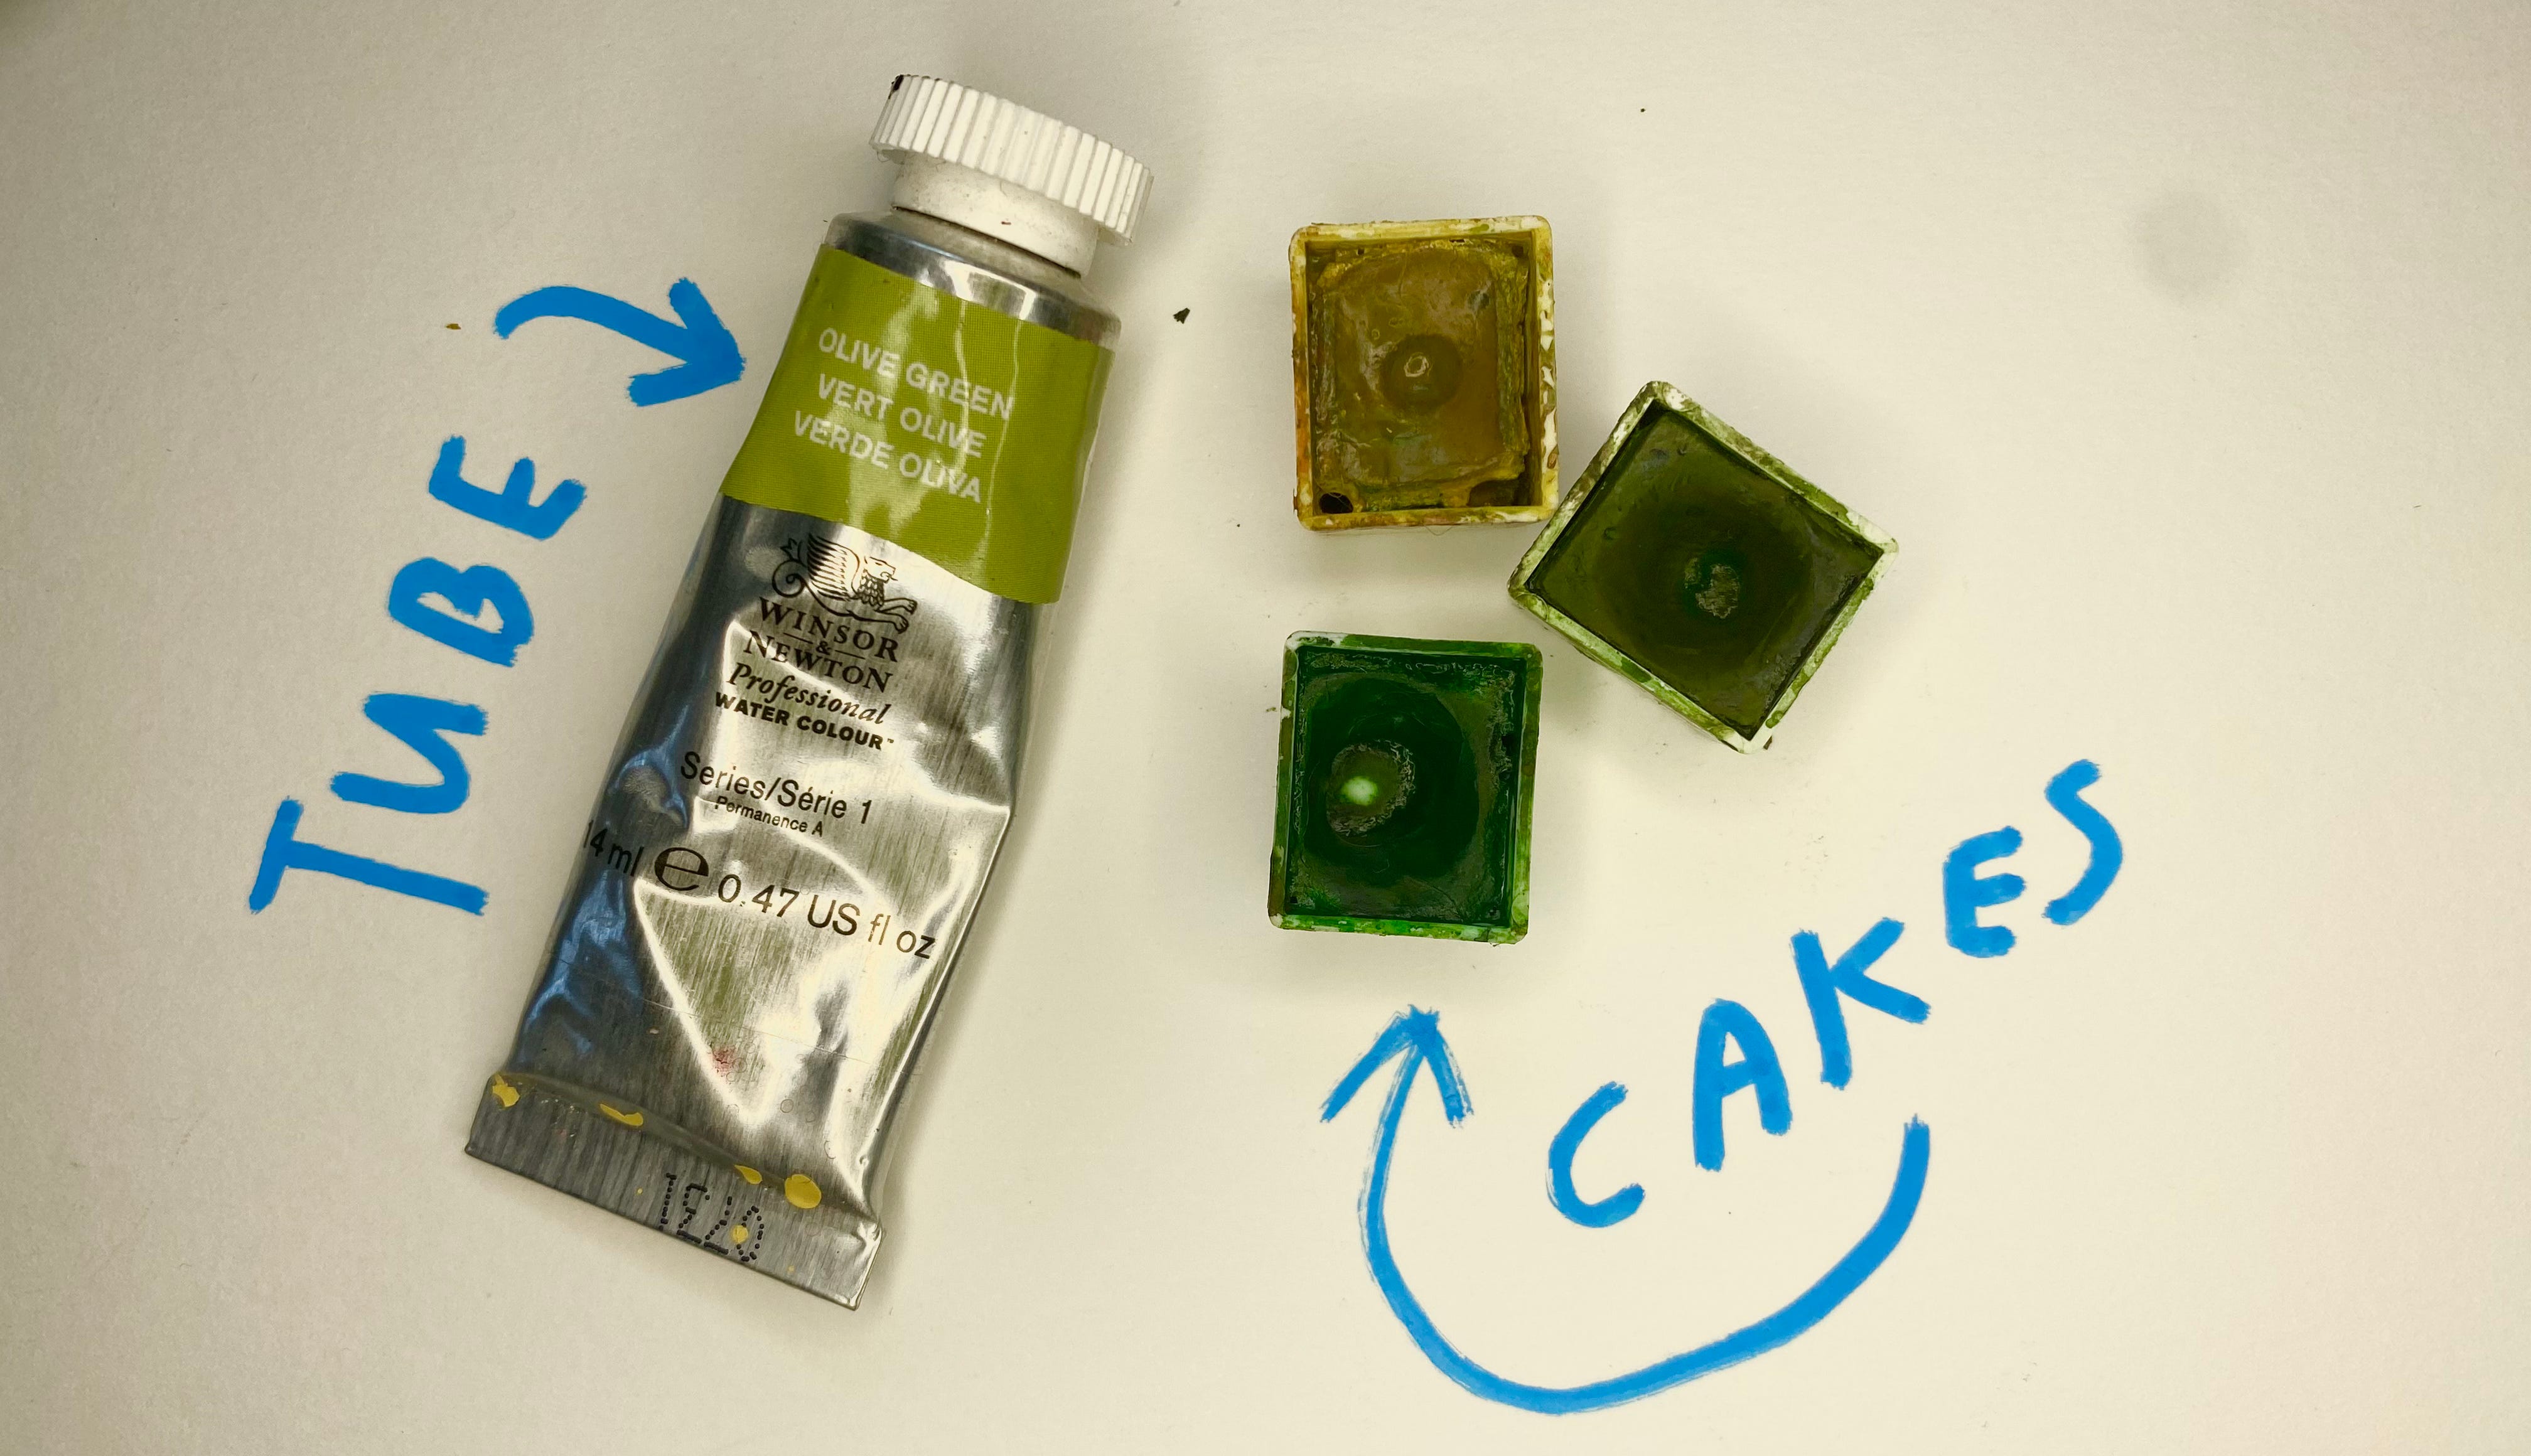
What’s the difference?? So glad you asked. Generally speaking, watercolor cakes have less liquid, and therefor higher concentration of pigments. But you need to add more water to use them, so that pigment concentration doesn’t make much difference. The real difference comes in how YOU use them. They offer very different experiences. If you are working with larger areas, you might find tubes helpful. If you want portability, you might find cakes easier.
FUN FACT: Love a specific tube but want to add it to your cake palette? Squeeze some of the watercolor from a tube into a watercolor cake container and let it dry. Poof. You made your own watercolor cake.
How to paint with watercolor.
This is what we are going to do in the GUT gathering today - learn watercolor painting techniques - but suffice to say here, you have to add water to the paint. How much water you add and how, and how you layer and move the paint around, let it dry or don’t let it dry creates different effects on the paper. These effects are what you’ve come to recognize as watercolor painting.
Despite what art schools around the world will tell you, there is no “right” way to paint with watercolors, or any paints for that matter. But there are techniques that achieve certain goals, and we can learn them so we can choose to use them or ignore them. Once we have the basics down we can adapt and incorporate and ignore to form our own personal styles. With practice, we all end up painting our own way. I am me, and you are you, and we are we together. Or something like that. Coo Coo Cachoo.
Now that we know what the PAINT is, what about the rest of the tools we need?
Paper!
I’d love to tell you paper doesn't matter and you should use whatever you have. And honestly you can. But because watercolor paints are so watery, the surface you’re painting on does actually matter. Some paper absorbs water. Some repels it. Some has a rough surface. Some smooth. And how the water and paint interacts with the paper is going to have a huge impact on both the experience of painting and the outcome.
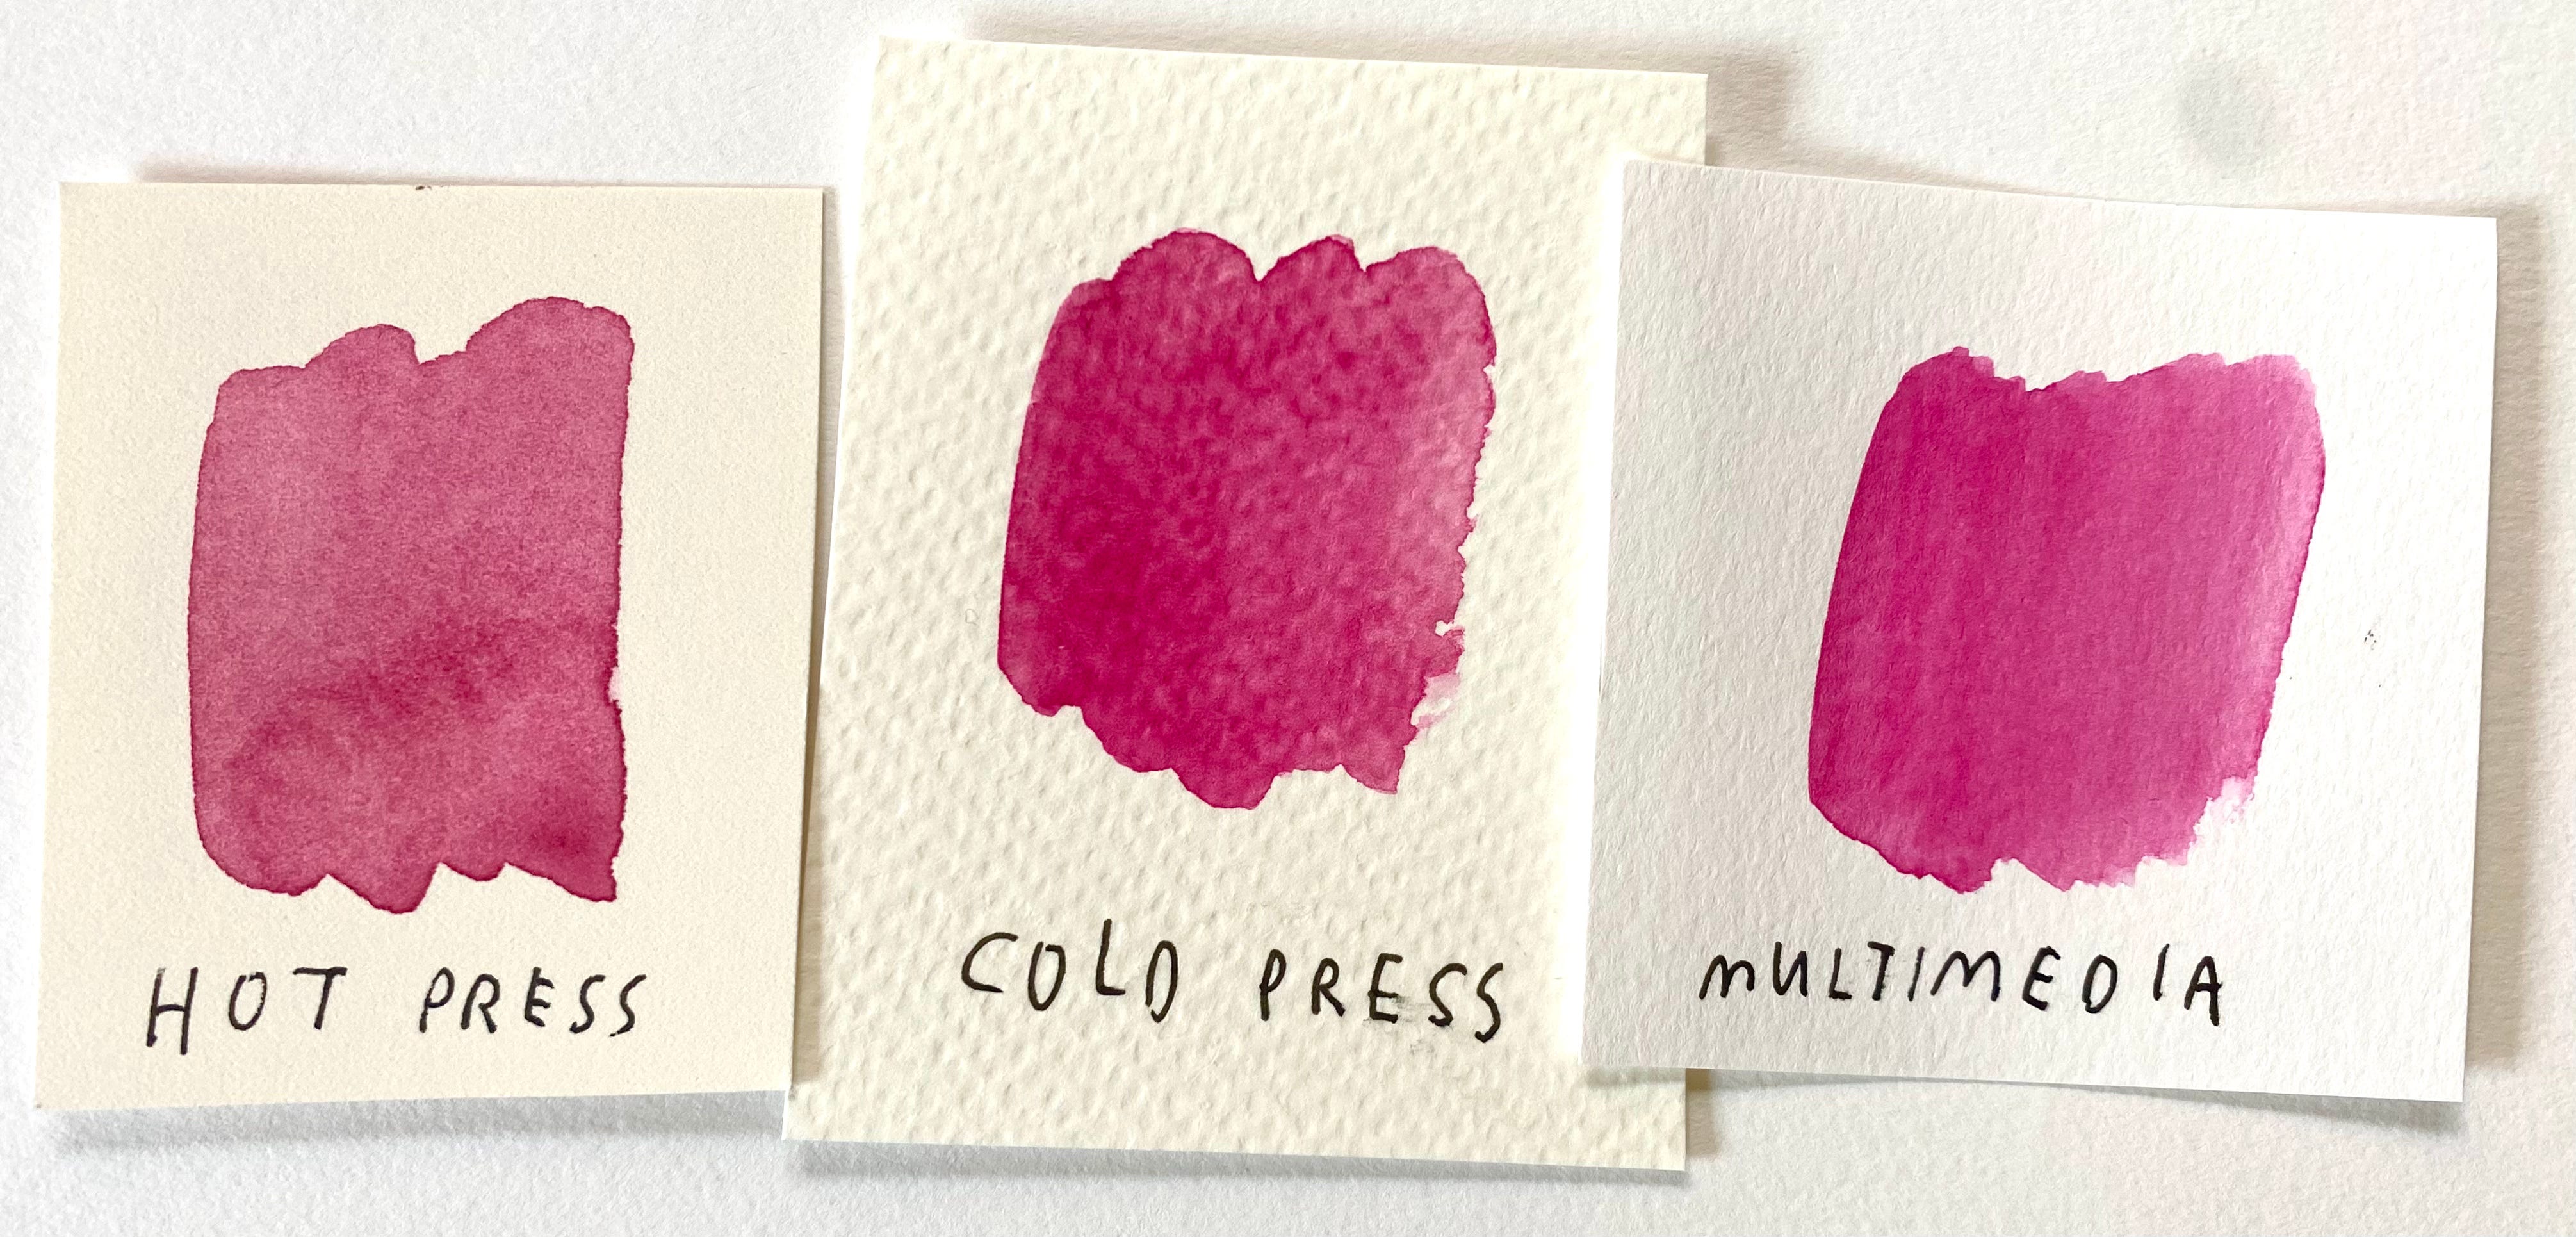
For our purposes today, I’m going to call out three kinds of paper that really support watercolor: Cold press watercolor paper, Hot press watercolor paper, and Multimedia paper. All three are heavy enough that they won’t tear or get soaked when you apply water. They will hold onto the watercolor in such a way that you can control. The main differences between them are texture, weight and absorbency. I’ll go into more detail in the gathering and talk about what paper I like to use, but very generally speaking: cold press is has a rough surface, hot press is very smooth, and multimedia is somewhere in between and is a thinner paper. Try them all and see which you like.
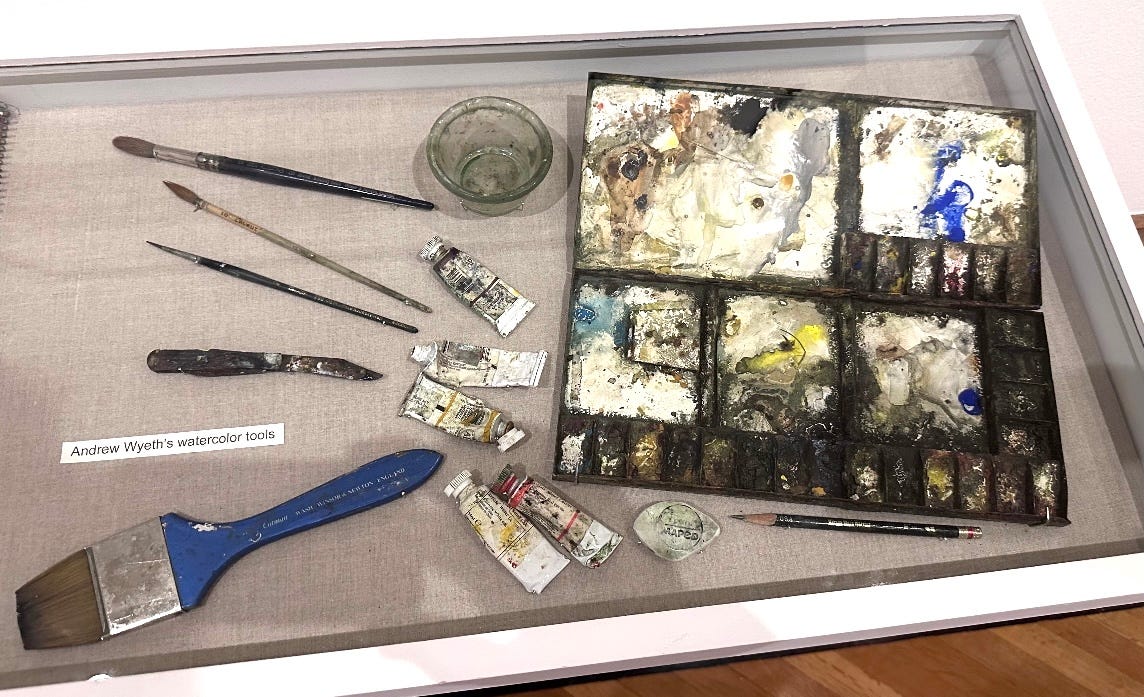
Brushes
To see an artists’ brushes up close is to get a peek into their soul. Not only do they carry the imprint of hundreds of hours of handle-gripping, they are often covered with flecks of colors carried from palette to paper over the years. Like flyers stapled one over another on an electrical pole, they hold a 2D archive of time, effort, failure, hope, art. A colorful, human palimpsest.
But I digress.
Here are the basic brushes we use with watercolor.
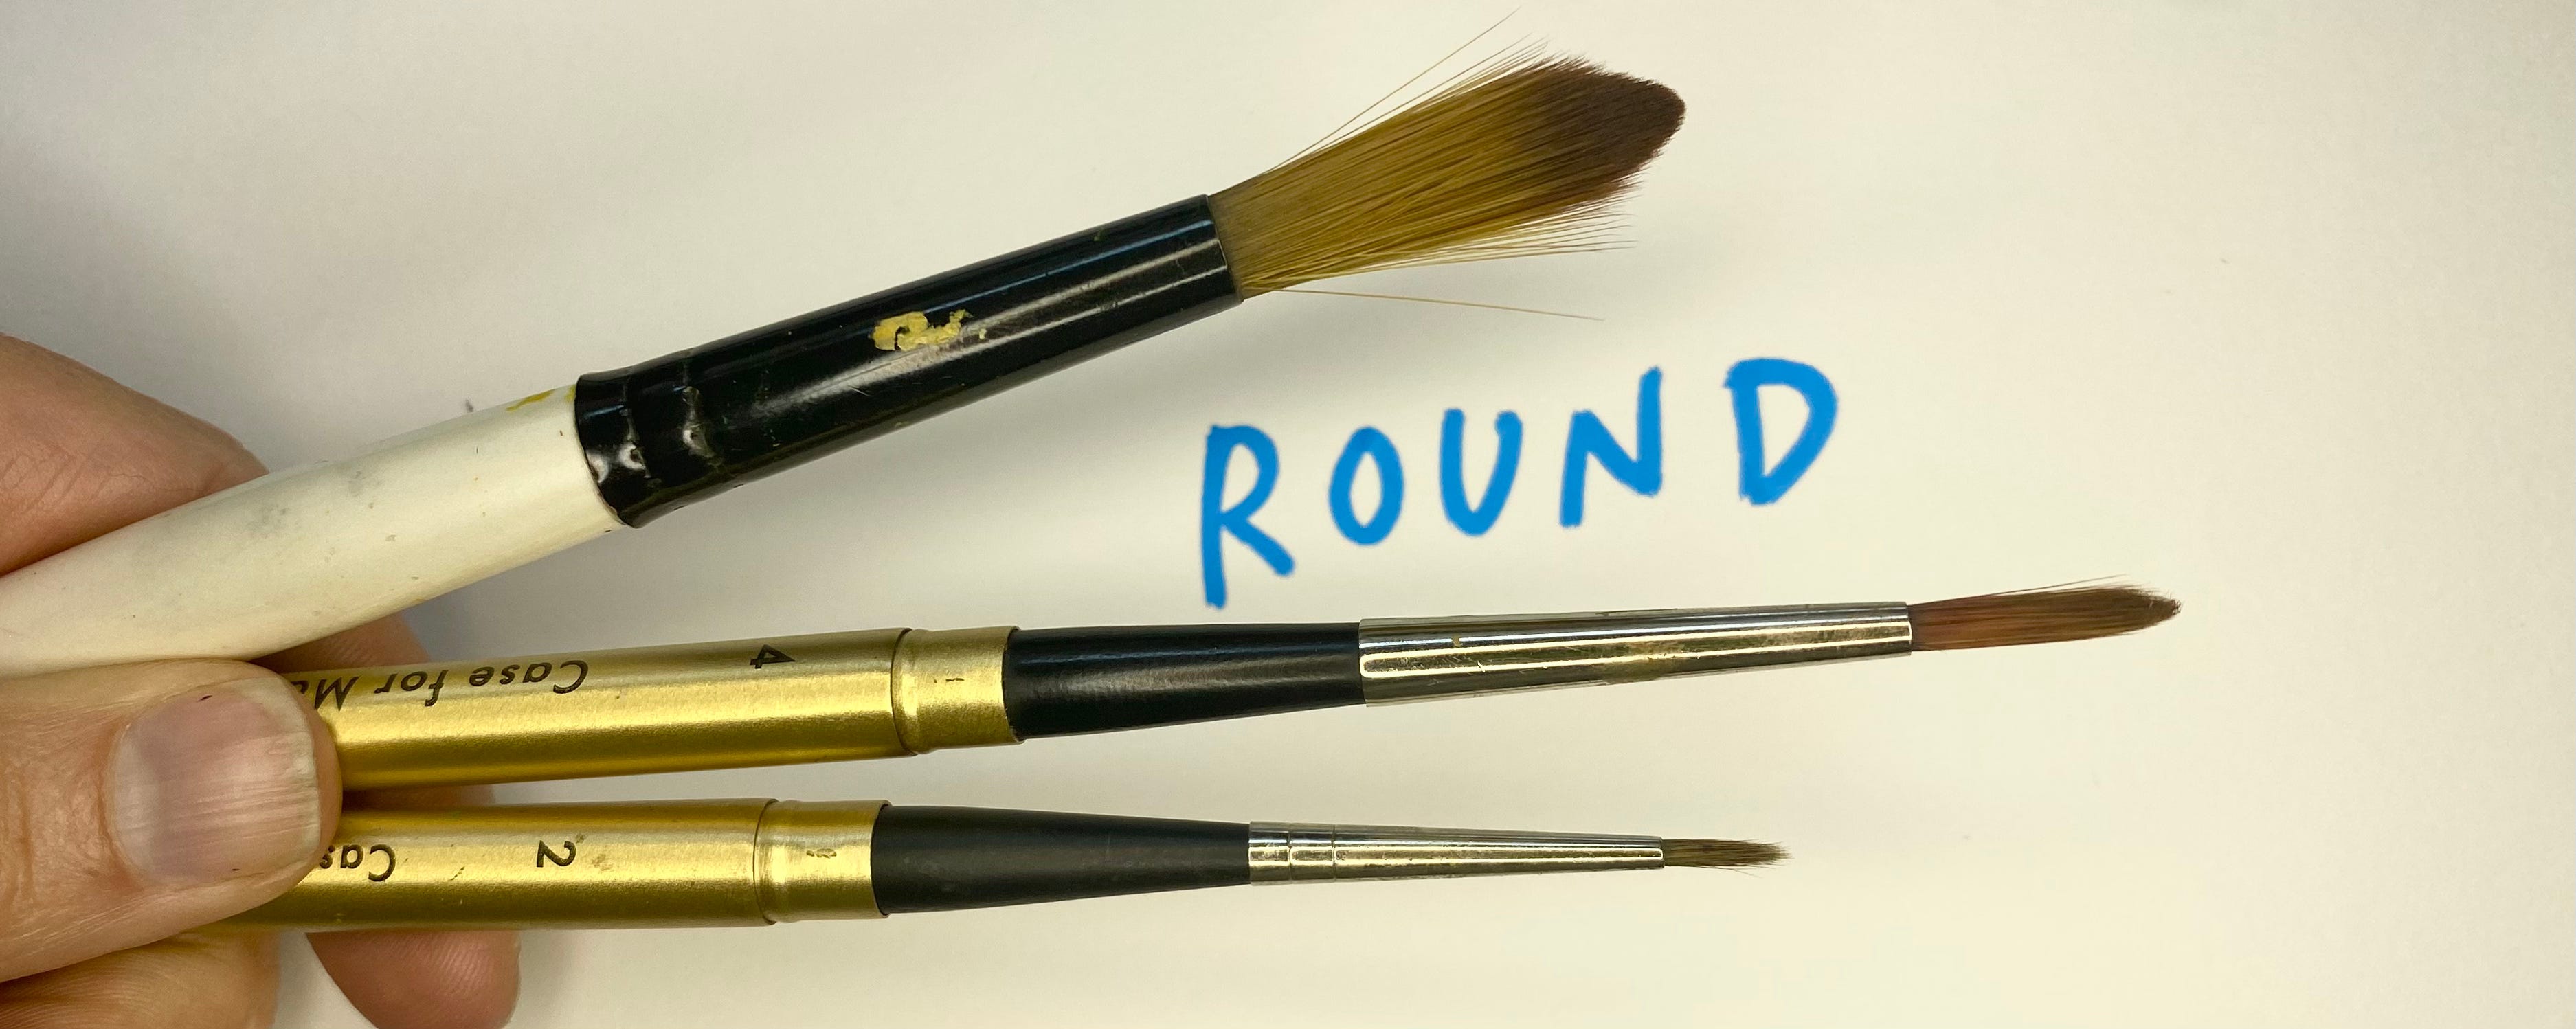
Round brushes are the most commonly used brushes in watercolor because they hold so much paint/water and can be easily manipulated to make different kinds of marks and lines. Round brushes are generally pointed, so they are versatile and good for making fine lines and details as well as using them at an angle or pressing down harder for larger, wider strokes.
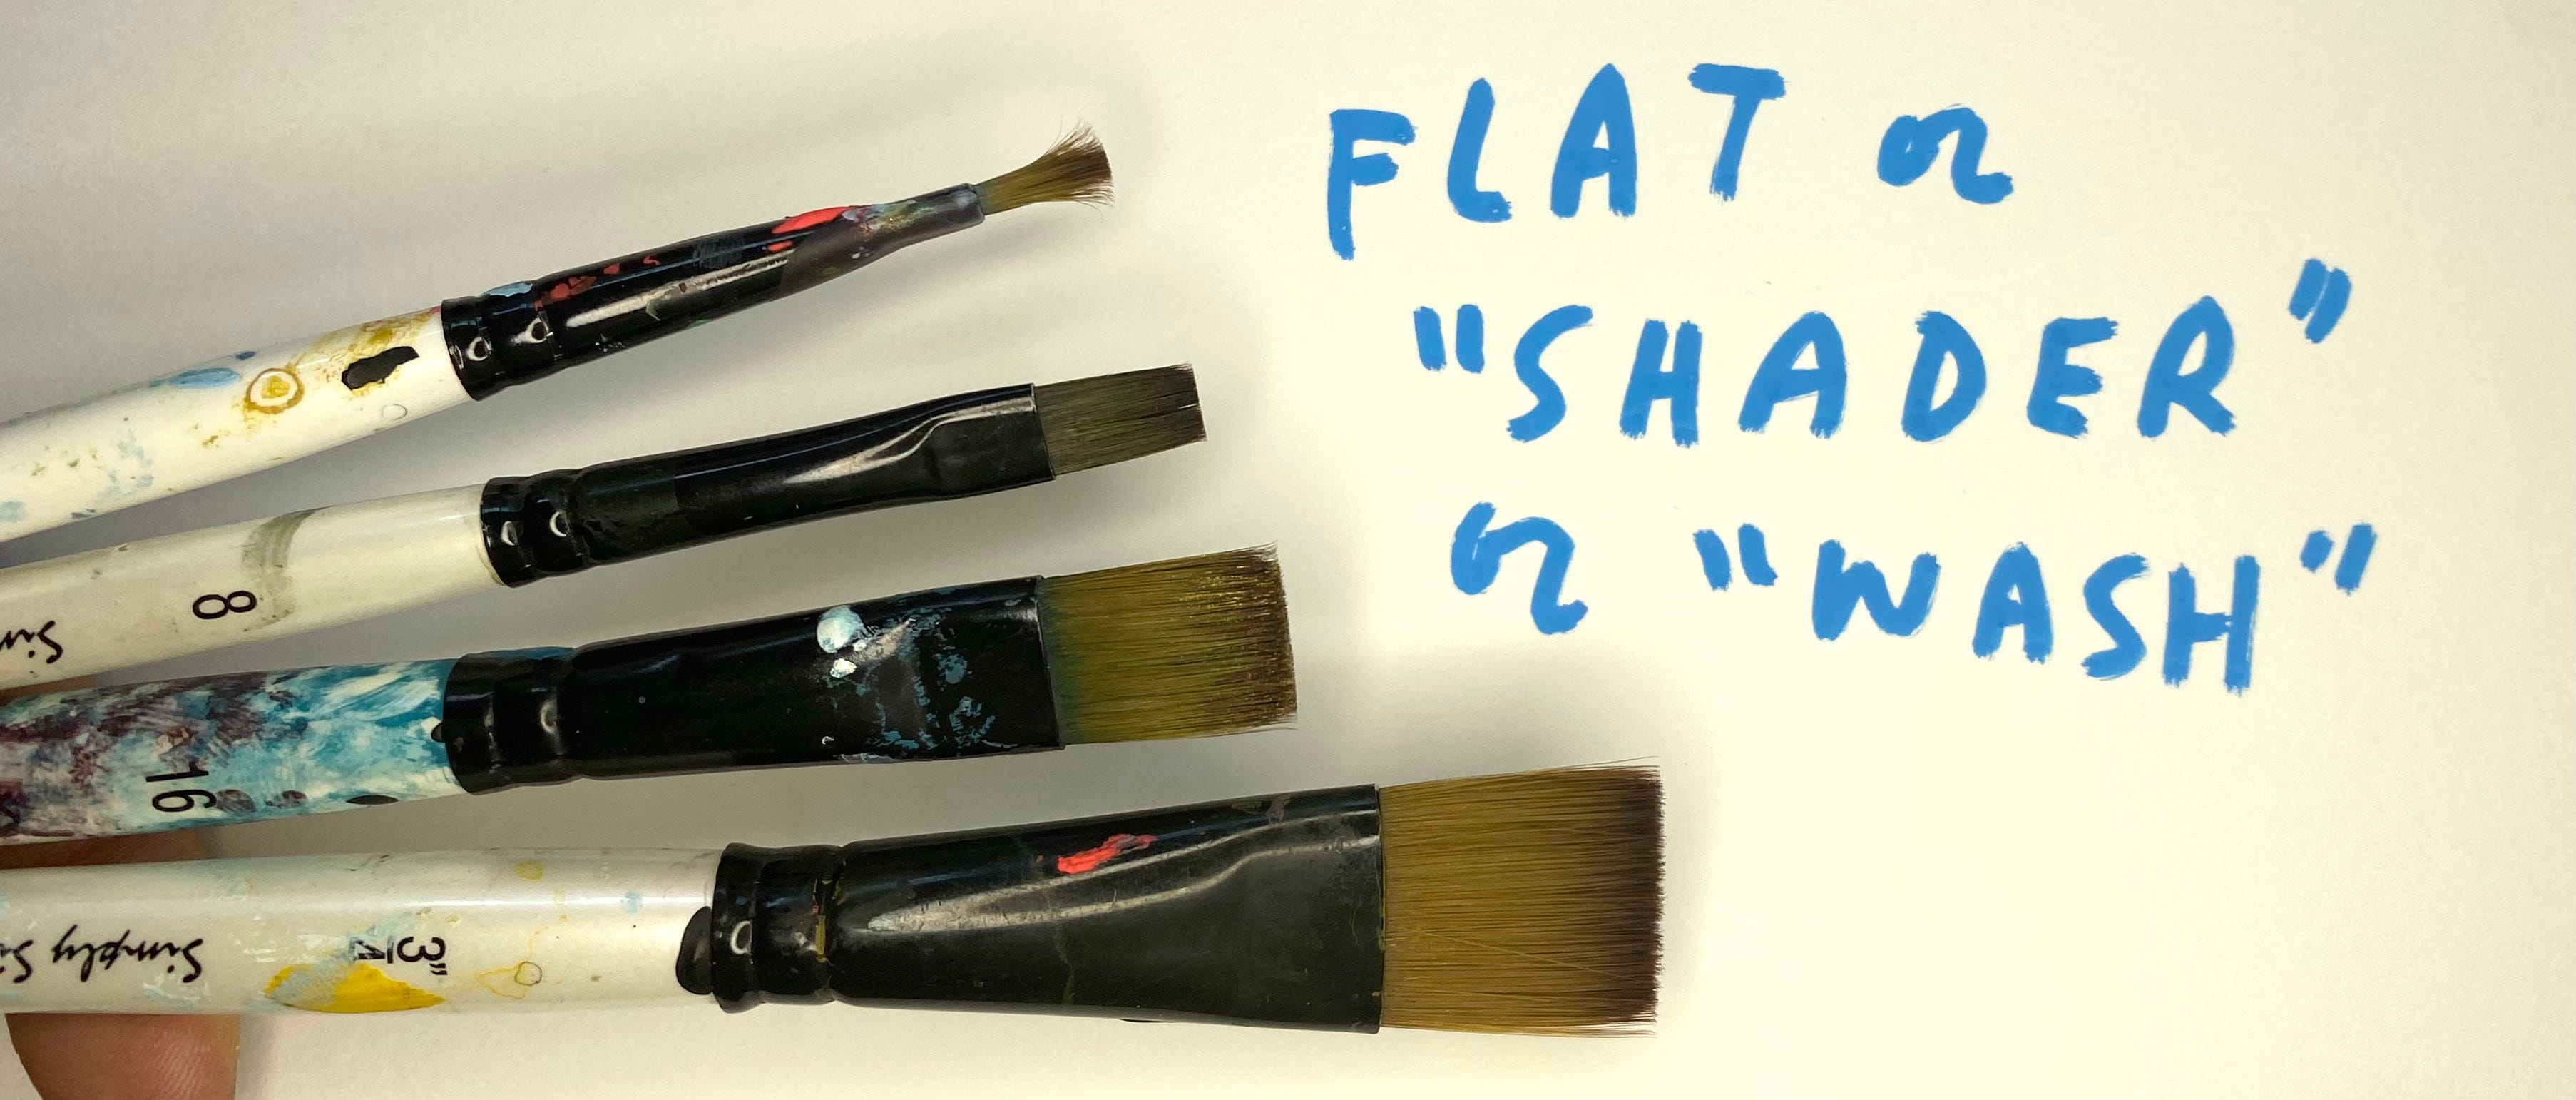
Flat brushes are great for making uniform marks and more geometric or hard edged, consistent lines.
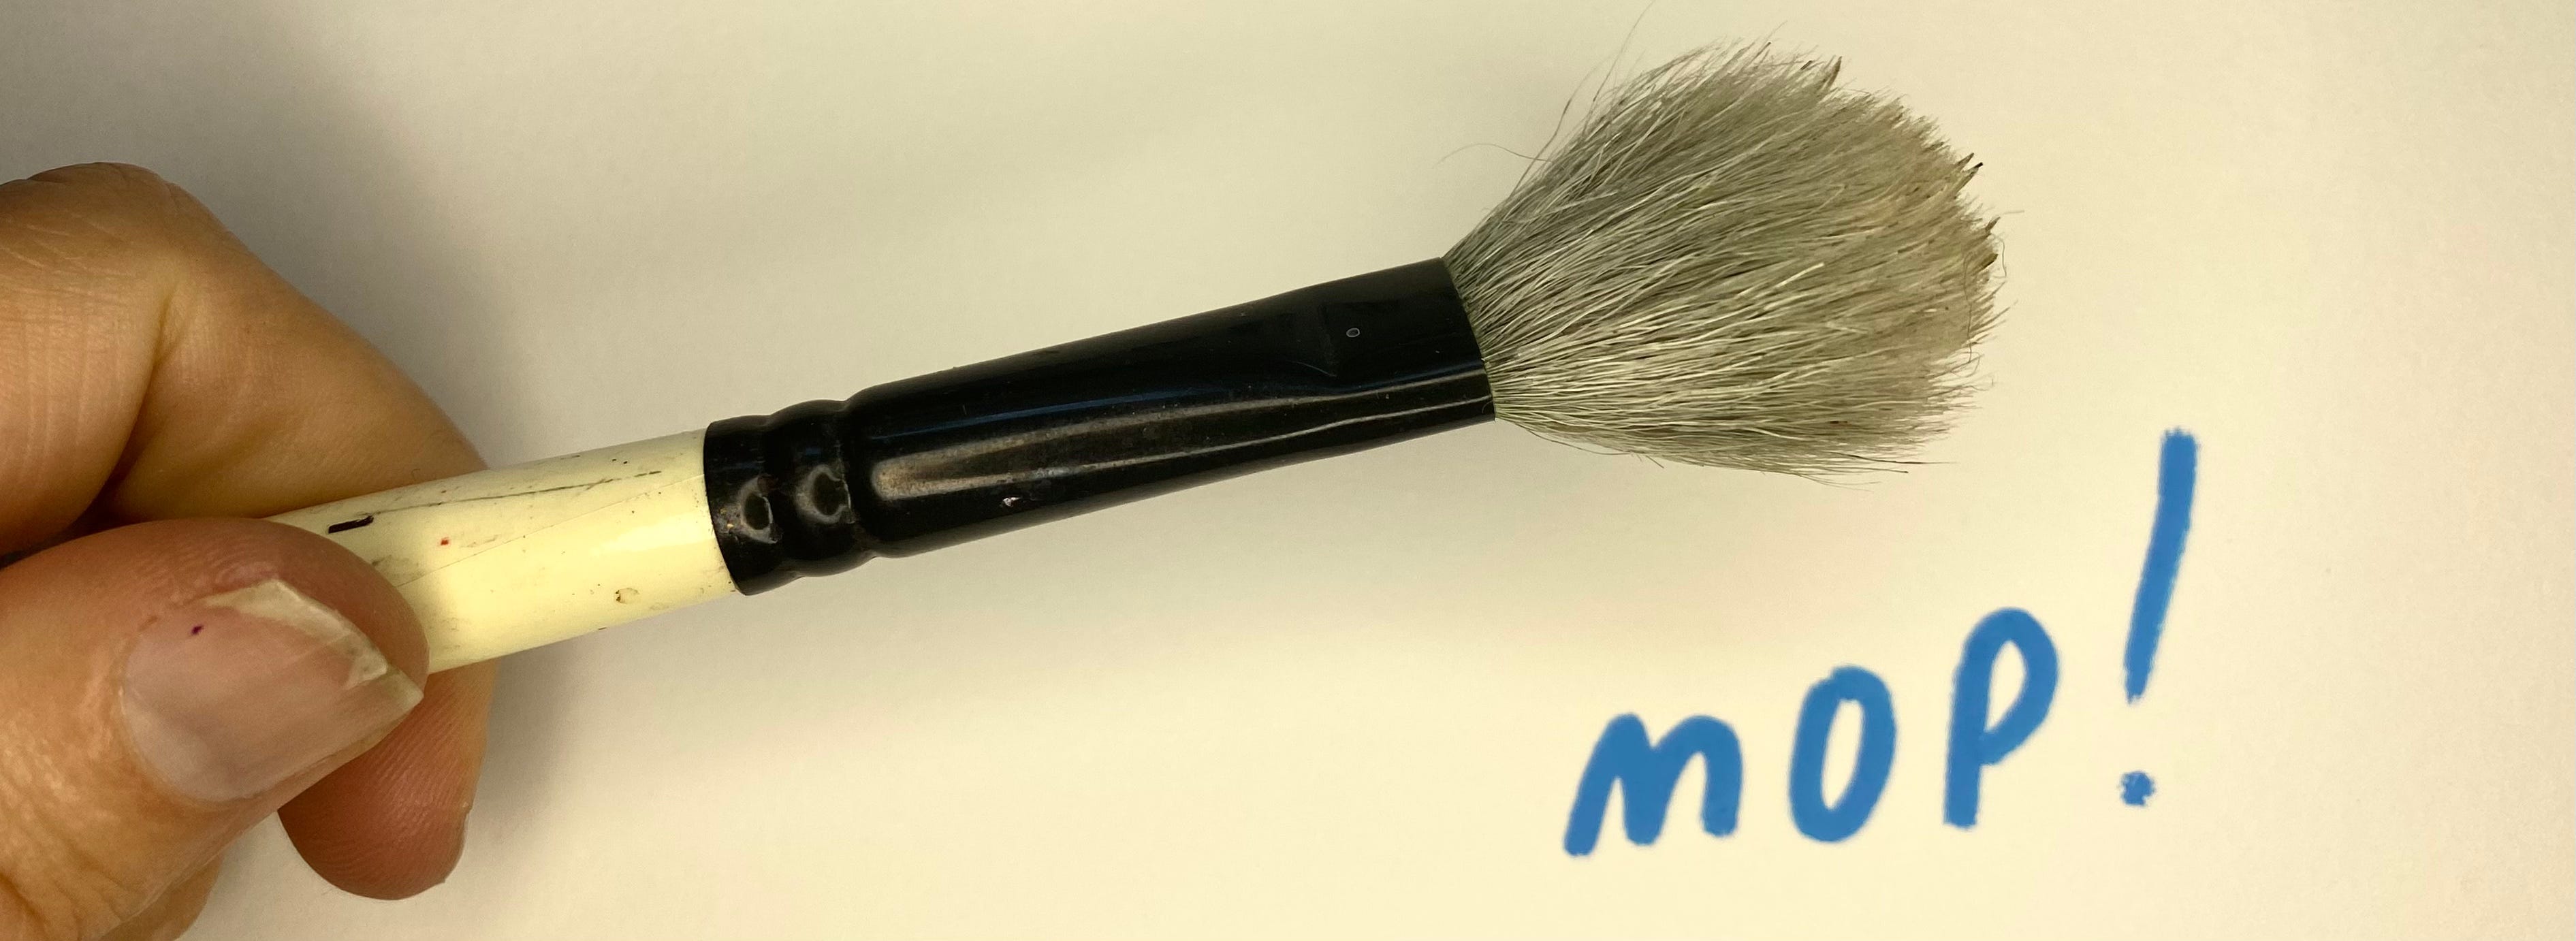
Mop brushes hold a lot of water and are great for laying down more water, like if you are getting an area wet to do a wet-on-wet technique (we’ll cover this in the GUT gathering today.)
Liner
I don’t use or have any liner brushes, sorry. These are long, skinny brushes that are great for creating long, skinny lines. Someday maybe i’ll get up the chutzpah to try them, but they remind me of pin striping on cars and make me anxious.
Travel Brushes
These brushes are generally round in shape and have a built in water reservoir for water. When you squeeze the handle where the water is stored, it pools in the synthetic bristles of the brush so you can simply dab the brush on your watercolor cake set to moisten the paint. And you’re off.
Speaking of synthetic… one last thing, because I feel strongly about this.
Synthetic vs. Natural Bristle
Synthetic bristles are great and they’re all I used. Some people swear by real fur, but here’s my take. Unless I feel good about wearing a fur coat made from the minks, ferrets and weasels, I can’t feel okay about using brushes that take the tips of their tails to make art supplies. Many animal-fur brushes are manufactured in China, where there are next to zero laws ensuring these animals aren’t suffering. Sorry, it’s true. And synthetic brushes are great, so hooray for synthetic brushes.
Water and Container
I love this watercolor cup.


I lifted these photos of the amazing shop Case for Making’s website. If you don’t know of Case for Making, they are a small art shop in SF’s Outer Sunset that focuses on handmade watercolors. Yup, you heard me right. And they partnered with Bay Area ceramic artist Julie Coultier to offer these handmade watercolor cups. I’ve used one myself for years and I love it. It brings me joy. I know it might seem silly to spend real money on something when you could just as easily use a mason jar, but this dish sits out on my drawing table 24/7 and I use it every single time I paint. To me it makes sense to invest in things that bring joy in the spaces we want to spend more time in, and pay more attention to. So there you go.
Palette
We add water to our watercolors and mix our colors on a palette. If you are using cakes, then the palette is usually built into the paintbox holding the cakes. If you are using tubes, then you’ll have to squeeze your watercolors onto a palette you create yourself. You can of course use a paper plate or anything around the house, but here are a few examples of palettes I like. (And no, i’m getting no kick backs for these or the watercolor cups above. I really just love/believe in them)
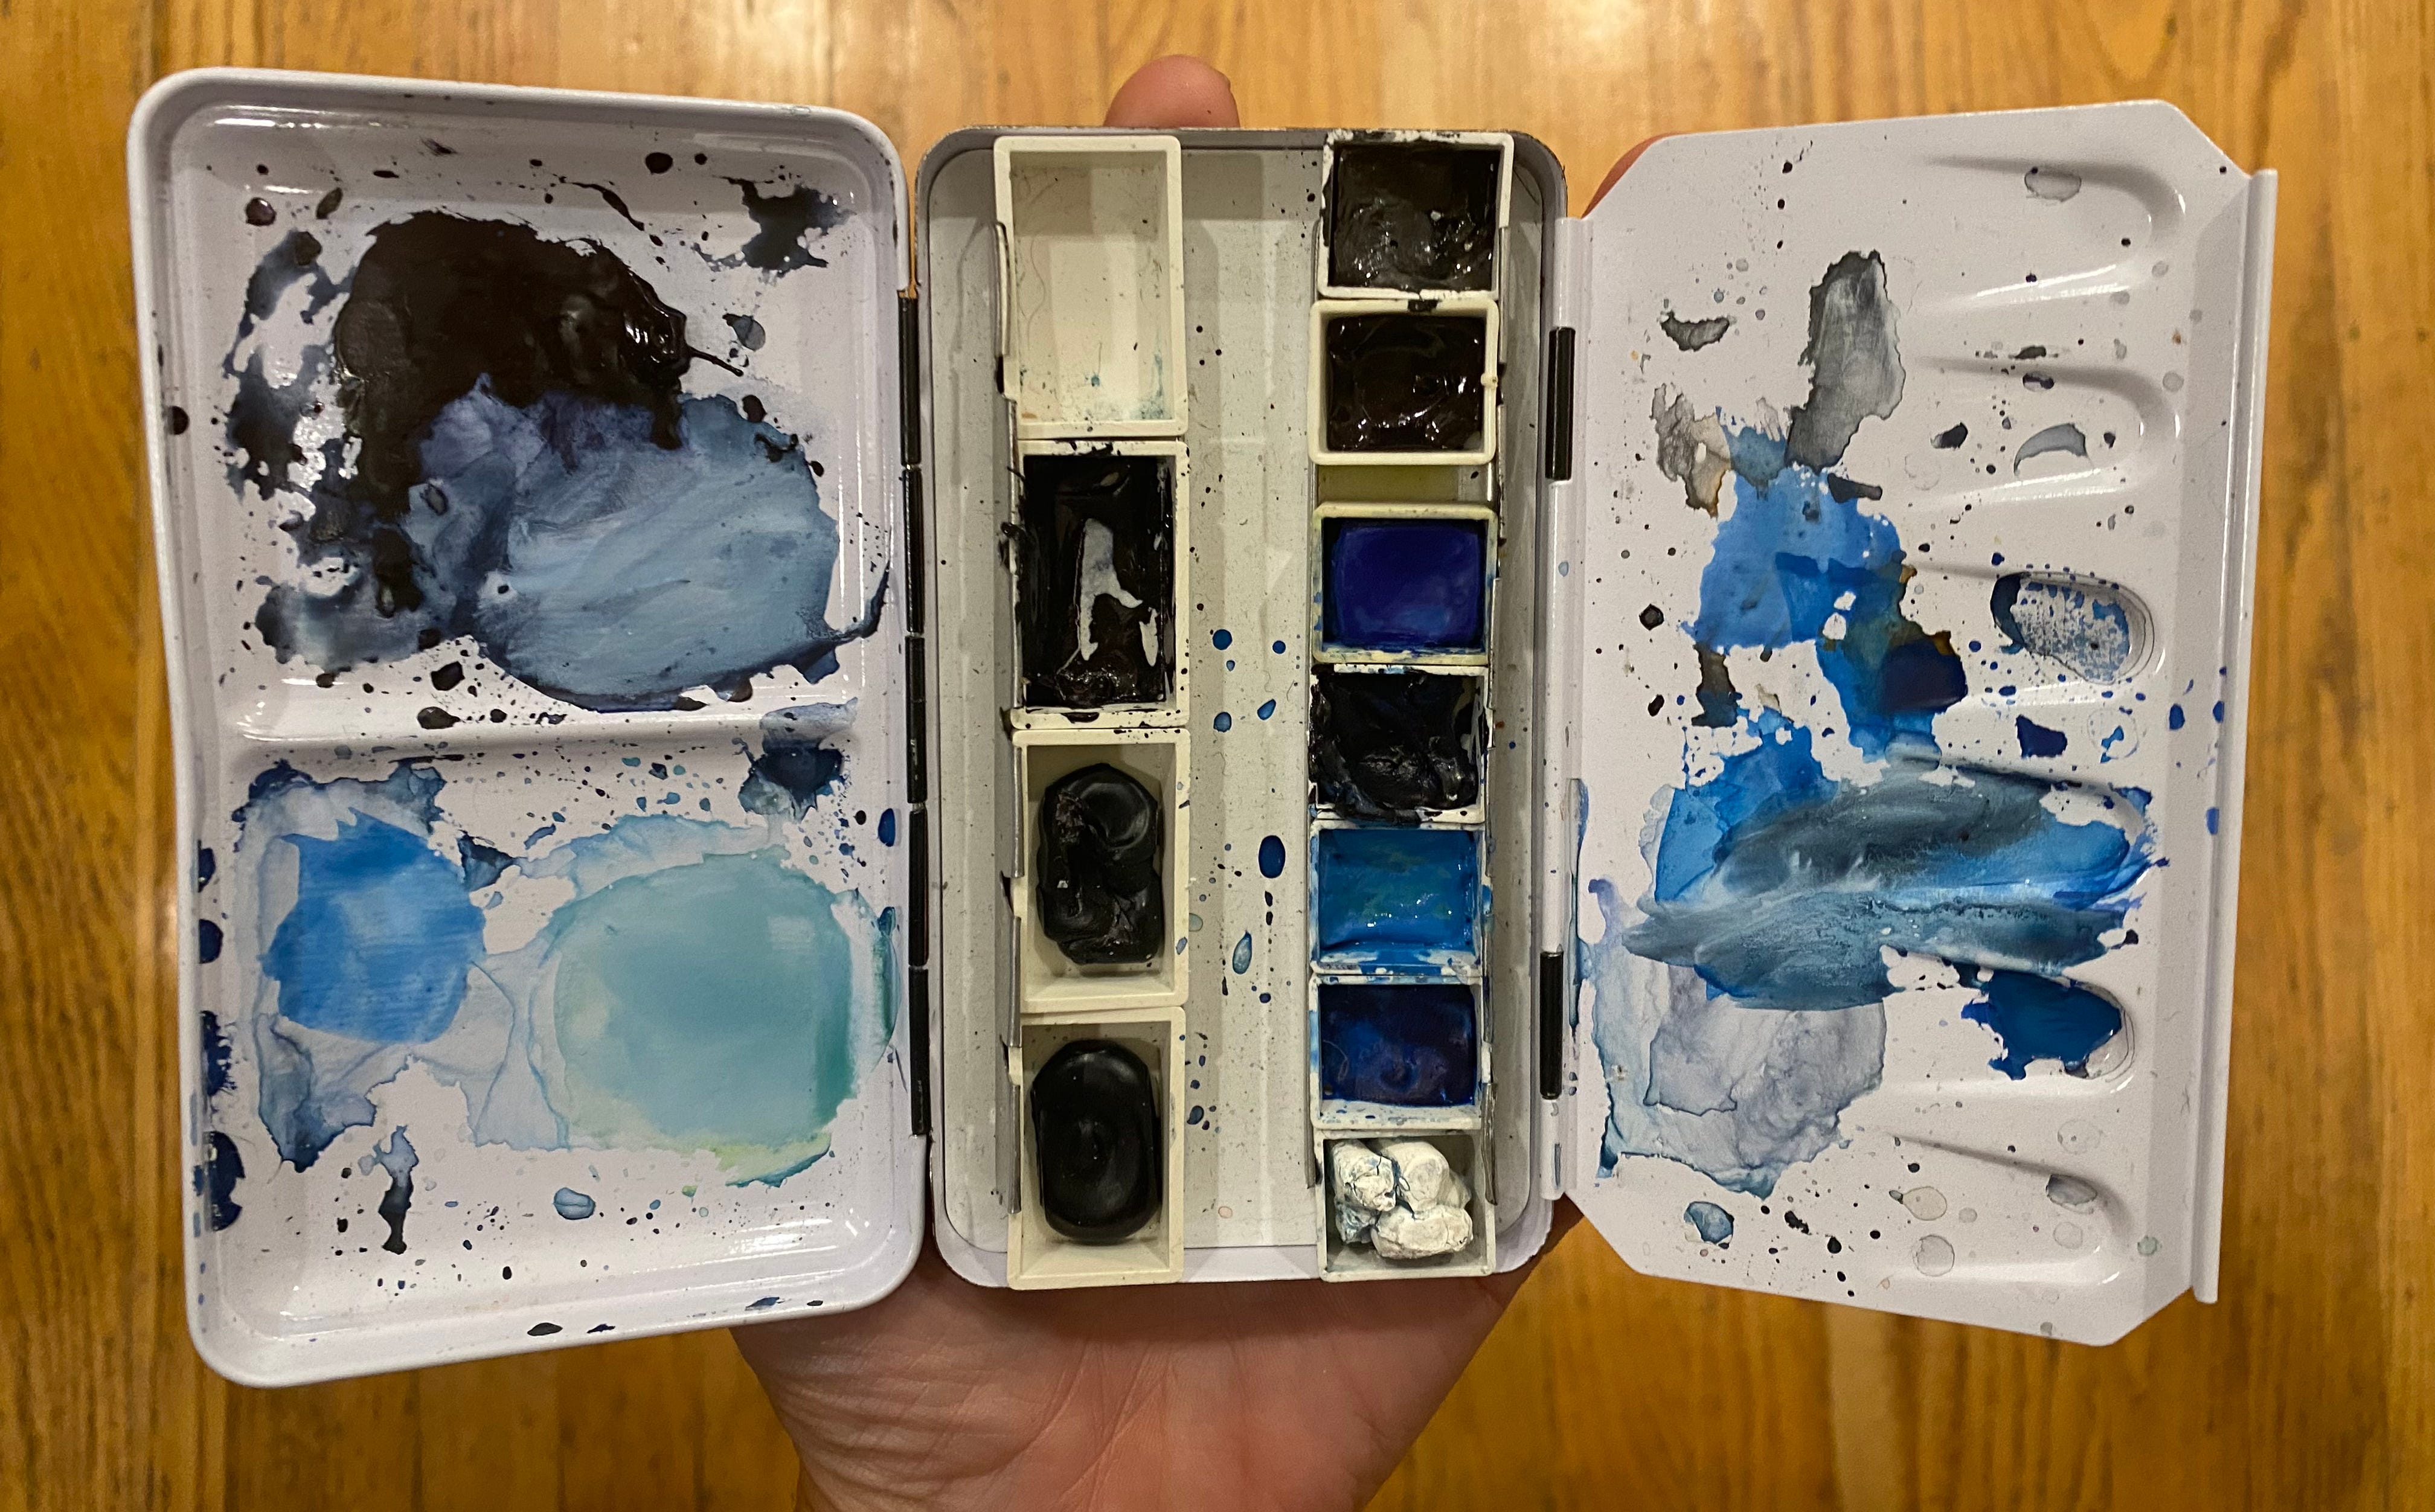
I created this myself using an empty watercolor box that I filled with the colors I wanted. I combined cakes and squeezed some tubes into empty cake containers and let it all dry, and then use the interior of the box as my mixing palette. I like it because it is tiny and I can fit it in my pocket and paint any sky, anywhere.
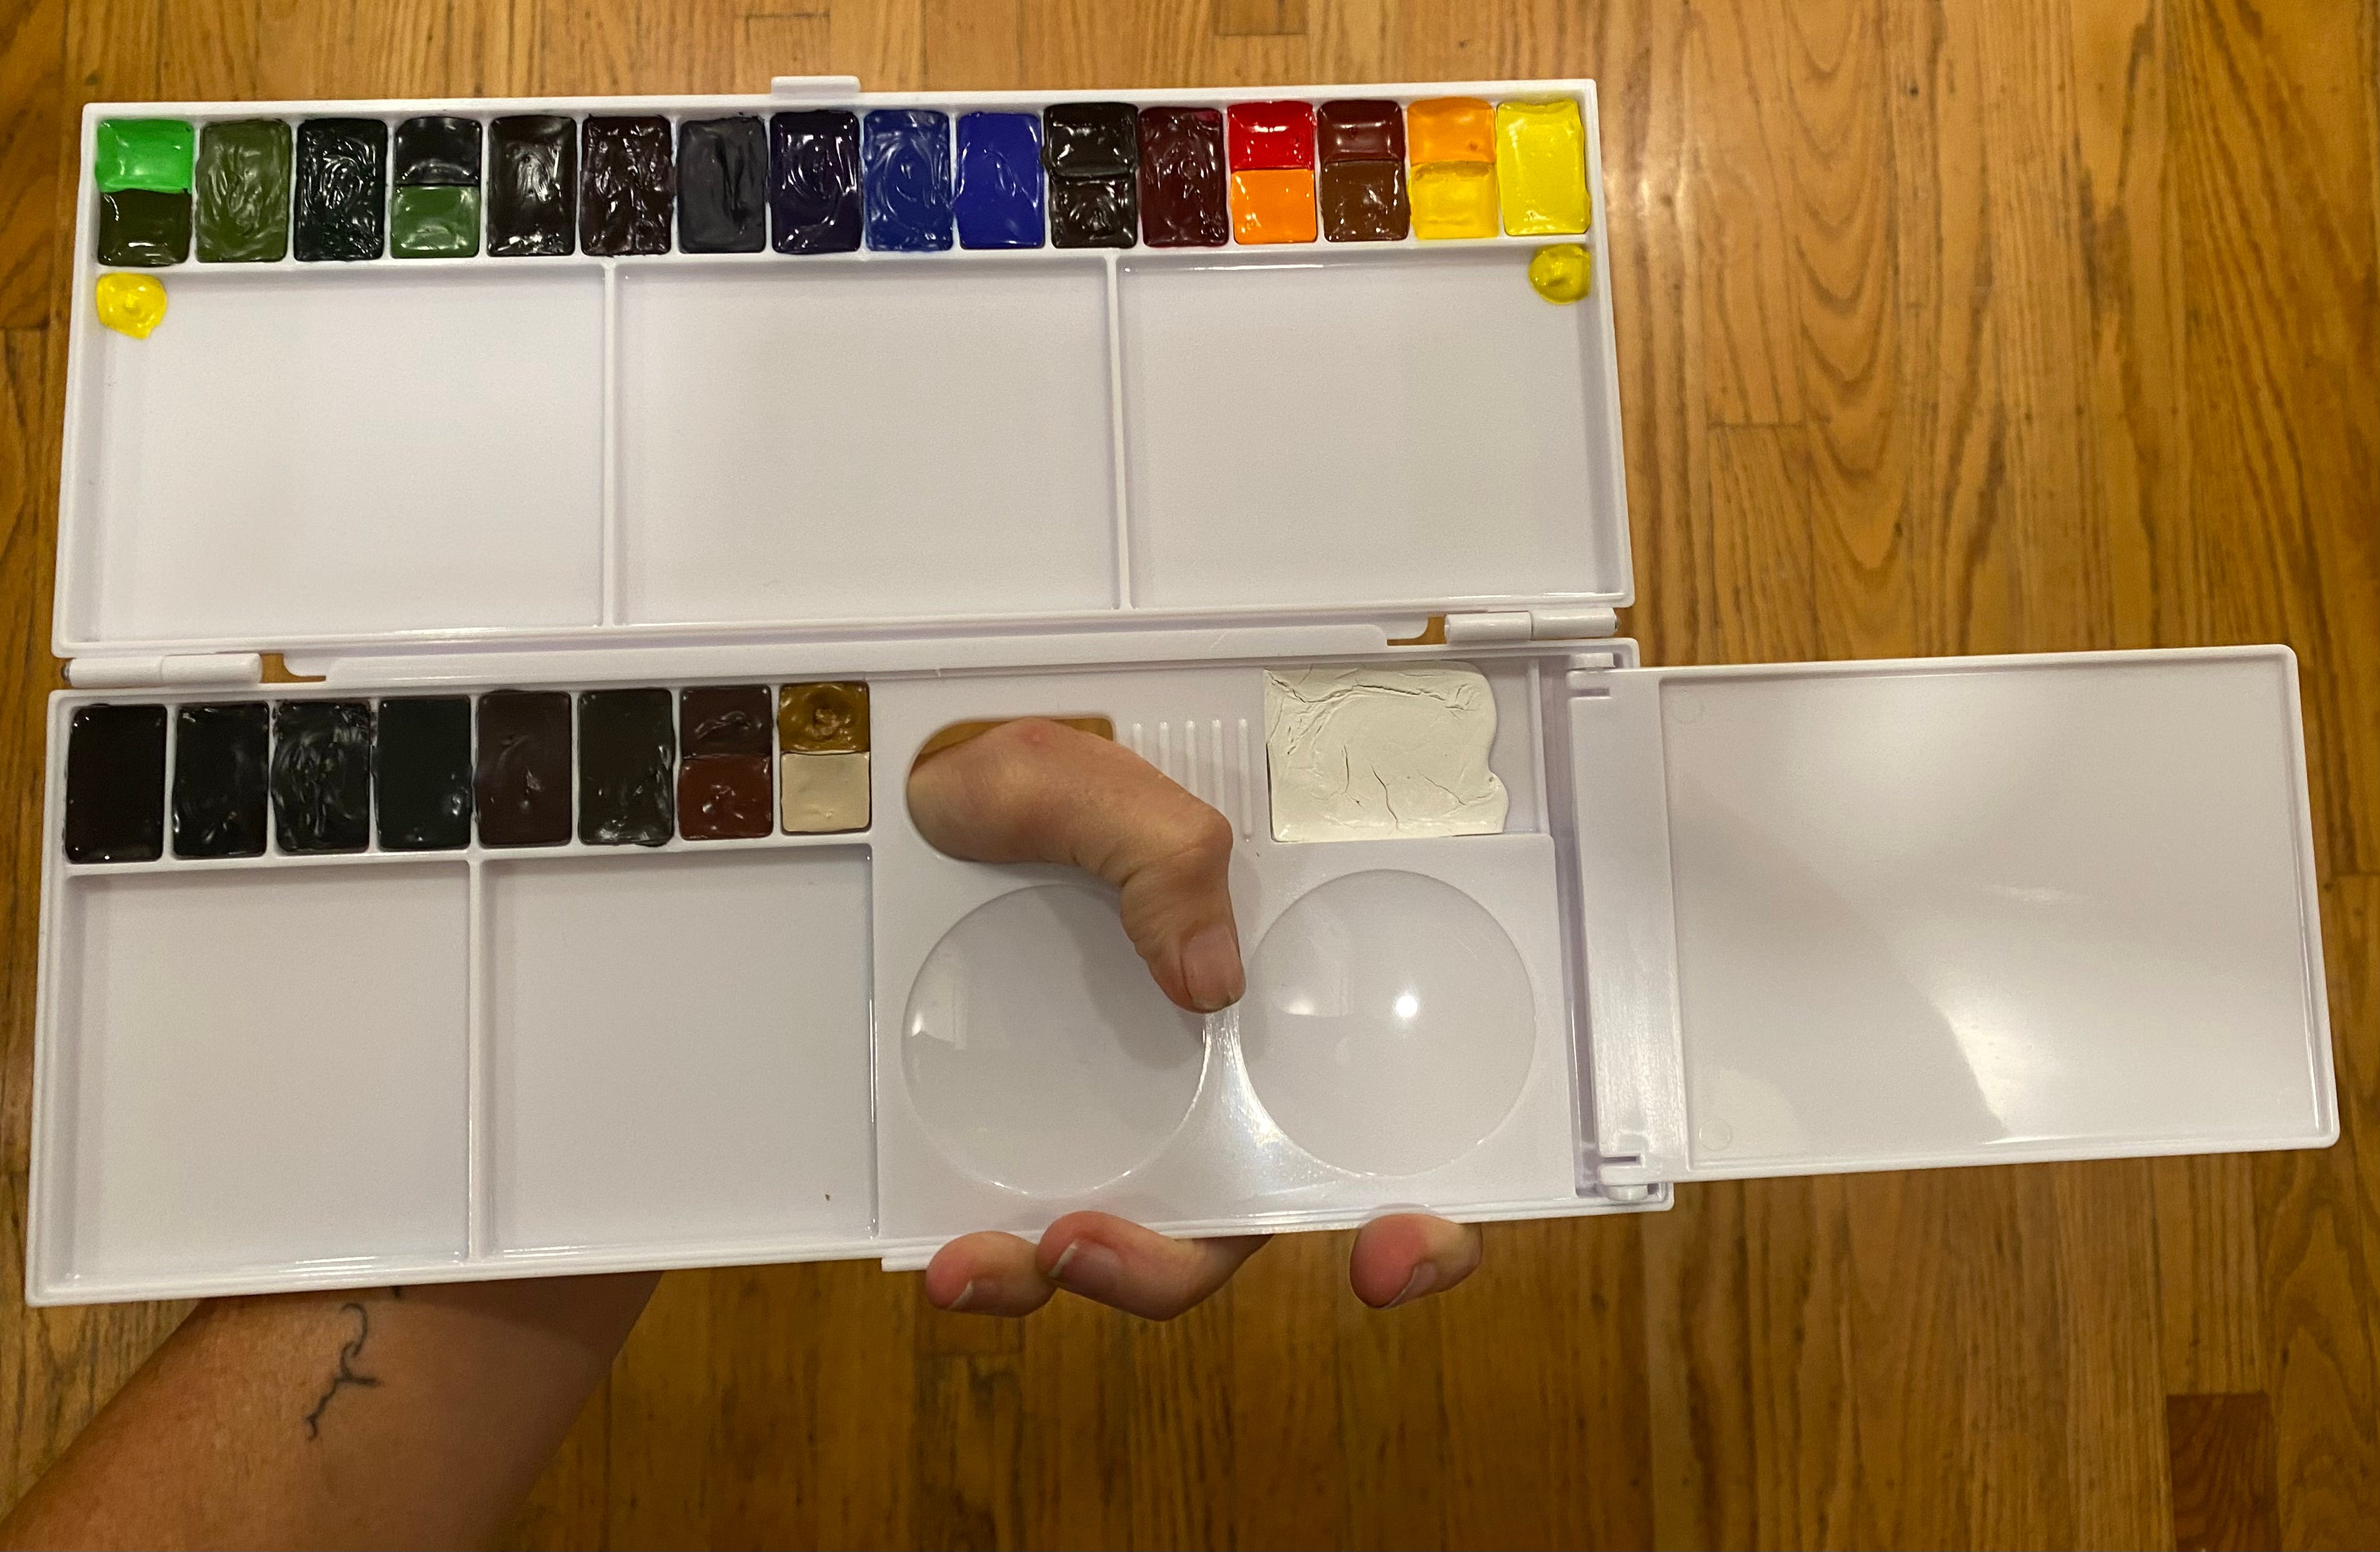
This is a wonderful palette, created by sketch artist and naturalist (and future GUT Visiting Artist) John Muir Laws, is intended to use in the field. As you can see it has water reservoirs and a thumb-hole so you can hold it with your left hand while painting with your right. And plenty area to mix. You can also get an empty one here.
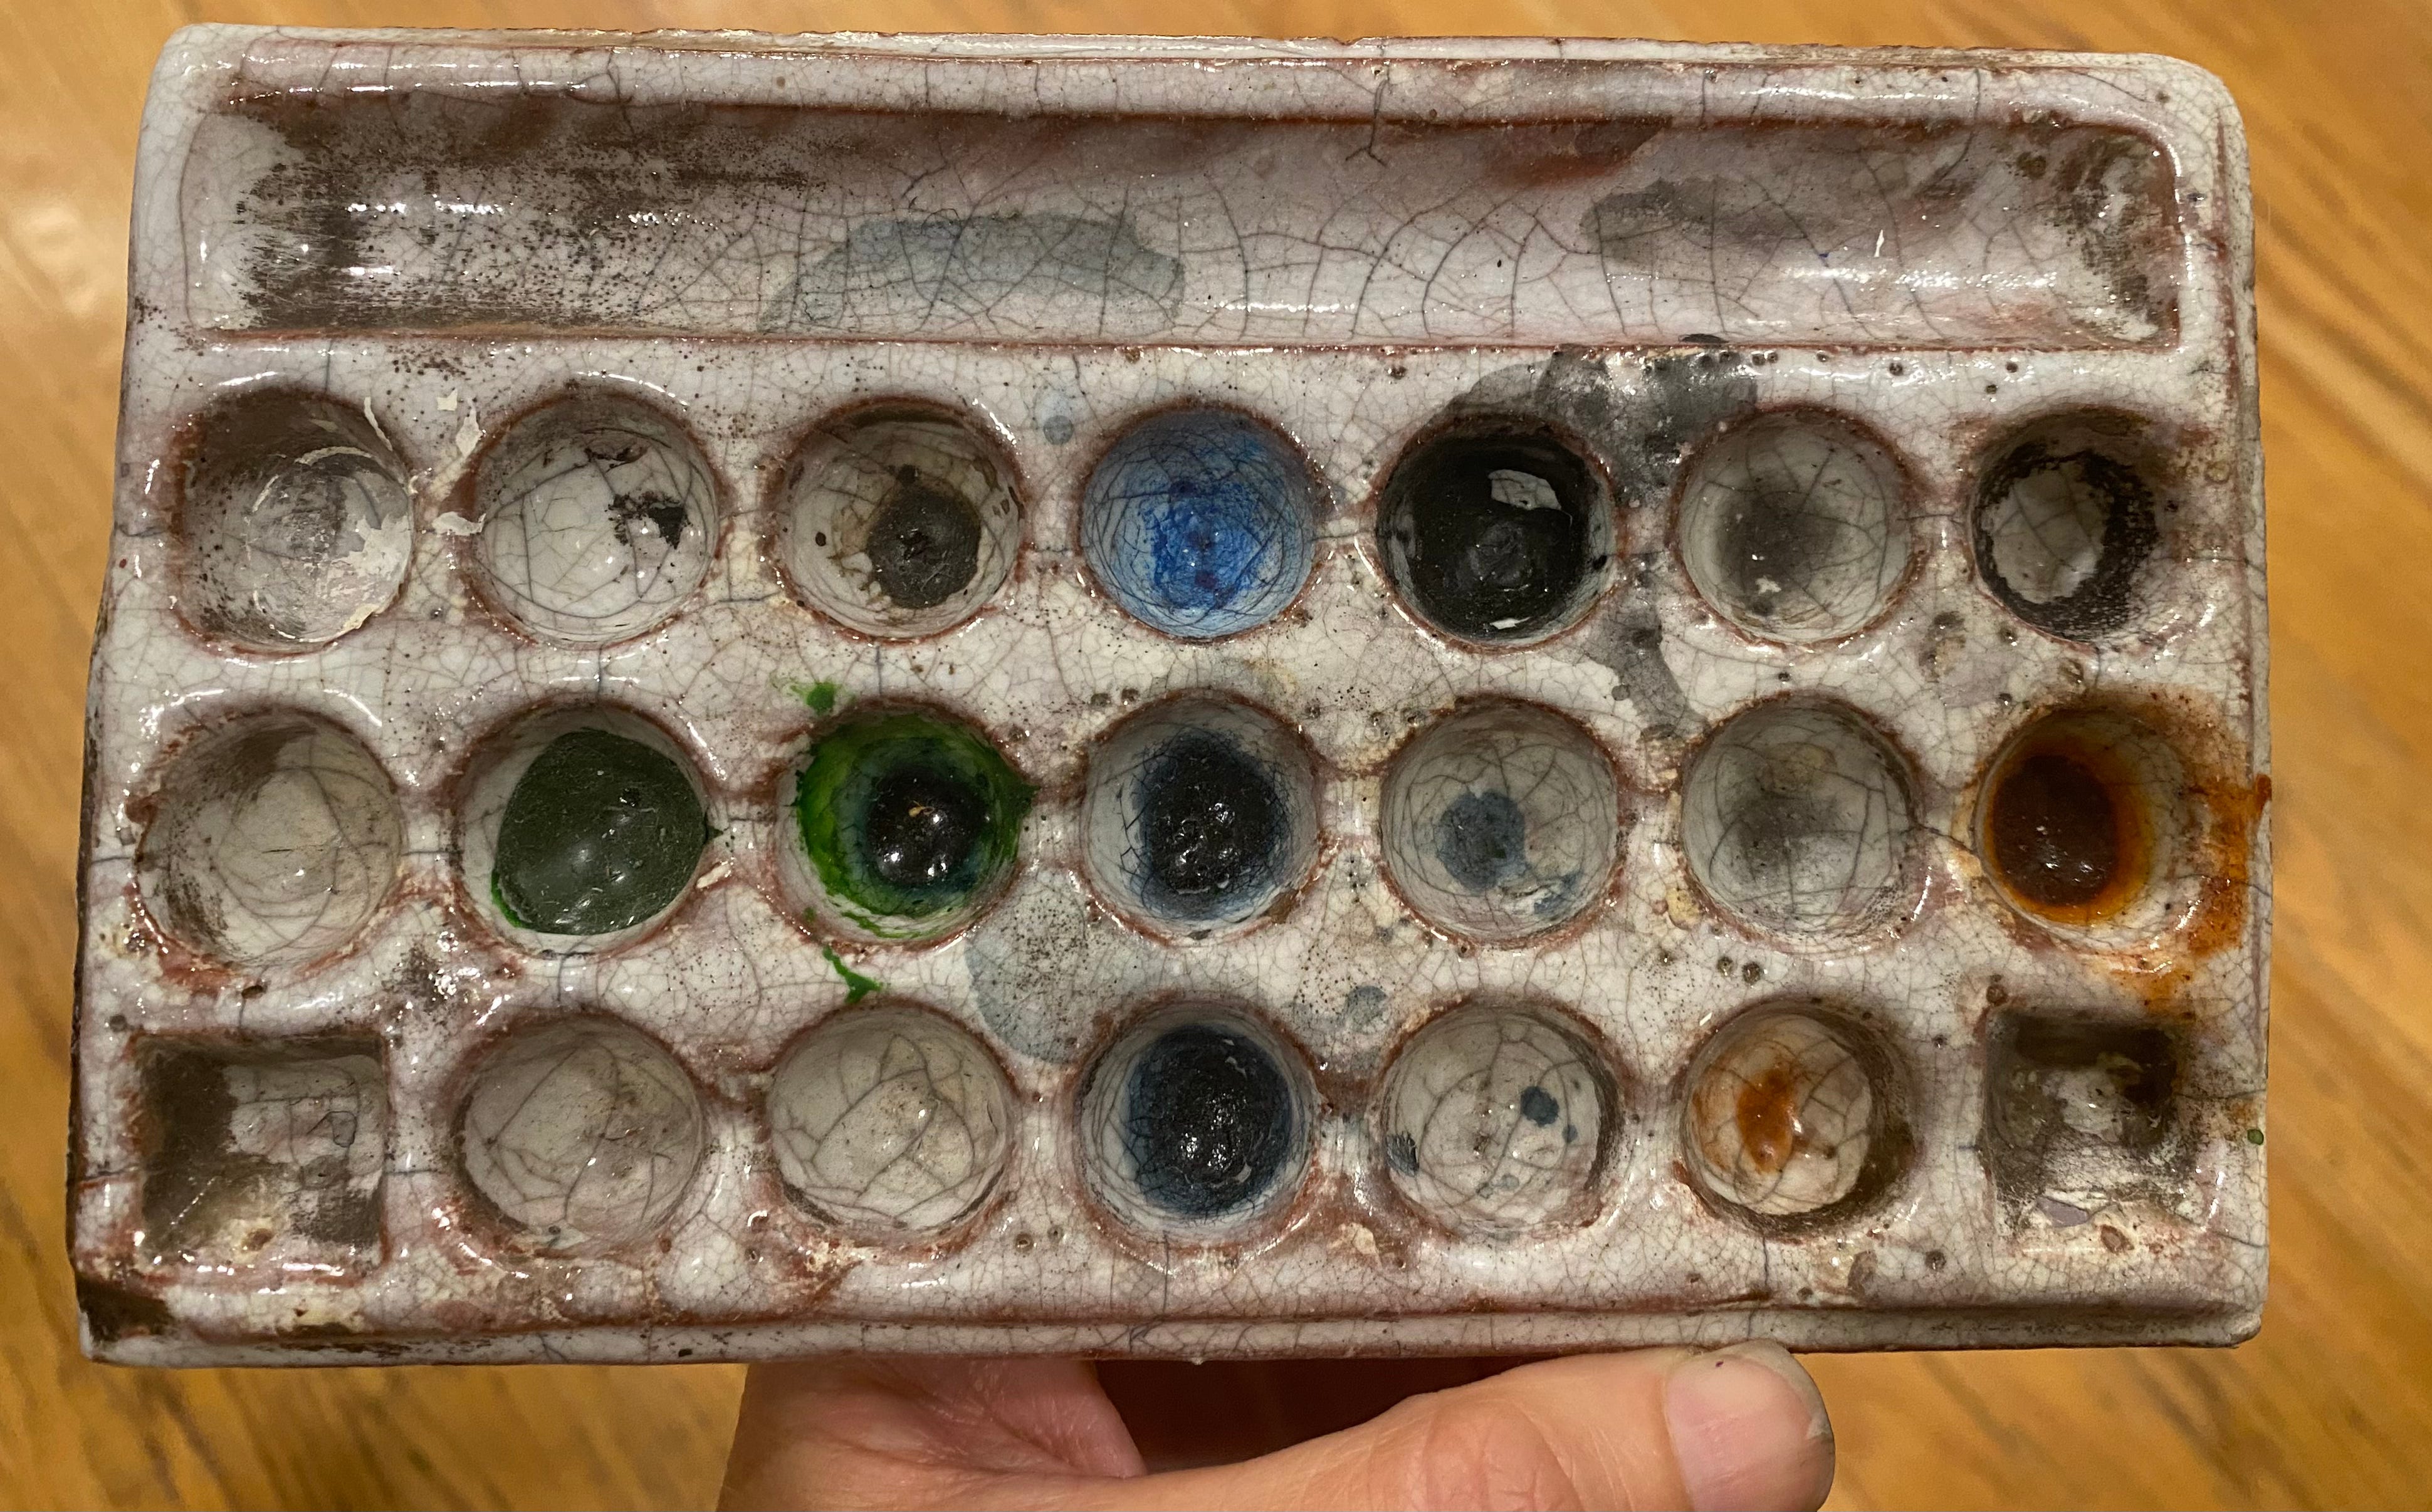
I found this vintage watercolor palette in a thrift store near Yosemite. It’s ceramic handmade and it feels great to the touch. I wish I could use it more, tho. I am pretty messy with my watercolors, and this doesn’t allow for futzing around so much. I bet more precise people would love it tho. Case for Making sells something similar.
Pencil, Pen, Eraser
Some people like to make a sketch before the start watercoloring, others don’t. This part of the process is totally up to you. If you use pencil and want to erase it after you put down paint, know that you will not be able to erase any pencil lines that you have painted over. I personally draw in pen first then paint after. That’s just what I like to do. But most watercolorist would call that not real watercolor painting and that’s fine. You do you. Coo coo cachoo.
Now that we have all all our supplies, what do we do with them??
So. Much.
Watercolor Techniques
Like I said above, there is no “right” way to paint, but there are some techniques we can learn and practice to achieve certain goals. Then we can choose to use them or ignore them and develop our own style.
In the GUT Gathering today we will learn: Wet on wet, Wet on dry, Dry on Dry, Glazing, Charging and Lifting. I’ll share my own approach to watercoloring as well. Which is a weird messy mix of all of most of those techniques. I’ve never really done a demo like this before, so we’ll see how it goes. No matter what, we’ll all just play and make a watery mess tomorrow. No mistakes in art. This will be fun.
