This Simple Perspective Will Change Your Life
An unfancy, unscary introduction to drawing in perspective. Your outlook will never be the same.
Helllloooo GUT friends.
I nearly failed two subjects in art school: Color Theory and Perspective. Both required a little bit of science or math. Neither of those areas are my strength. But over time, I’ve done enough trial and error to overcome my fears and get curious about how these two fundamentals of art actually work.
And since the GUT is basically an opportunity for me to share things I’m exploring/looking at/listening to/reading about, I figured we could go down the perspective/color rabbit holes together.
So that’s what we’re going to do. We are going to learn about perspective and color. Together.
Mwahaha. Sorry, GUTsters. You’re stuck with me.
But don’t fear. This stuff is just as intimidating to me as it is to you. I’m not going to make us do some boring comprehensive lesson that makes us all feel terrible and run away. Some other dry, old-school art teacher probably already did that to you. Hopefully this will be easy and fun and very DT.
I am also not going to create a 16-part consecutive series that should be followed in exact order. TBH, I’m not sure what I’ll do yet! But it will probably involve a few dispatches for each areas, and I’ll space them out and do other stuff in between so we don't get bored. Of course you can do them in whatever order you want. Color and perspective may have rules, but the GUT does not.
Sound good?
Hope so. Because we start NOW.
Welcome to perspective. GUT style.
Part One: Objects in SPAAAAACE!
(Or, the four elements of perspective, and how to draw anything, anywhere, and make it look right.)
Today we are discovering the basics of perspective and learning something called One Point Perspective.
One Point Perspective is the simplest way to accurately draw a 3D world on a 2D surface. In one point perspective, everything disappears into one vanishing point, and everything is always faces front. Meaning, any object you draw in one point perspective will always have one side facing the viewer, square on.
If you want to draw an object turned at an angle in space, we’ll have to use two point perspective, which is awesome, but we’ll save that for another time.
A Little History for the Nerds Among Us
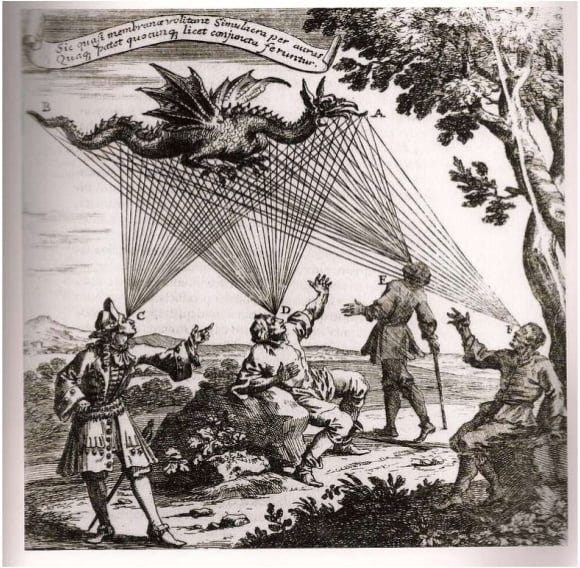
In medieval times, people believed sight was possible thanks to threads of light that emanated from people’s eyes and illuminated the world around us. (Ew, gross, but also kind of beautiful, right!?)
It wasn't until the 17th century that Johannes Kepler re-imagined the eye as a camera and put the kibosh on Emission Theory1. But 200 years before that, in 1435, an artist/writer/architect named Albeti used Emission Theory theory to figure out how to represent our 3-D world on a 2-D surface. (Aritsts. Always ahead of our time.) Alberti used those light threads in the etching above to create a grid pattern to depict how people perceive objects at a distance. 2
Where you stand determines what you see.
Cliche but true. Where we stand, literally or figuratively, emotionally or intellectually, reveals some things around us and hides others. It determines what we see and experience in terms of light, form, angles, feelings, and ideas. It tells us about what we are looking at, and it tells us about ourselves.
The same is true of perspective in drawing. (Or, “Linear Perspective”, when we are drawing depth on a flat plane like paper or canvas.) How we choose draw something in space communicates scale, light, depth (figuratively and literally), feeling and ideas. Perspective tells a story.
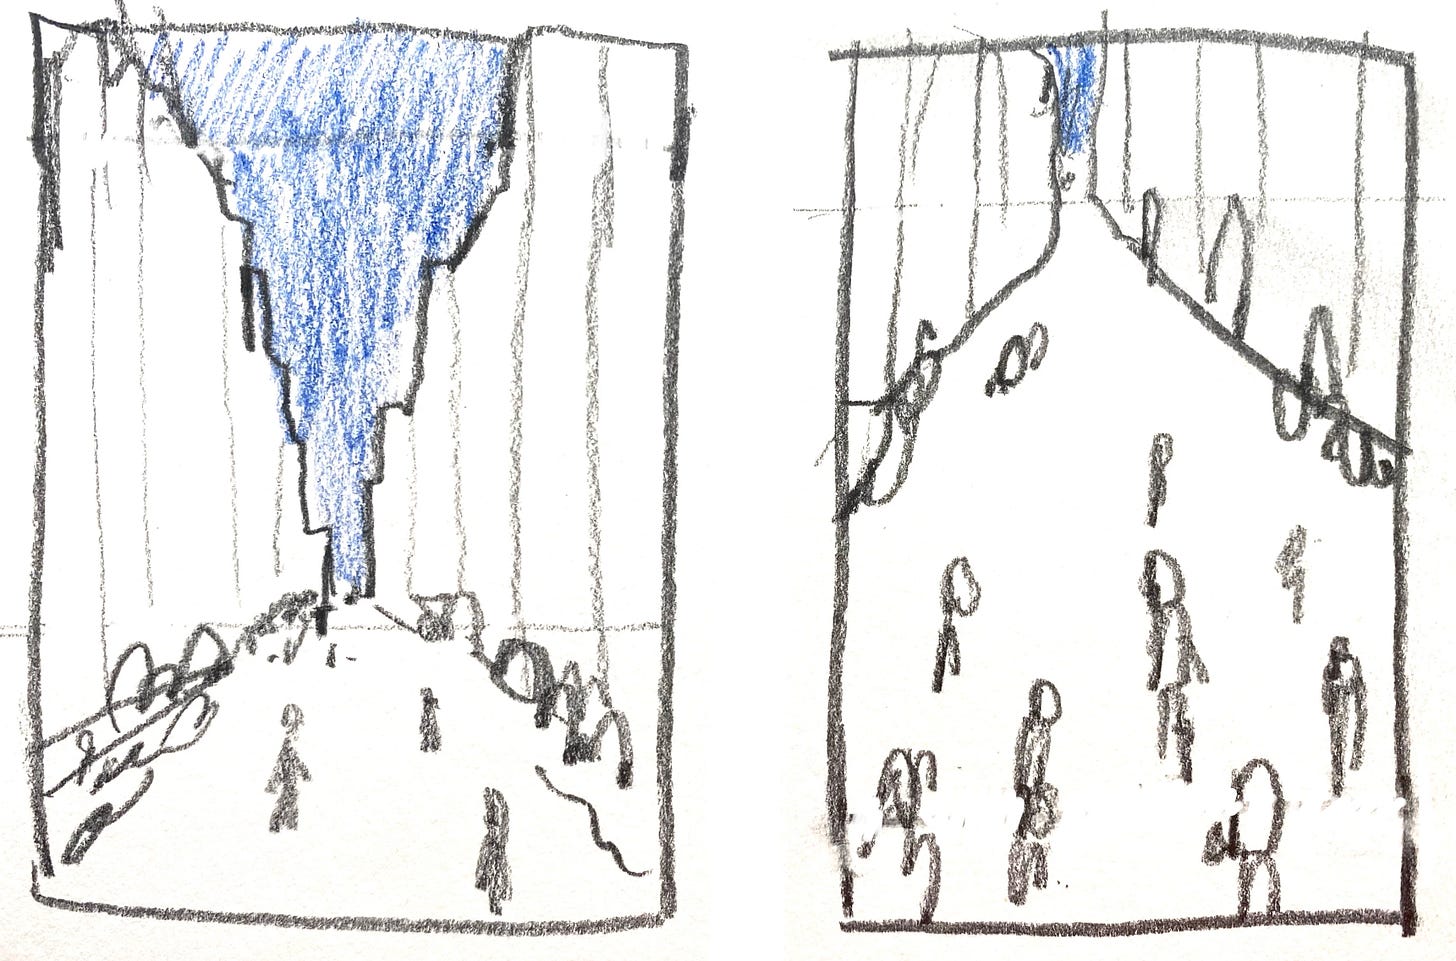
Being able to choose how we are going to draw something means being able decide the feelings and ideas we want a viewer to experience when they see our drawings. It’s not just being the drawer of your drawing. It’s being the creator of your story.
Anyone can do this. There are a few simple things to understand, and a little bit of practice to do, and then you will be able to use.
I recommend grabbing a piece of paper, a pencil, a ruler and a pen, and draw along with my explanation. If you’re like me, we learn with our eyes AND our hands.
Basic Elements of Perspective.
The four elements of Perspective are: The Horizon Line, The Vanishing point, Orthogonal Lines and Transverse Lines. I am going to explain each one with a little drawing exercise. Again, I recommend you draw along with me. Way more fun.
1. Horizon Line
We start any drawing by assessing where we stand, and what we see.
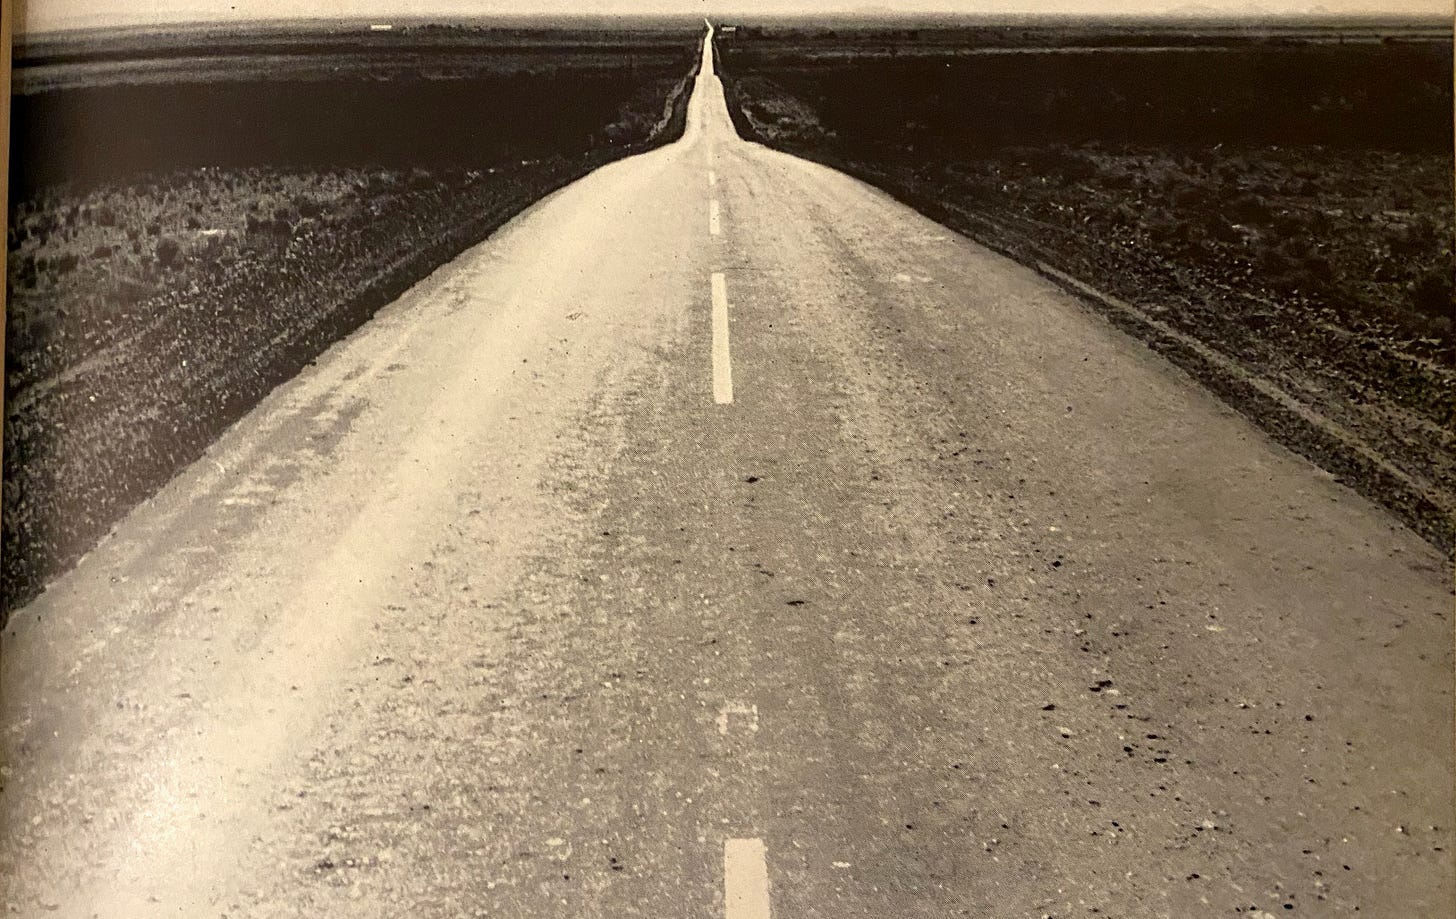
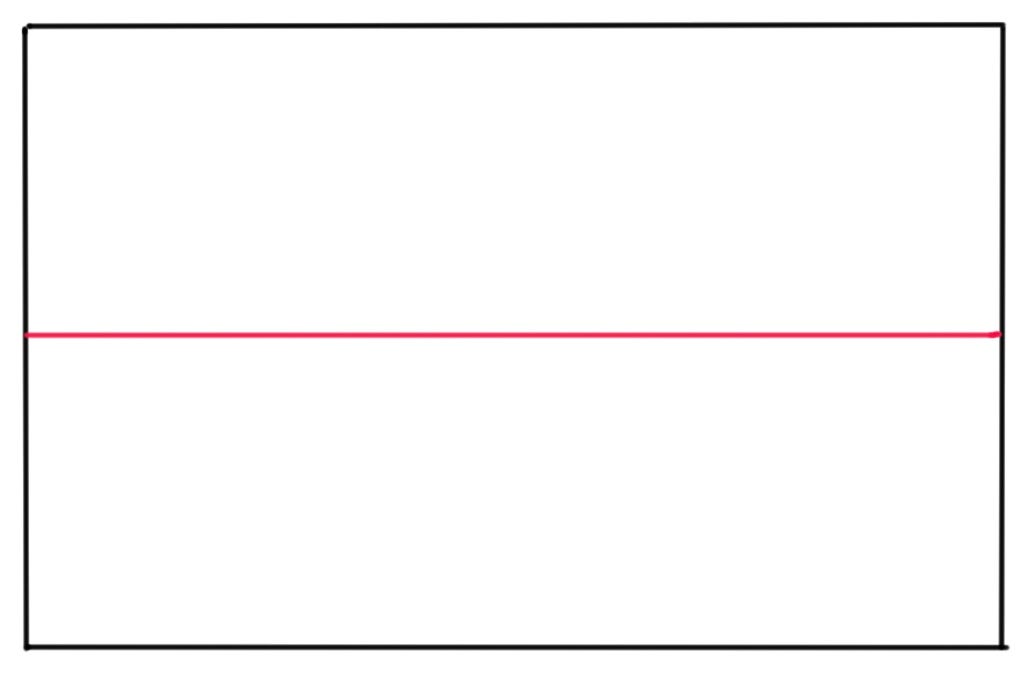
So, let’s imagine it’s noon and sunny and we are outside, standing in the middle of flat desert like land - dry, quiet, unencumbered as far as the eye can see. You look into the distance. All you see is earth, sky, and the edge of the earth. That is the horizon line. The horizon line is the edge of the earth. It’s also eye level.
If you were to hold up a frame up in front of your face, at eye level, where would the line of the horizon fall inside the frame?
Right. Directly through the center.
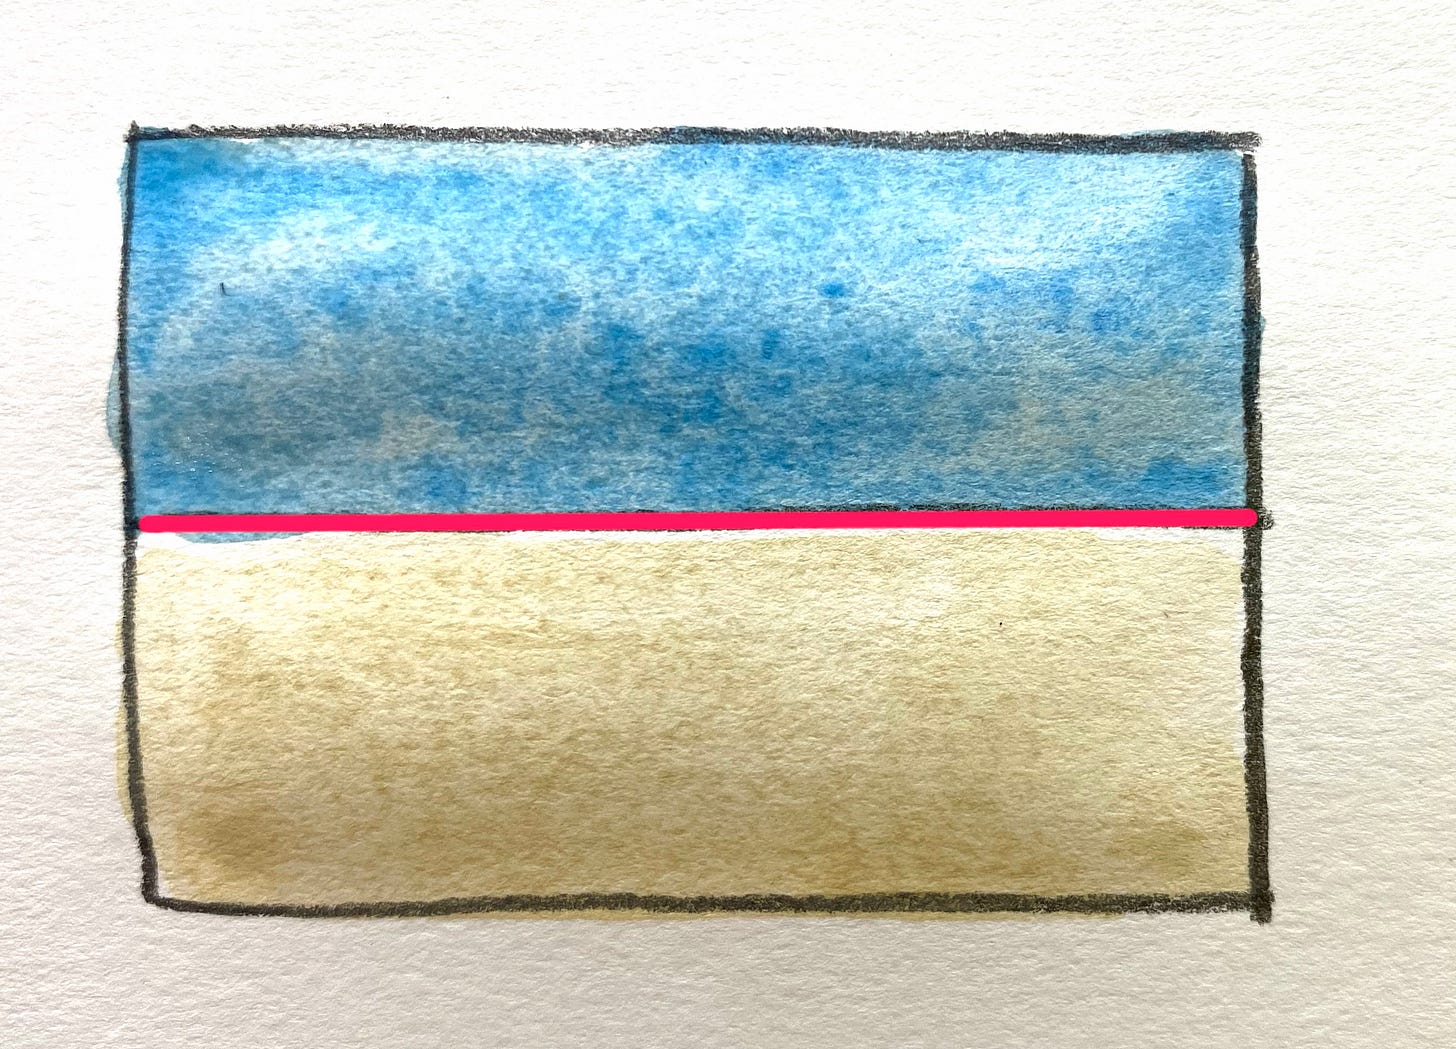
When we look straight on at the earth and try to draw it at eye level, the horizon line runs through the center of the frame.
When we move the horizon line up or down on the page, how does that change things? It’s fun to mess around with, actually.
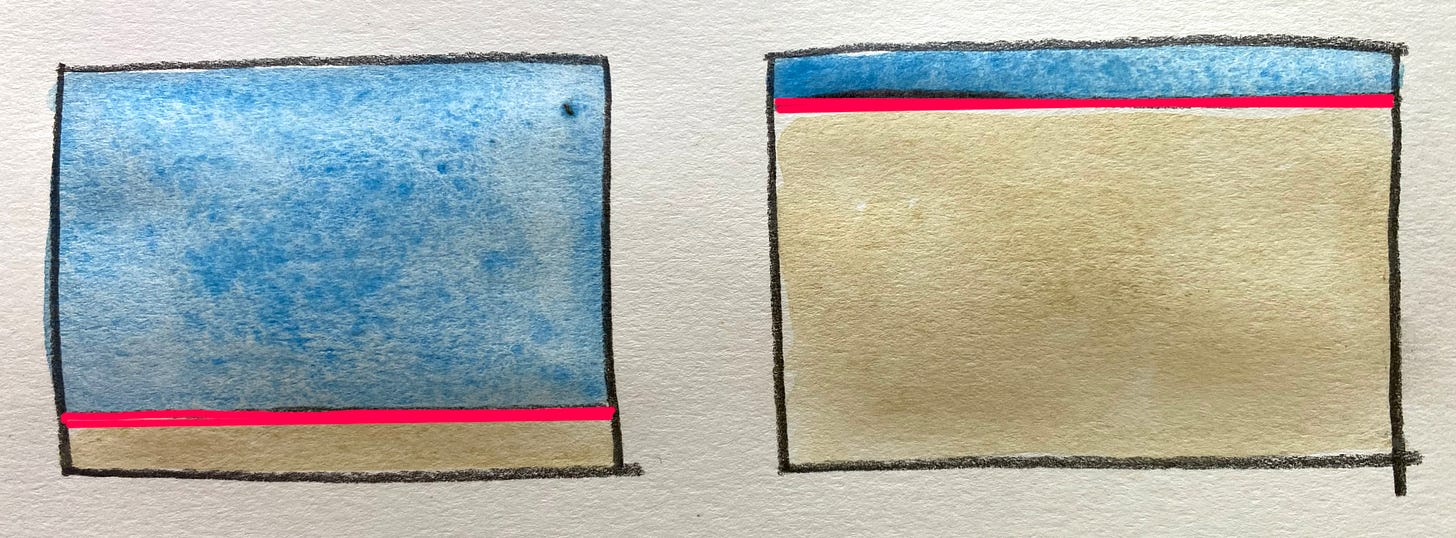
Low horizon line = looking up with a focus on what’s far away.
High horizon line = looking down with a focus on what’s near.
Scale (or how big something is) and angles (which we will get to in a moment) can add to the effect, but the fundamental element of perspective is a line that runs across our page. The horizon line orients us to the entire world.
2. Vanishing Point
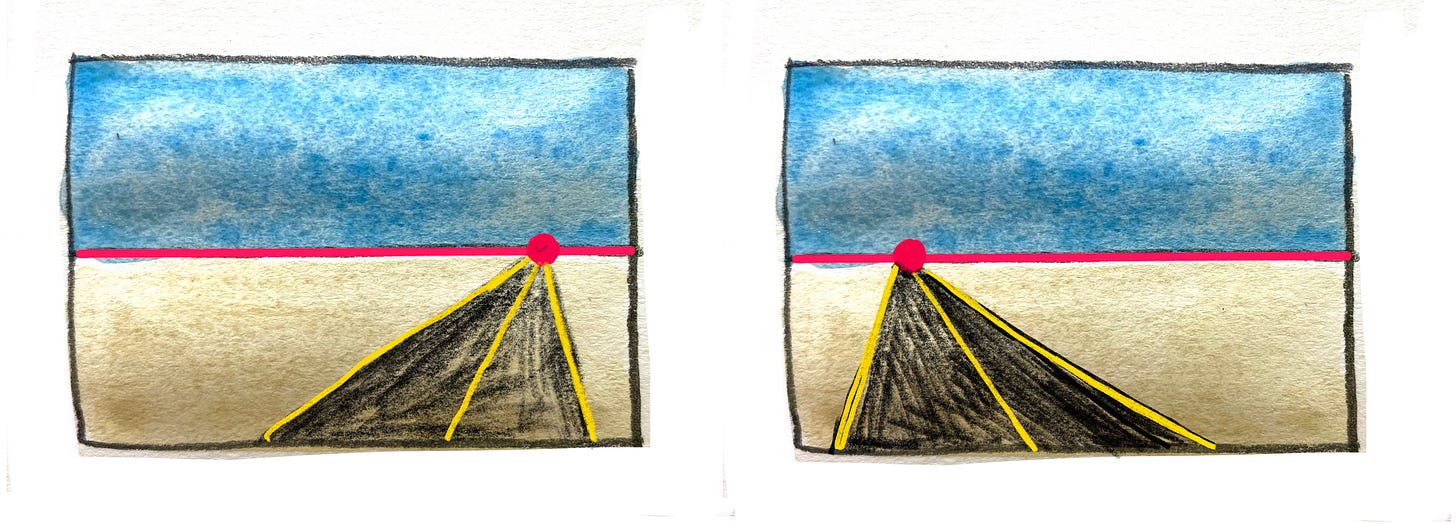
Now, imagine you’re in the same place, but you’re standing in the middle of a long road with painted yellow lines down the center and either side. It seems to go on forever, receding into the distance until it disappears into the horizon line.
Go ahead and draw it.
The place where all the lines converge on the horizon line is called the vanishing point. In fact, in one point perspective, everything converges at the vanishing point. It’s a pretty big deal.
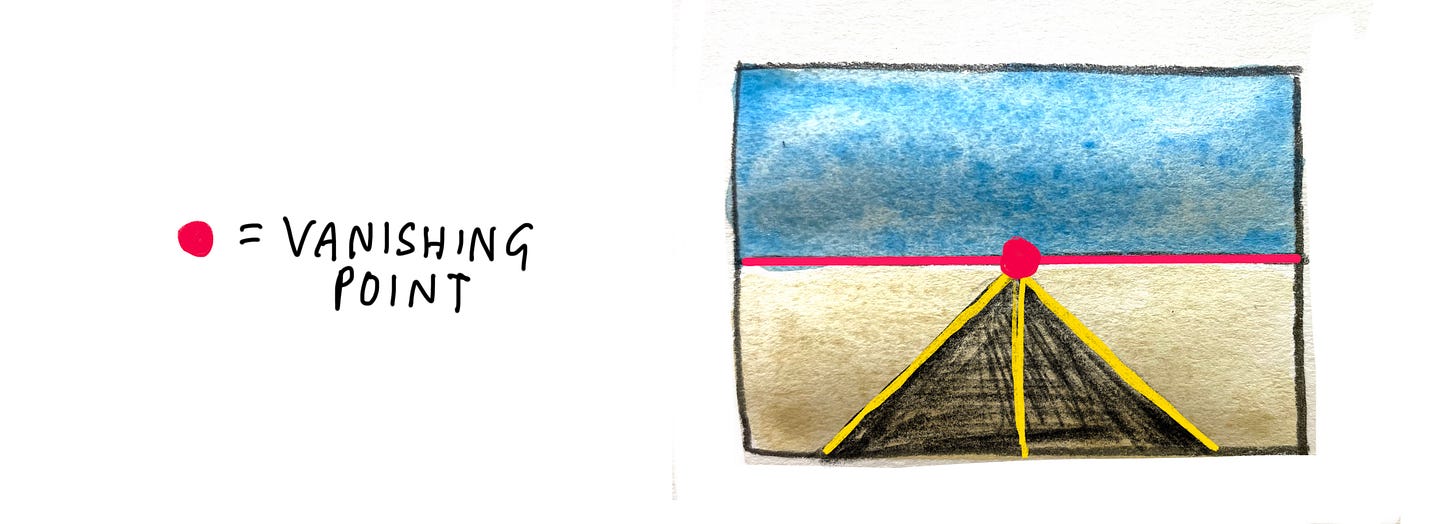
Now what would it look like if walked a little to the right or the left, so you weren’t directly in the middle of the road. How would that change how things looks?
Try drawing the vanishing point little to the left or right, and draw it.
Different, right?
You can also try combining what we did with the horizon line heights and where you place your vanishing point and see how that changes your road.
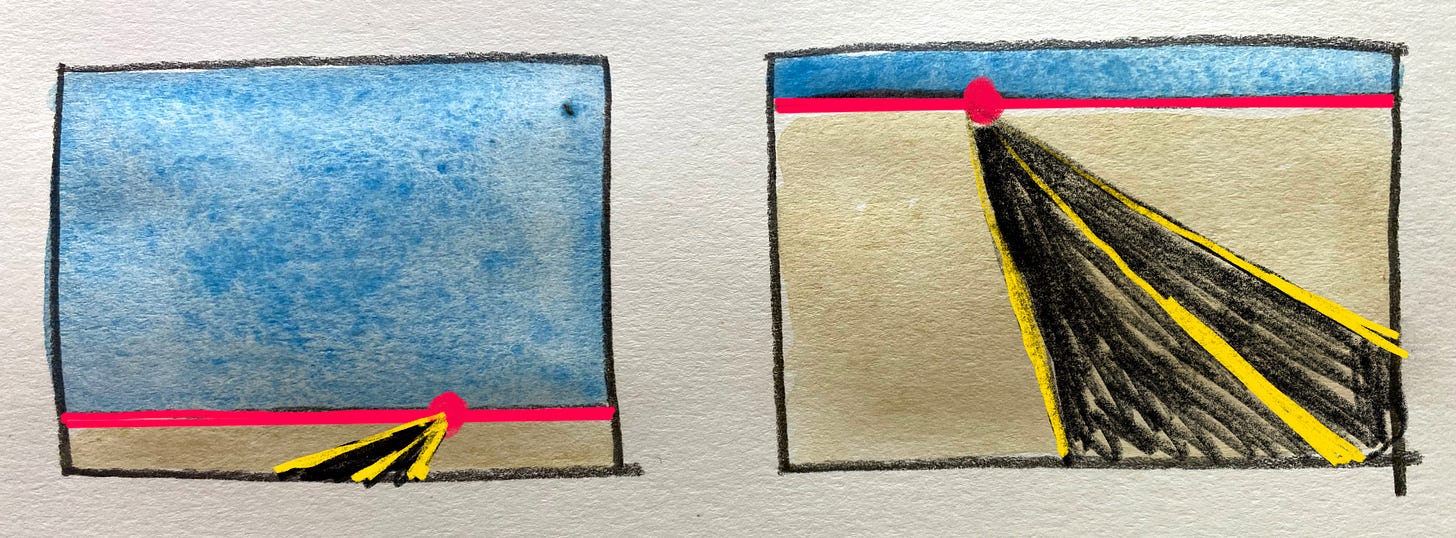
Cool right?
And did you notice how our road’s yellow lines may change place or direction, but thy always extend directly from the vanishing point to the outside of the frame? And they are always a super straight line? Those yellow lines are actually super important. The yellow lines represent the 3rd element of perspective drawing, and where we really learn to create 3D on a 2D surface….


