The Importance of Touch
Which is to say, let's draw some big feelings and textures ✏️
Helloooooo GUT Peeps!
I am on my way to Washington DC today! If you’re in the DC area (or want to head that way) I’ll be drawing and speaking at the National Gallery of Art on March 1 and 2. Here are the deets:
Friday, March 1, 12pm-1pm: In conjunction with the National Gallery of Art exhibition Dorothea Lange: Seeing People, I’ll give a talk on my work in conversation with Dorothea’s work. I’ll discuss our overlapping methodologies: how we each developed our artistic/journalistic practices, how we use our respective mediums to research, create visual stories, connect with people, and engage with social change, and some of the challenges inherent to our artistic/social practices as well. The talk is free, but registration is required. Sign up here. And bring your questions - we’ll do Q&A for sure.
Saturday, March 2, 11am-3pm: I’ll host DrawTogether Strangers inside the National Gallery! If you aren’t familiar with this project, listen to the New York Times’ audio piece, “A Deceptively Simple Way to Rebuild Trust in Scary Times.” Last week I trained 20 enthusiastic National Gallery staff members to co-host drawing tables, too, so there will be a bunch of us there to facilitate strangers (you! your family and friends! people you don’t know!) drawing, looking and loving. There will also be a table to hang out and keep drawing beyond the Strangers experience, and a gallery wall to hang up your art. Yes, that’s right, you get to hang your art in the National Gallery. PUT THAT ON YOUR ARTISTS RESUME! All ages welcome. Registration not required, but GUT peeps and DT kids, please come say hi and introduce yourself. COME DRAW! Interested in hosting a DrawTogether Strangers experience yourself?? Everything you need to set one up including the free toolkit is here!
Alright, and with that, I rewind time and bring back a DrawTogether GUT classic that is kind of combo of doodling and light and shadow. It’s super fun, relaxing and a great exercise for our brain. This week we are focusing on TEXTURE. After all, isn’t it all the varied feelings we have that make life interesting, rich and full? It makes us human. This week, let’s embrace ALL the textures in life. Feel them. Name them. And then learn to draw them.
If you’ve been with the GUT for a long while, this is an opportunity to create NEW textures. There are more feelings in heaven and earth, GUT, than are dreamt of in our philosophy. 😉
Now, Let’s Draw Some Texture
This week’s lesson focuses on physical touchy-touch texture. But! There is clearly some obviously overlap with emotional touchy-feely texture. If you’ve got big feels this week and would like to layer this lesson with an ID-your-feelings exercise and label your textures with emotions, go for it. If you stick to the art-centric lesson, that’s great, too. Either way, we’re going to explore texture and value (light and shadow) and learn how to make our drawings (and maybe life) as varied and interesting as possible.
What is texture in art?
There are TWO TYPES OF TEXTURES IN ART.
ACTUAL texture. That is what you would physically feel if you broke all the rules and actually touched the art.
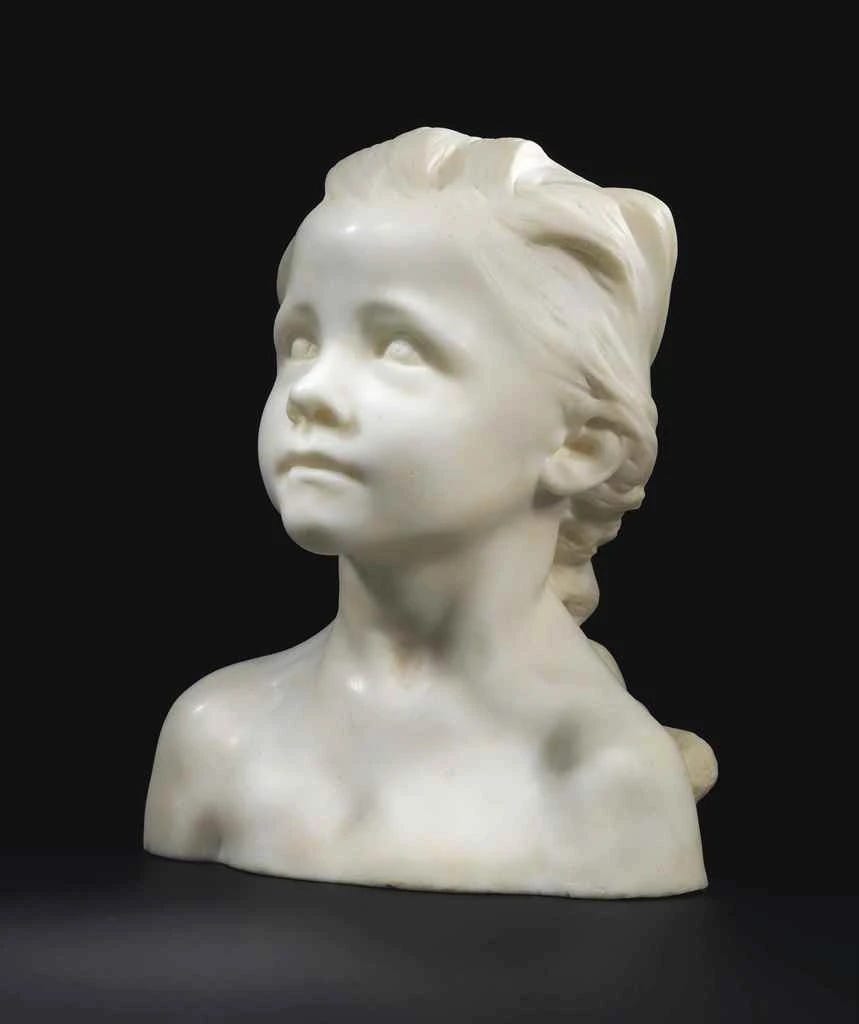
What would this marble sculpture Camille Claudel by feel like? What would its texture be? Probably smooth and hard. What if it was made of sparkly slime? Or Sandstone? Or moss? Every drawing, painting, sculpture, and installation has texture. 2D or 3D, everything has a unique feel, even if we don’t touch it.
IMPLIED texture. That’s how an artist uses materials to create the appearance of texture.
This Andrew Wyeth painting is made with egg tempera paint, which is a fast drying, slick paint. It’s on panel, which is a flat, hard surface. So while the actual texture of this painting is probably shiny and hard, the IMPLIED texture is very different. The Implied texture is… Grassy. Dry. Sharp. Rough… How many different textures can you count in this paintings? What words would you use to describe them? Look closely. How do you think Wyeth created each of these textures?
But wait! There’s more. You get a BONUS TEXTURE!!
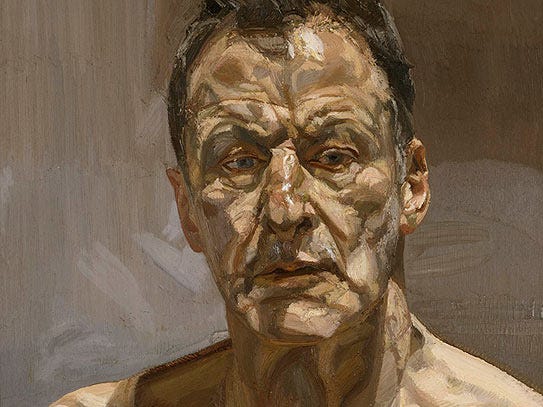
Bonus Texture: IMPASTO. When an artist uses tools like a palette knife, brushes or even their fingers to build up paint on a canvas in such a way that the paint itself becomes actual texture. This is called IMPASTO. You’ve seen this in paintings by Van Gogh, Money, and one of my all time favorite portrait aritsts, Lucian Freud.
Gosh, I love Freud’s paintings so much.
Today, we are focusing on IMPLIED texture.
Drawing Implied Texture
How you create (or imply) texture will vary depending on which medium you use. To start with, I suggest we work exclusively with pen and paper. By restricting ourselves to black marks on a white surface we have to learn the basics and really push our imagination. Creating implied texture with pen on paper also quickly becomes a total doodle-making zone, which is awesome and super fun and less stressful. I think we could all use that right now.
How do you create an implied texture with just a pen??
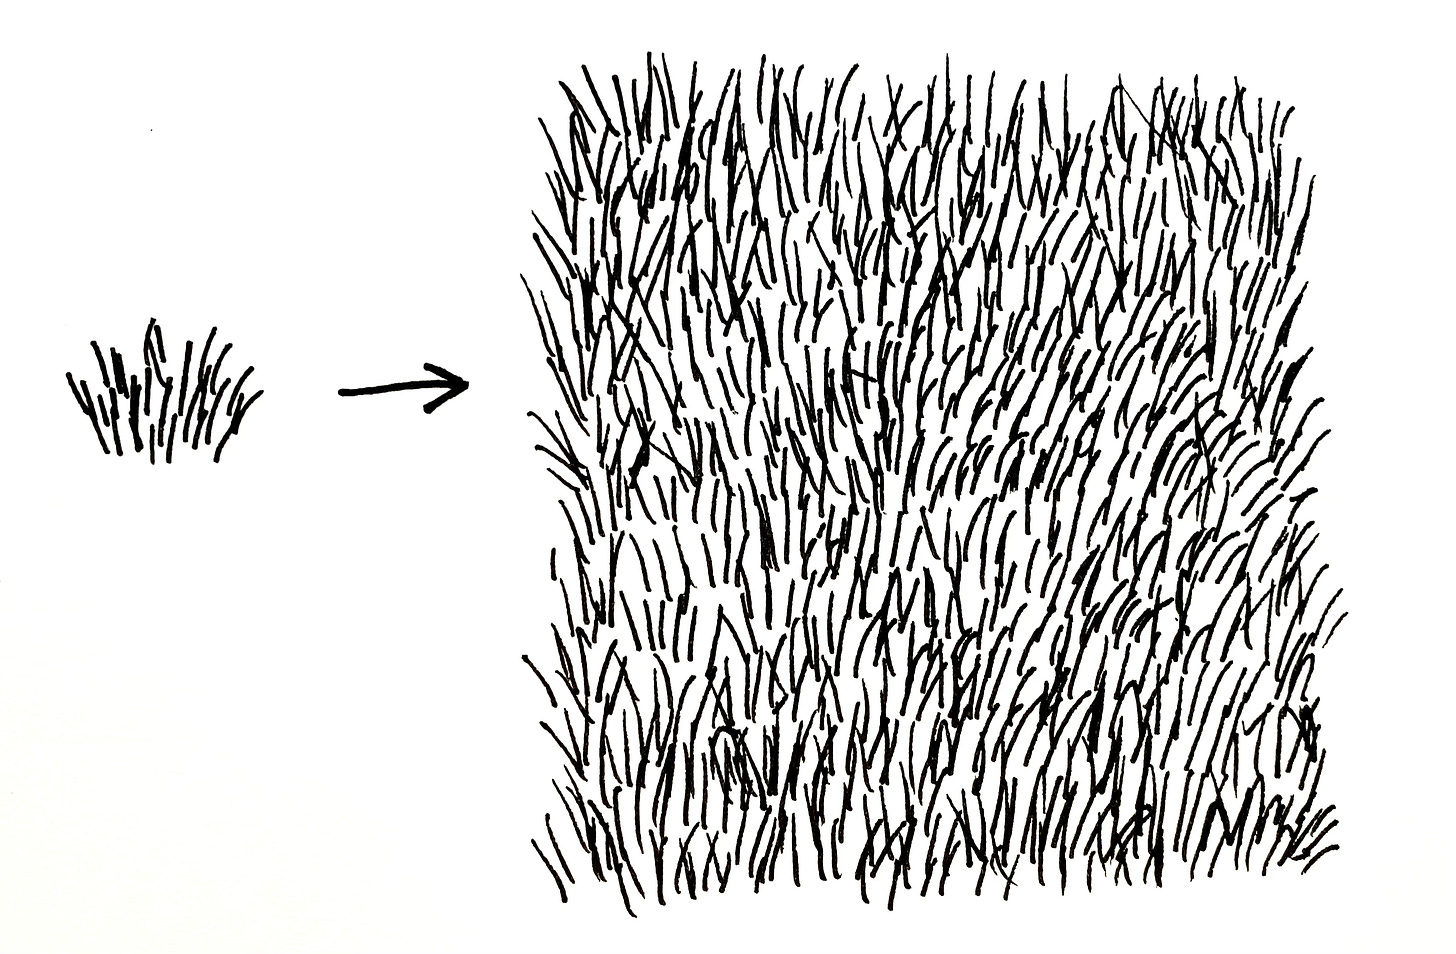
Creating a texture with just a pen is very similar to creating a pattern: draw marks that implies the texture you’re going for, then you simply repeat it all over the object/space. Ta-da. Texture.
With that, go grab your paper and pen.
We’re doing TWO Drawing Exercise/Assignments this week. Both are simple and fun. One of them taps that knowledge we built with the GUT lesson on Values and Shading. (If you haven't done that lesson yet, you might want to check it out. Or don’t! No rules in art. It’s always here if you want to try later.) Both of these texture prompts are easy, fun, and get our feelings moving through our bodies.
NOW BRING ON THE BIG FEELS.
Assignment
This is a two-parter this week! Take your time with it. In addition to being a solid lesson on texture, it’s also a great doodling, stress-reduction, anxiety-relieving, imagination inducing kinesthetic exercise. Part two is also a refresher on light and shadow, and how to combine VALUE and TEXTURE. It’s fun and silly and relaxing and you will be able to draw an awesome Cousin IT by the end. :)
Part 1. Texture Tiles
Got your paper and pen? Great. Before we get started, quick quiz:
Q: What is the ACTUAL texture of your artwork so far?
A: Chances are your paper is smooth, or it has a slight roughness to it, depending on how much grain your paper has. What’s grain? Grain the word for the texture of paper. The more grain, the rougher the paper. Another fun fact about paper - when you’re working with watercolor paper: Cold press = Rough. Hot press = Smooth. The more you know…
Okay, back to drawing IMPLIED texture.
Draw 10 empty squares on your paper.
Now, let’s think of some textures: Soft. Gritty. Rough. Fluffy. Scaley. Furry. Pokey. Grainy. Smooth. Bubbly. What else can you think of? Jot them down on a piece of paper.
Next, let’s think of some of the ways we create textures on the paper using a pen or pencil: Dots. Lines. Hatching. Loops. Swirls…. Write those down, too, if you like.
Now imagine each square you drew is a tile, and every tile is a different texture. You are going to use your pen to transform all those blank tiles into textured tiles using whatever drawing technique you like. Ready?
Here’s mine:
Pro tip: Make sure your textures get right up to all four edges of the tile. If you get stumped thinking of textures, look around your room or out the window. Spot a new texture. And if you get stumped figuring out how to use a pen to imply the texture, just make it up! Give it a go. Even if your marks don’t look like the texture you were tryin to imply, they will look like some sort of texture . :)
When you’ve done all ten tiles, name or label them whatever you want.
You now have a sample of texture tiles you can refer to and decorate with anytime.
CONGRATS. You did it. You can stop there, or move on top Part 2!


