Hellooo and Happy Pride, my dear DrawTogether friends.
Today let’s dive directly into Part 2 of our 3-part series on PENCILS.
In Part 1 we learned about how pencils are made (or as we now call them, “graphite pencils”) and the standardized grading systems for hardness, softness and value. (Note: I am working on creating a comp chart for Blackwing and other brands that do not adhere to the standard system. Stay tuned!)
In Part 2 we dive headlong into what appears to be a pretty silly topic: Pencil Sharpening. But as artists we know the simplest subjects hold the most opportunity for discovery.
Let’s do this.
Part 2. How to Sharpen a Pencil.
If you can believe it, there’s a whole BOOK dedicated to the subject of sharpening pencils. I won’t get into all the ironic details and partial-parody demos that David Rees does in How to Sharpen Pencils, but I’m going to teach you what I find most important to consider, and some useful techniques.
And believe me, it’s about more than just creating a sharp point.
Before we get started on materials and how-to’s, let’s address some basics. I’m talking shape, mechanics, and blades.
Let’s get into the basics.
Shape: Long vs. Short Point
Sharpeners produce either sharpen long or short points. Not both. Both hand and machine sharpeners can produce these length, so just make sure you know which one you are buying when you buy a sharpener. (Hint: if it doesn’t say long point, it’s probably short. Short is standard. More family friendly.)
Shorter points have a strong advantage: they are stronger and resist breakage more. Disadvantage: the tip is stubby and doesn’t give you much coverage when drawing on the side of the graphite. Long points have two advantages: they stay sharp for longer, and they have a larger area of exposed graphite which allows for more varied mark making. Disadvantage: they break more easily. Only YOU know what’s right for you.
Hand vs. Machine: Care, Effort, Consistency and Control
I talk a lot about process vs outcome here at the DrawTogether Grown-Ups Table, and this is a perfect example. Sure, you could go ahead and buy yourself a $695 hand crank (or “Helical”) sharpener (OMG), or a fancy electric Helical for $330 and I’m sure you’d dig the outcome. However, I promise you will feel even better after sharpening your pencil BY HAND. Think of a painter stretching their canvas to the taughtness that feels right against the pressure of their brush: art making often starts long before the material touches the surface. Making art starts with creating the conditions for making what you want to make.
If you are interested in the process of drawing with graphite, and not just in the result, it will always serve you to find opportunities to connect with your medium. When you sharpen by hand you get to choose how you want your medium to behave. In turn, the medium becomes an extension of you, not a machine.
In terms of concrete outcomes, the main difference between hand sharpened vs machine-sharpened pencils is effort, consistency and control. If you sharpen a pencil with a machine you are guaranteed reliability and speed. Until your blade goes dull, you’ll get the same graphite length, angle and diameter every time. But! You give up all control over the outcome of the pencil to the machine. Whatever the machine does is what you get. Every. Time. If you sharpen your pencil by hand - and by that I mean using a hand-held blade and maybe sandpaper - you give up consistency and speed: it will take forever and you will never sharpen a pencil the same way twice. But! You gain total control over the outcome of the shape of your pencil. So again, only YOU Know what is right for you.
Blades: How sharp is your sharpener??
It’s going to be tough to sharpen a pencil with a dull blade. You can figure out if your sharpener’s blade is sharp by looking at the wood of your pencil after you sharpen it. Is it smooth? Great, that's a sharp blade. Is the wood rough and raggedy? Then the blade is no longer sharp.
Luckily, it’s easy to sharpen a dull sharpener blade. There is a little screw on the top of the blade, and you can unscrew it, remove the blade, clean, sharpen, and replace it. (MIND BLOWN!) If you take care of it, even the cheapest single blade sharpener will last you a very long time.
And with that….
Let’s Sharpen Our Pencils
What you will need for this pencil sharpening tutorial:
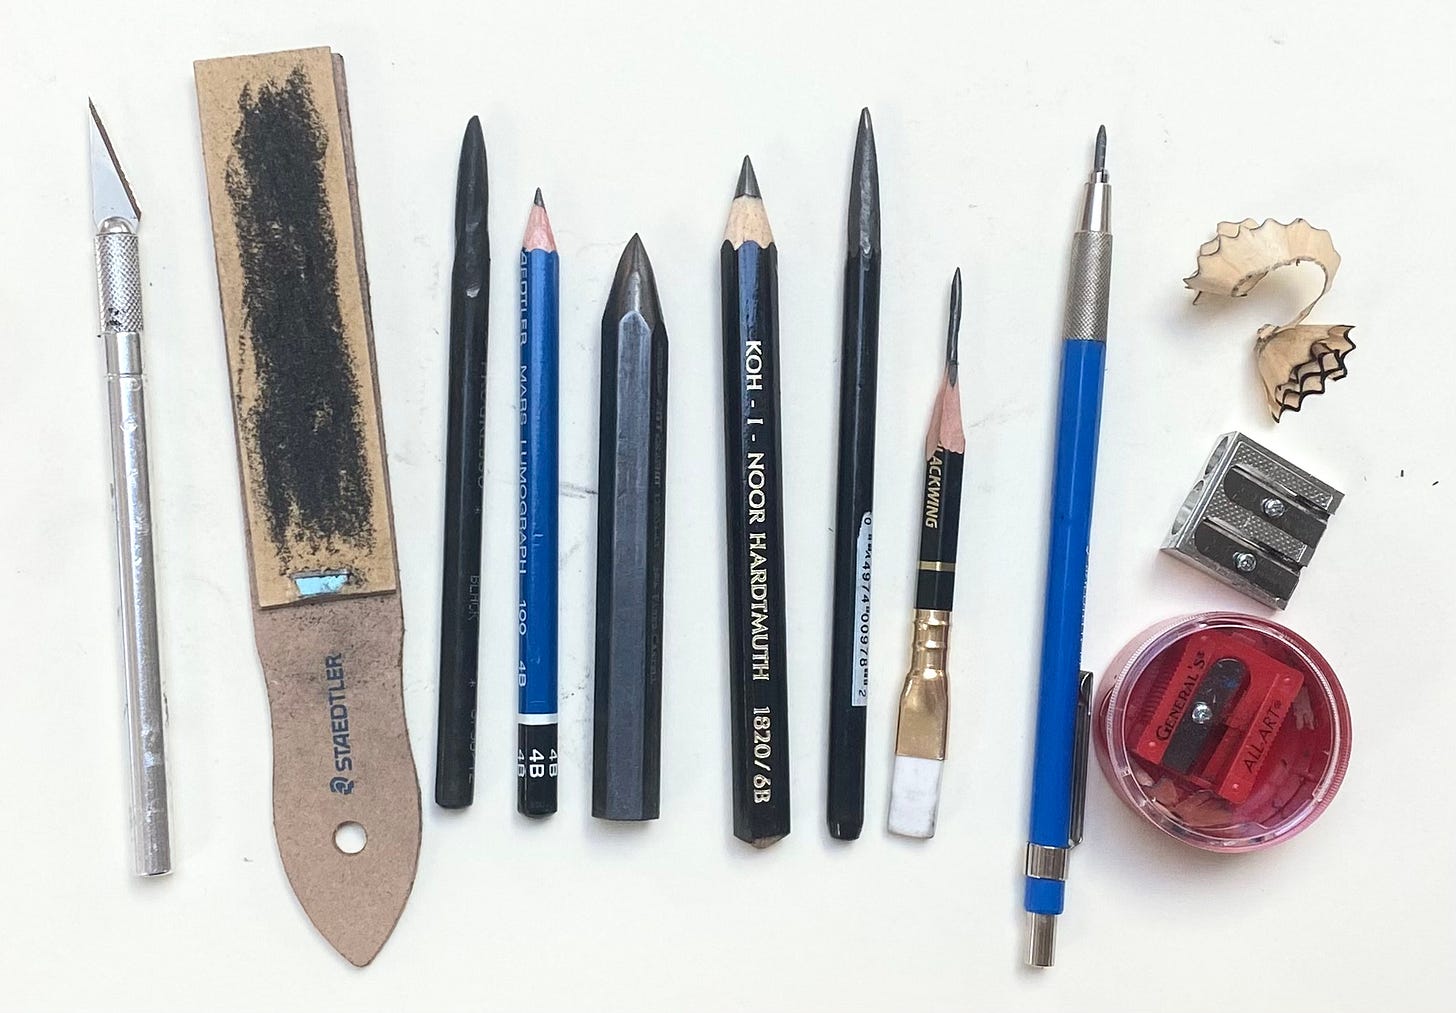
All Your Graphite Pencils (I’m using: Wooden, Woodless, regular sized, “jumbo”, mechanical")
Single Blade Sharpener
Sharp Blade (xacto knife or pocketknife will do)
Sandpaper (120 grit or finer)
Paper, of course
If you have a double blade hand-held sharpener or electric or hand crank sharpener, great. I do not. If you love the one you have and want to recommend it to the GUT, please submit your instructions to me via community@DrawTogether.Studio and I may invite you to be a distinguished guest pencil sharpening instructor. Yes, I’m serious.
Single blade sharpener.
Handheld Single Blade sharpeners are great for wooden graphite pencils. They come in many shapes and sizes.
Some single blades are open (meaning not in a container) allowing the pencil shavings (removed wood and graphite) to fall freely from the pencil. You’ll want to use these over a piece of paper or waste basket or the ground outside to catch the debris (it’s biodegradable!) Open blades can be made of aluminum or brass or plastic, and range from fifty cents to fifteen dollars.
You can tell a good sharpener when it carves the wood off into a single long unbroken shaving. That means the blade is sharp, and the angle is good.
The one here is.. not so good.

That little aluminum two dollar sharpener does the trick. And with two hole/blade sizes it sharpens both regular and jumbo sized pencils of most any medium. (I do not recommend using a a single barrel sharpener with any oil-based medium, however. That can get sticky.)
This one below is contained inside a little plastic box that collects shavings and then you can empty it in the trash when it’s full.

Here I tried a single blade handheld open sharpener on a graphite stick, and it worked great. It produced a ton of shavings and was a mess, tho.
I recommend scooping these shaving into a little jar like a little spice jar, and using them to dust paper! Or mix them with some water and gum arabic and make a graphite ink out them!
Hand-sharpening with a knife and sandpaper
This is my favorite way to sharpen pencils. Here’s why: you can use it with any pencil medium (not just graphite), and you have complete control over how you want to create your tool. All you need is a blade (x-acto or pocket knife or any sharp blade) and sandpaper. Ideally a 120 grit or finer.
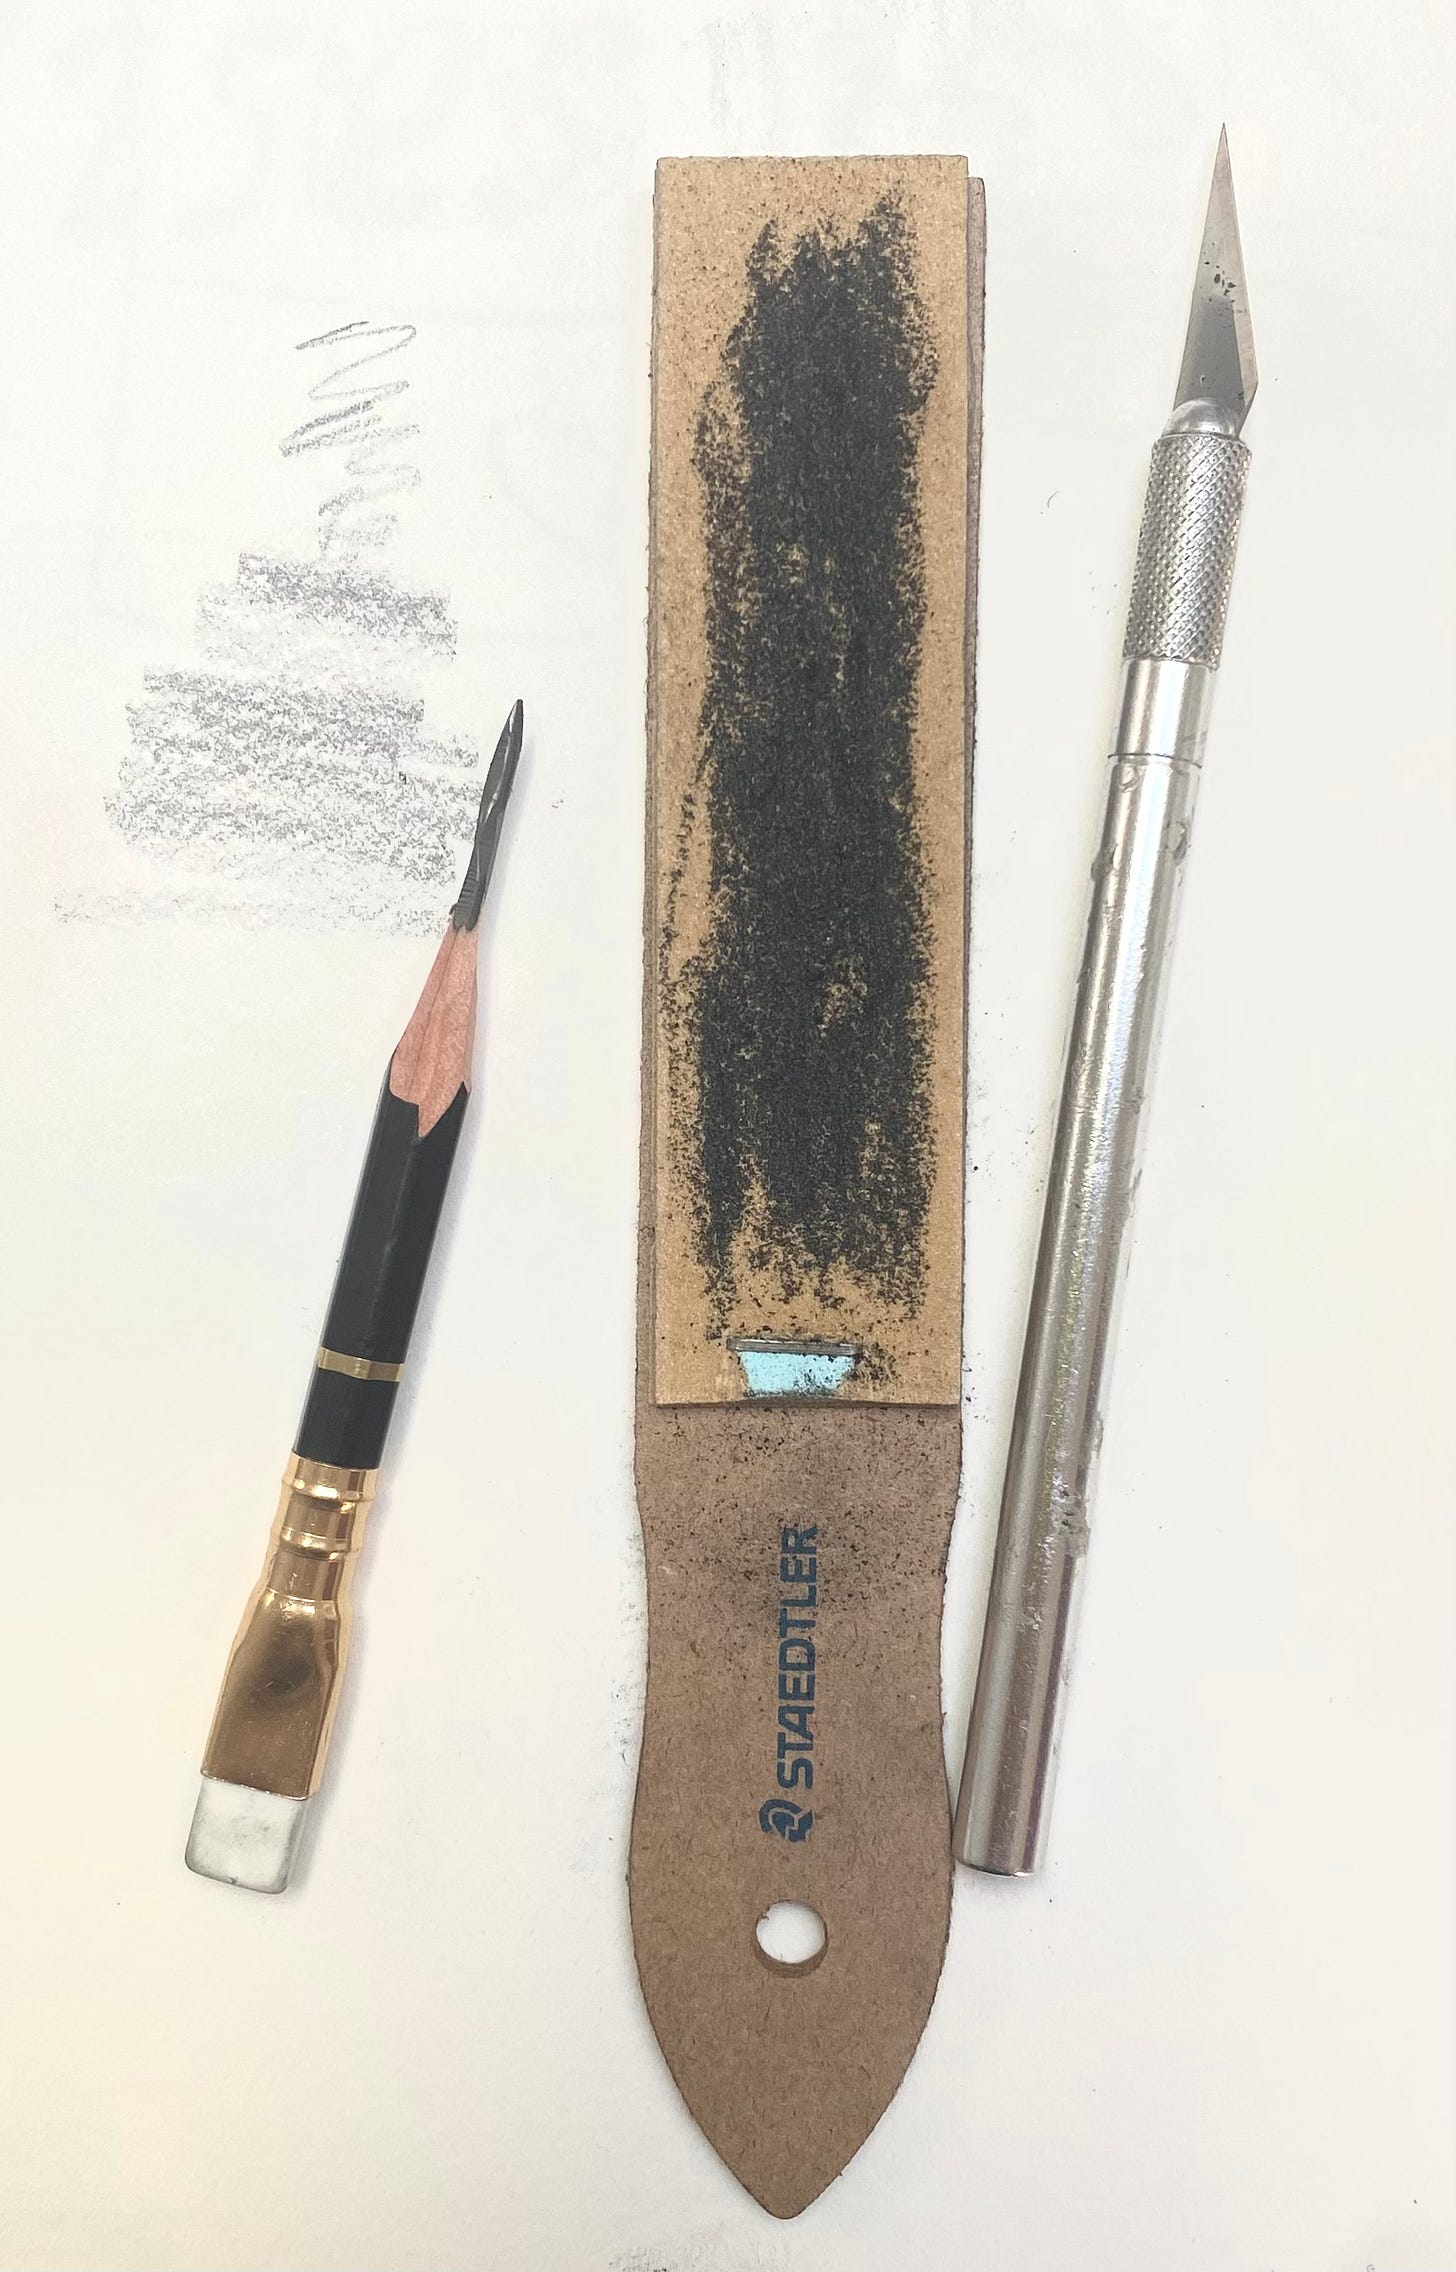
In this little example below I used an X-Acto blade, a Staedtler pencil sander from the art store, and a woodless pencil. (You do not need to buy an art store sander. I just didn’t have any fine sandpaper at home, and I was at the art store. But WAY better to make your own with sandpaper and a wooden block!)
Woodless Pencil
Here’s instructions on sharpening a woodless pencil like this:
Carefully use the X-Acto blade to remove the plastic coating around the woodless pencil and begin to carve the graphite into the kind of shape you want. Remember, you can make your tip long, short, skinny, thick, it’s totally up to you. I wanted to make it pretty long and bullet shape, so it would be fun to use on its side.
Once the shape is pretty close, hold the graphite in your dominant hand, and the sander in your non-dominant hand, and start to smooth the graphite into the shape you want it by making long strokes along the sandpaper.
When you think you’ve shaped it to your liking, try rubbing it across paper to check. Pay attention to little nicks in the graphite that could leave blank marks, or spurs that could leave a dark mark.
That’s it!
Wooden Pencil
Using a blade and sandpaper on a wooden graphite pencil gives you the opportunity to create the ultimate pencil: the extra long lead pencil. Fixated on by first year art students world-wide, this type of sharpening gives you a super long lead that allows for less sharpening, and more variation and control over your mark.
How to sharpen a wooden graphite pencil like this:
Using an X-Acto blade of similar sharp knife, start whittling down the wood around the graphite at the tip of the pencil, slowly working your way back, revealing more and more lead as you go. Take care not to dig into the lead if you can help it. Make sure to leave a good angle of wood leading to the graphite to support it.
Once you have a length you like, get out your sander. Hold your pencil in your dominant hand, and the sander in your non-dominant hand, and VERY CAREFULLY smooth the graphite a smooth cylinder with a tip that works for you. The graphite is delicate, so be gentle, and take your time.
When you think you’ve shaped the pencil lead to your liking, rub it gently across paper to check your marks and use sandpaper to clean up any strays.
Mechanical pencil
David Rees says it best in his book book How to Sharpen A Pencil. Here’s an image of the whole darn chapter:
So there you have it, folks: How to sharpen your pencil.
I know it might seem ridiculous, and maybe it is for you. But I maintain, prepping our materials in a way that is deliberate, slow, careful and mindful brings our attention to the process of making a drawing, and helps us focus less on the outcome. It brings us closer to the materials we use. We get to know them better - their strengths and limitations - and helps us discover our own particular way of using them.
Also, it’s fun.
Questions?
If there’s anything I missed (I’m sure there is a ton) please leave your questions and your comments and suggestions in the comments below. (Comments, chat and all community activity - along with our weekly assignments - are reserved for subscribers to DrawTogether with WendyMac. Please do subscribe and join us at the Grown-Ups Table, it’s a blast. If you are experiencing financial hardship, email community@drawtogether.studio and we can talk scholarships. Thanks to the Muriel Pollia foundation, no artists left behind!)
Next week we’ll dive into some of the lesser known approaches to mark making with graphite. Meanwhile, an assignment to integrate all this new knowledge and share with your fellow GUT artists.


