

Day 17. Let's catch our breath
Artist stretches and a drawing assignment to move our bodies.

Welcome, DrawTogether/GUT friends!
You.
Are.
Doing.
AWESOME.
You are over halfway through drawing for 30 days! You made it through GUT Drawing Basics with flying colors. I bestow honors degrees on every single one of you. Valedictorians, all!
Today we are going to take a quick pause. We will draw, of course, and our assignment is designed to help us catch our breath. I am opening up our drawing assignment today to EVERYONE. No artists left behind! Everyone needs this and I ain’t gatekeeping health.
Lesson: Self-care for artists
This week, our lesson is all about caring for our bodies as artists. This is something people in the arts rarely talk about, and I’m hellbent on changing it. We artists deal with a unique set of physical challenges, and if we don’t address them head on, they’ll sneak up behind us when we least expect it. Trust me, folks, this one is personal.
Last year, I had to have my left hip replaced due to bone on bone arthritis. Friends, I WAS 49. How did that happen? I was surprised to learn that the deterioration of the cartilage in my hip was due to two things: 1. the way my body was born. And 2: the way I’ve always sat while drawing.
For decades I’ve drawn with my left heel propped up on the edge of my chair. (I am flexible — that the how-I was-born part.) I lean forward, extending my body past my knee. It’s kind of like a sitting pigeon pose. It felt good. Comfortable. I had no idea I was damaging my body.
In art school, nobody teaches you to keep both feet on the ground while sitting. Or to sit up straight. (Did you know that’s one of the reasons an angled desk is so useful??) Nobody tells you to take a deep breath. Or to roll your neck around, stretch your forearms, rotate your wrists. Turns out, if we don’t learn this stuff early, we WILL learn it later. The hard way.
So today I am teaching you some movements I learned from my friend, the writer and athlete Bonnie Tsui, who wrote a book called On Muscle. She shared these stretches with us last year, and part one of today’s assignment is to do them. :)
Three movement practices to support strength and mobility for drawing
As taught to us by Bonnie Tsui, author of On Muscle.
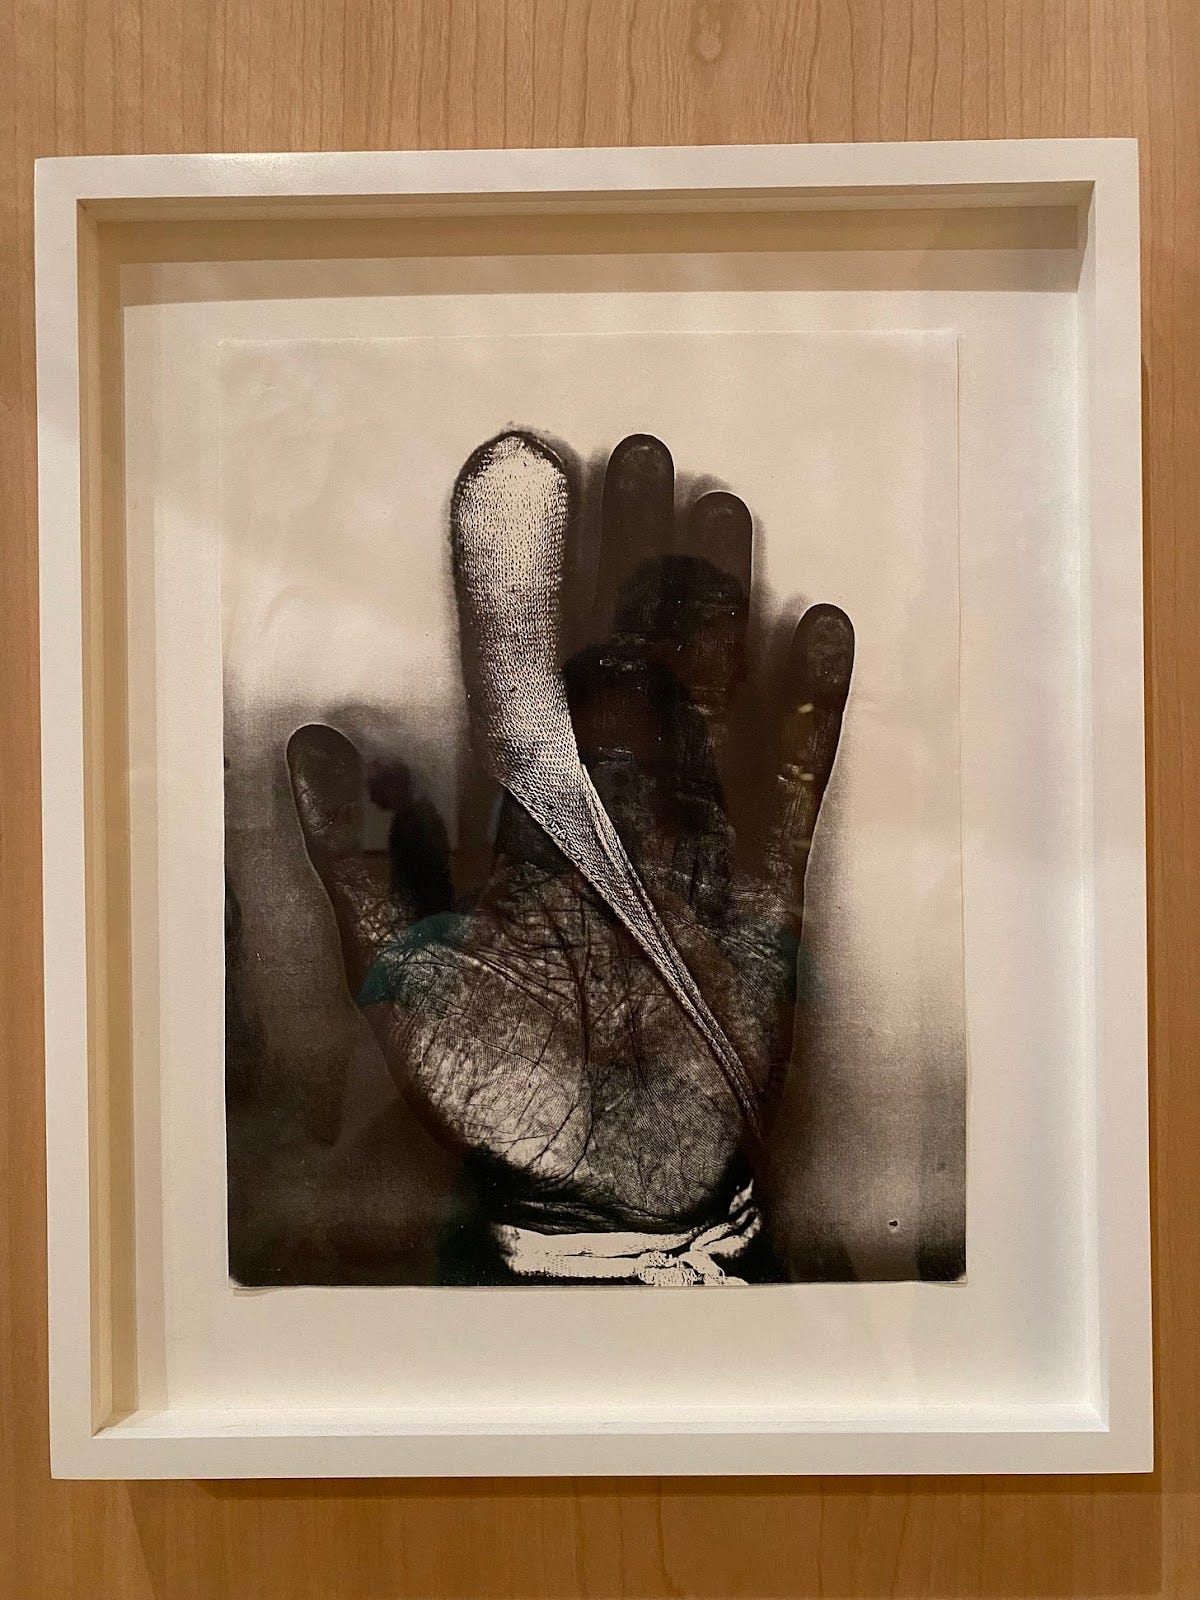
1. Hand and finger strength and mobility for drawing
At some point in the previous 16 days you’ve probably experienced a little achiness in your drawing hand. Maybe some cramping or fatigue. That’s normal. Often it comes from holding the drawing tool more tightly than you need to — a result of anxiety or nerves or stress or the expectations we put on ourselves while drawing. This stretch is great for loosening up our hands.

Many people use stress balls or other squeezable things, but those only promote movement in one direction! A really helpful stretcher allows for multiple movements and also gets your hand to expand. Bonnie suggests using a finger stretcher that offers resistance (you can find one at your favorite online retailer), but a good substitute is a thick rubber band, like the ones you find in the supermarket holding heads of broccoli.
2. Wrist, arm, and shoulder strength and mobility for drawing
Our wrists, forearms, elbows, and shoulders do a lot of work when we’re drawing. This assisted stretch is great for loosening those muscles so we don’t get cramps — or worse, long-term damage that can require we wear a brace while drawing! I invested in a Theraband FlexBar and I keep it at my drawing desk. When I’m drawing a lot, I use it at least once a day.
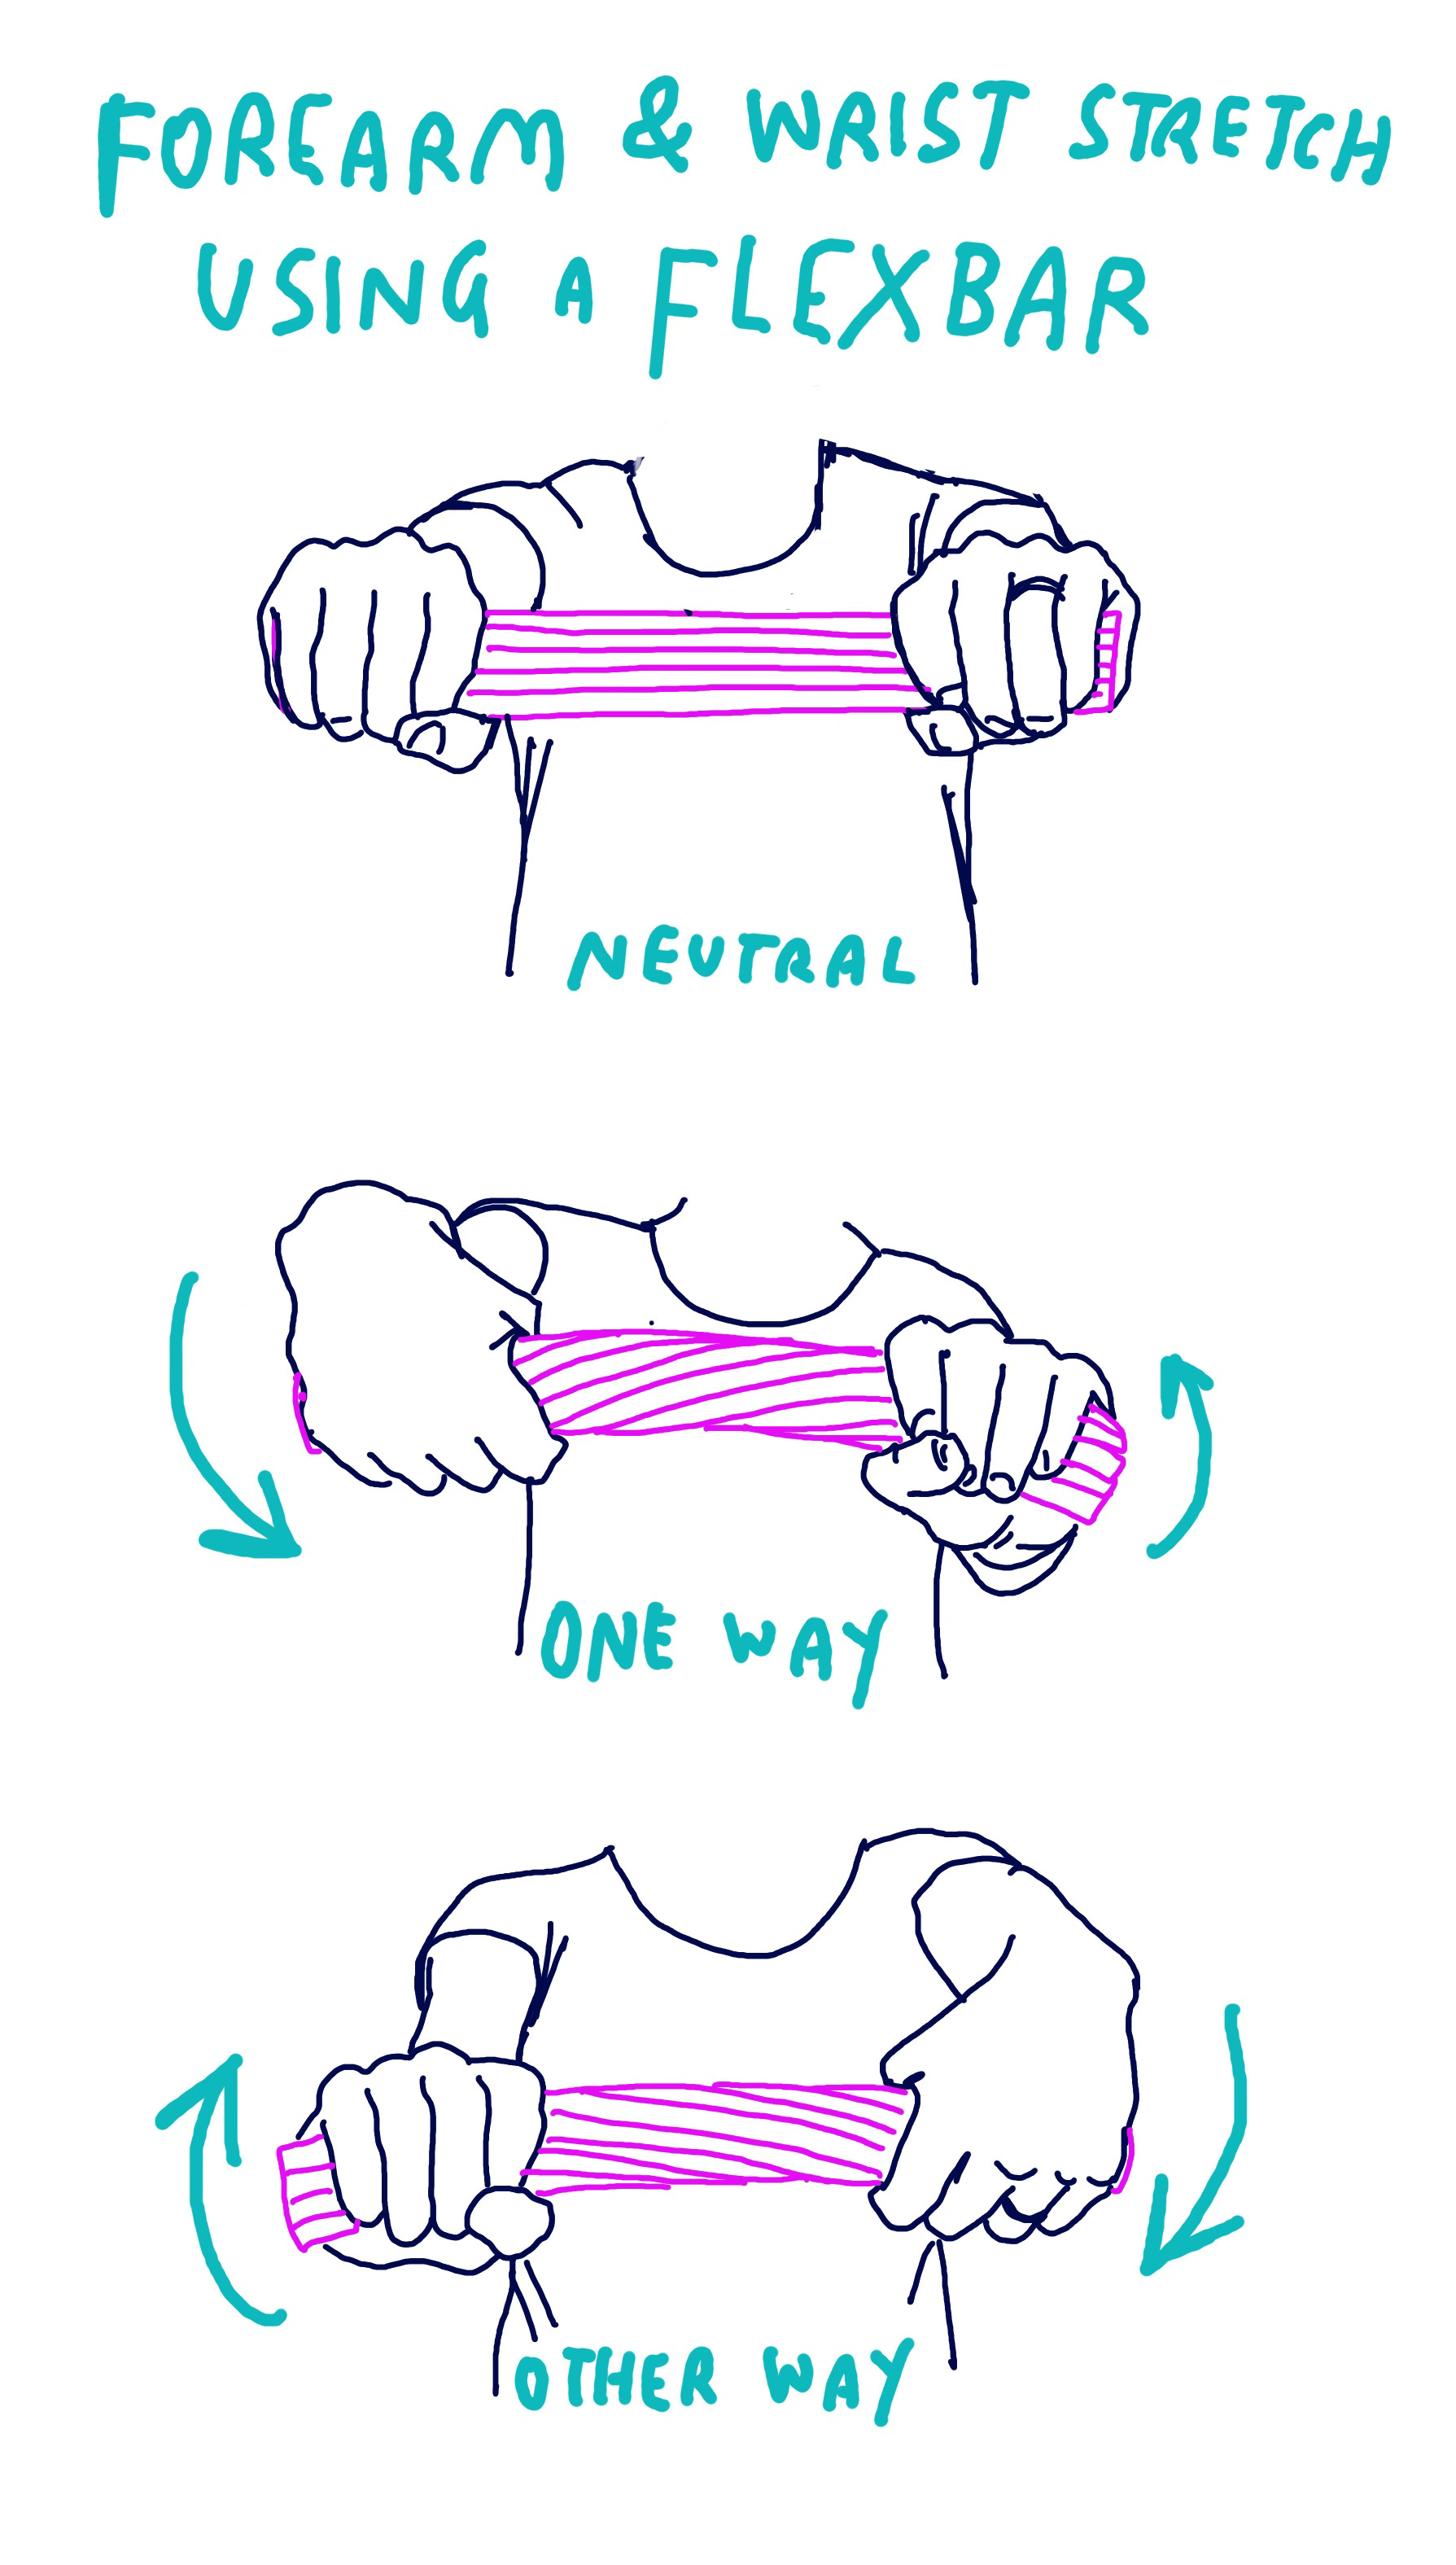
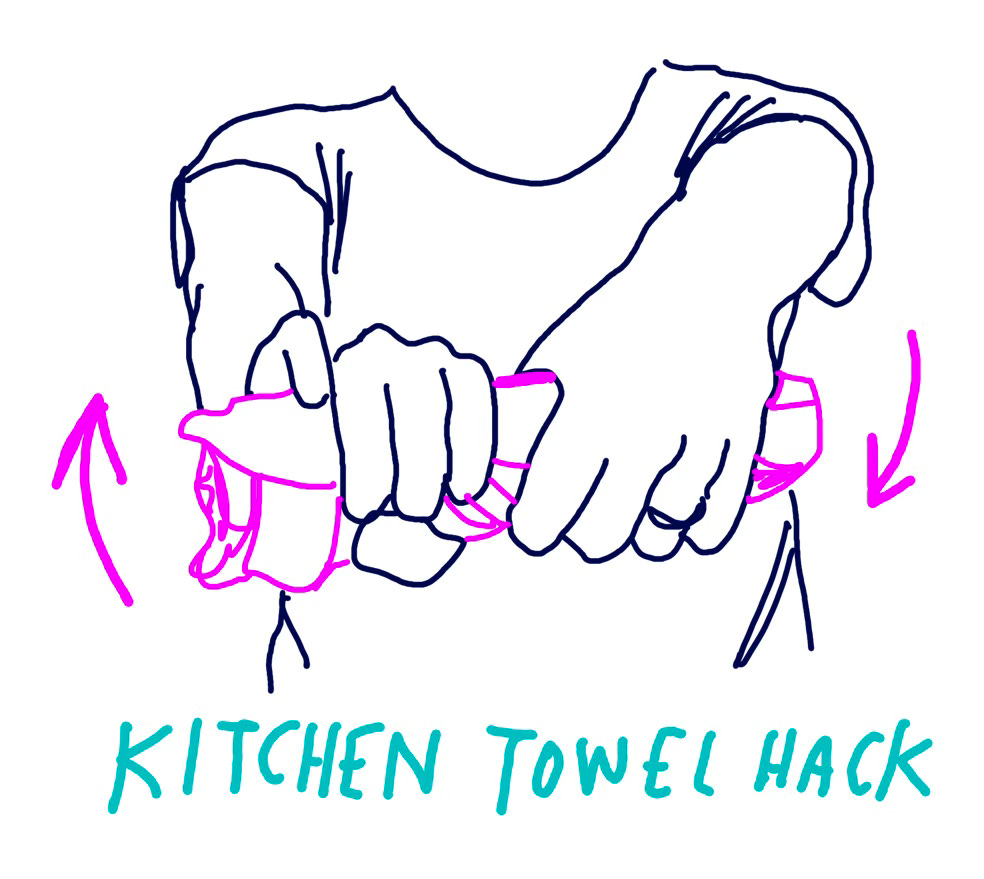
If you don’t have a FlexBar, you can use a rolled-up towel. Either way, hold the bar like the handlebars of a bicycle and twist it in alternating directions. You can start with smaller movements focused on the wrists and forearms, but you can also make the movements bigger through your shoulder and spine, through your core. This illustrates how we can expand from more restrictive movements! While a towel won’t feel quite the same as the FlexBar, you should still be able to feel the stretch.
3. Whole body stretch and strengthen for drawing
We don’t just draw with our hands — we draw with our whole bodies. (Also, we sit at a table hunched over a lot and that is poison for our corpus drawingmentus.) This is a full body stretch that opens up your shoulders and torso.
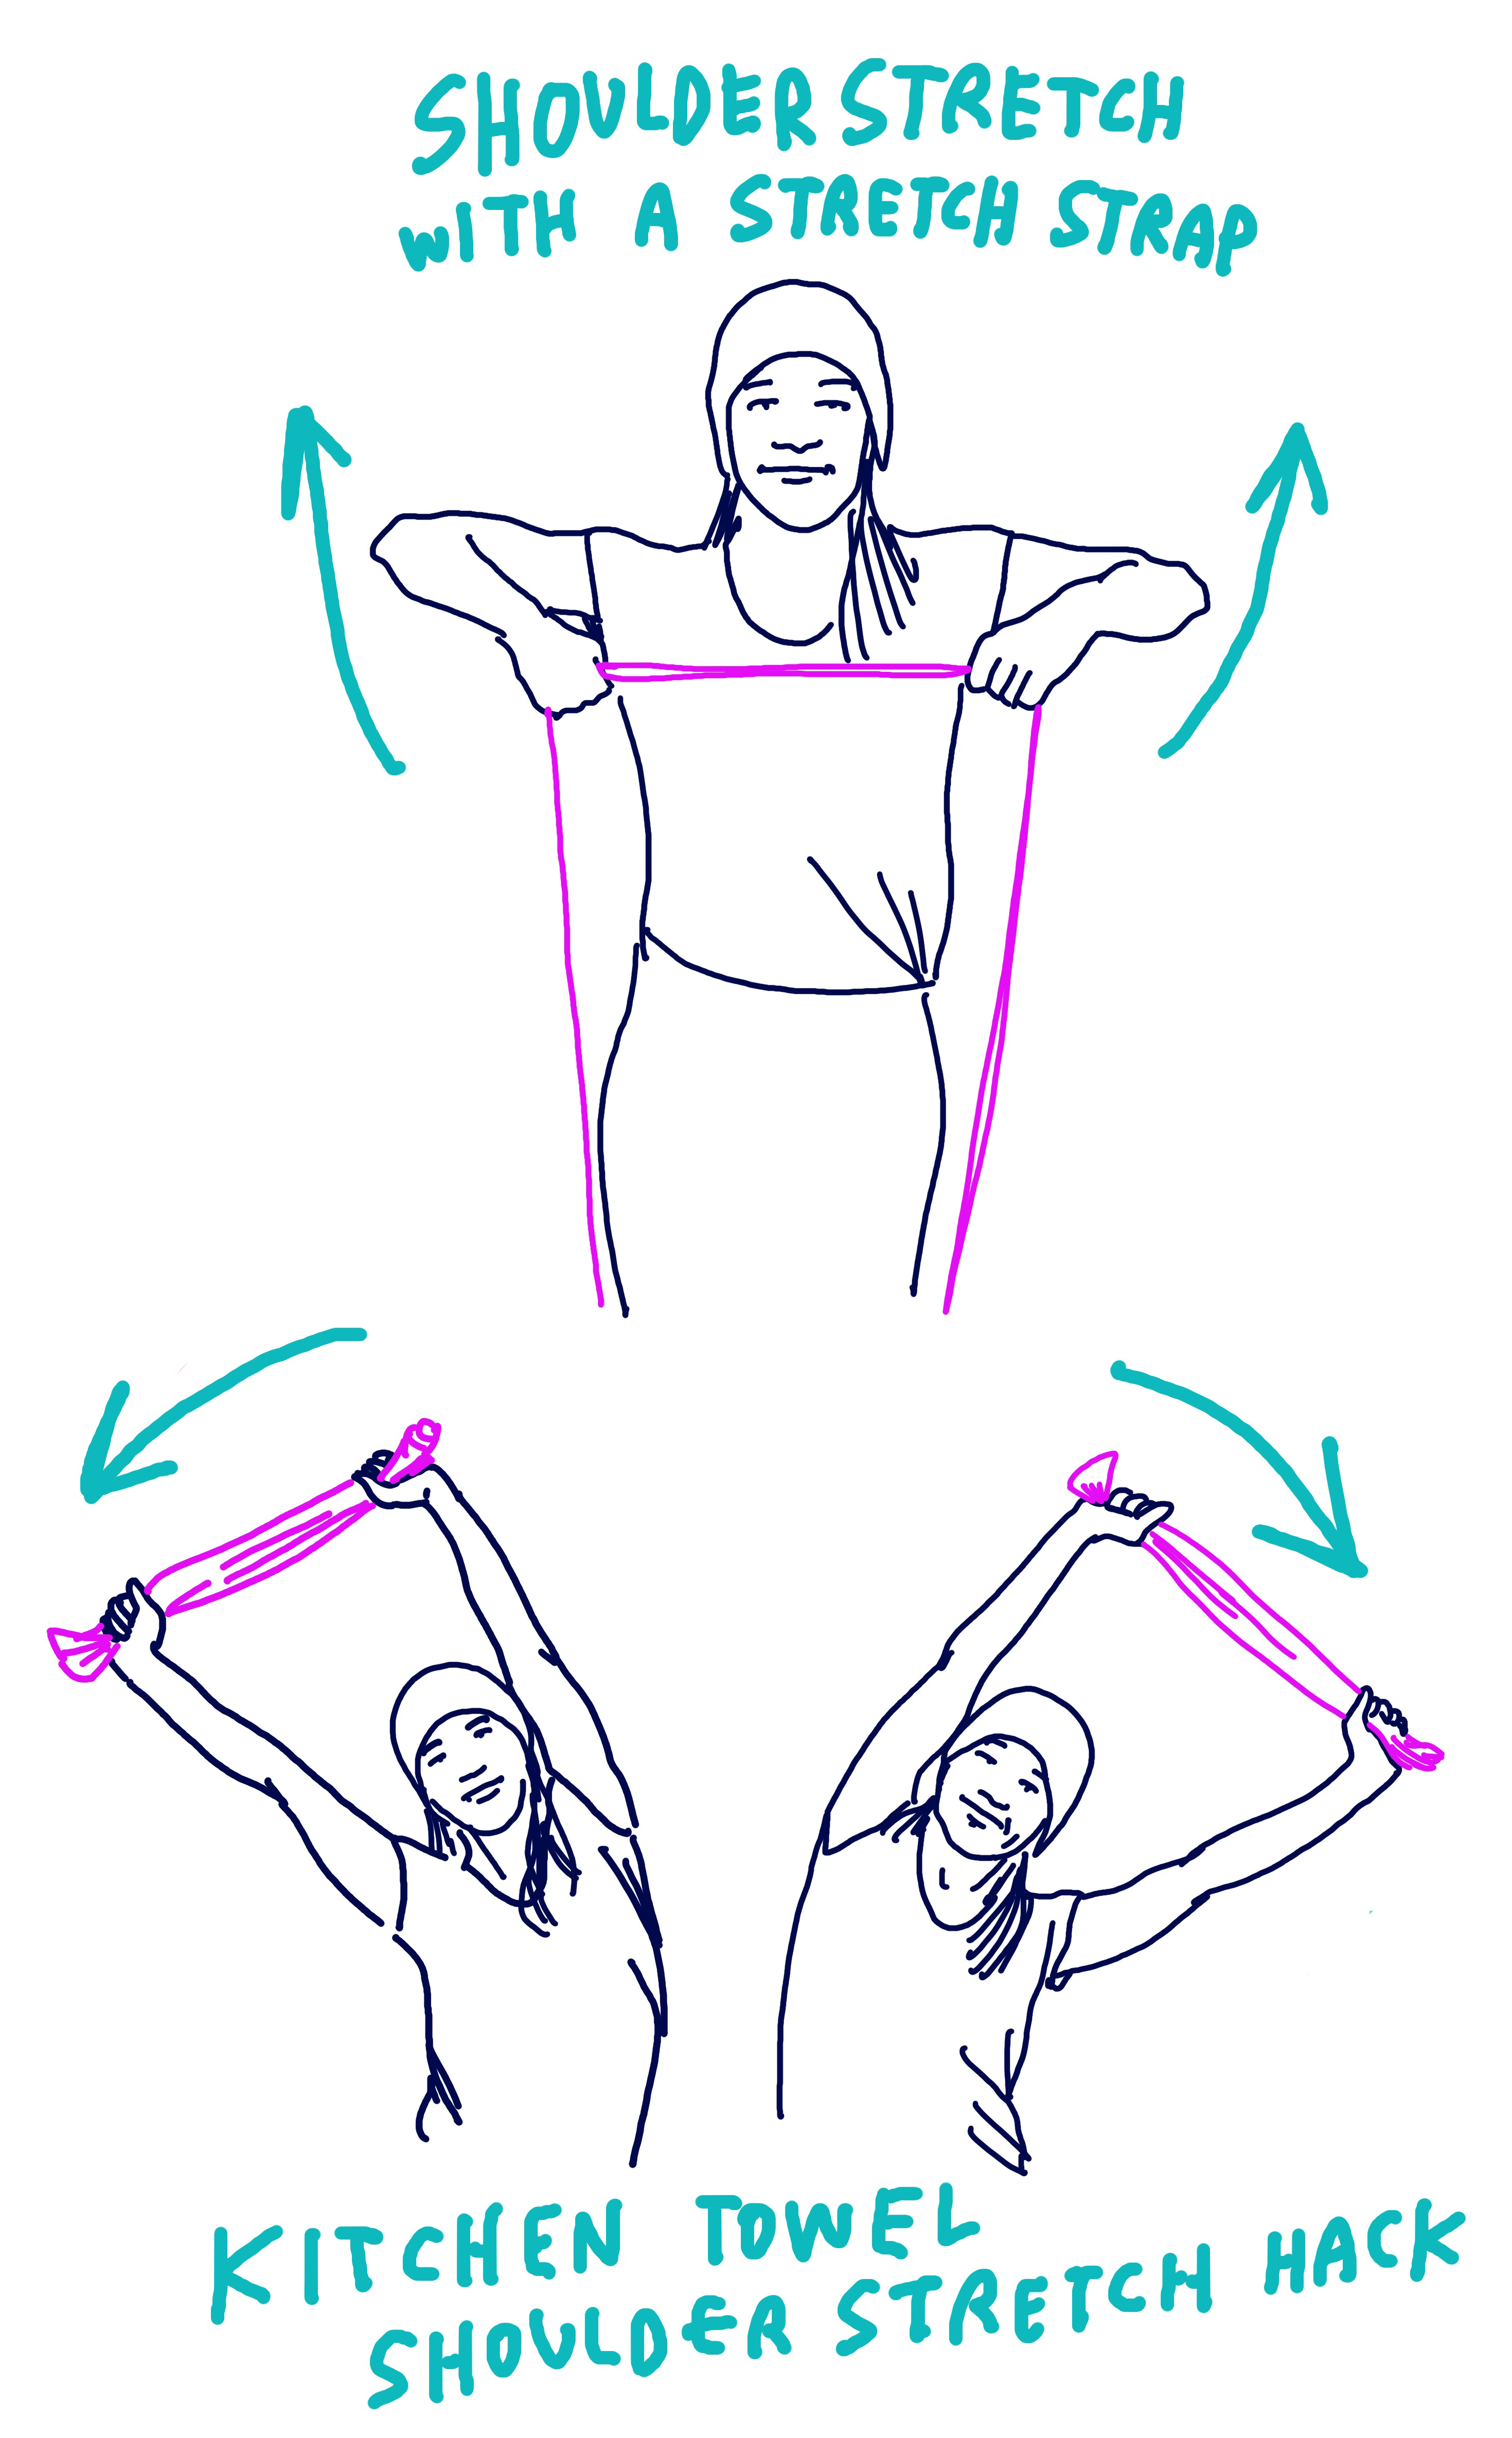
Bonnie likes to use a large resistance band/strap so she can lift her arms over her head and fully extend from a more contracted position, then lean side-to-side.
Try a few of these today. If you don’t have the assistance tools, just make the motions so you can start to feel the areas of your body that need the extra love. Later today, try a couple of the full stretches with a rubber band or towel. Our bodies are the foundation of EVERYTHING we experience. We only have one. So for goodness sake, if we want to keep enjoying drawing, let’s take care of our number one drawing tool: ourselves.
Open assignment: Draw with your whole body
Today we are keeping the assignment open to ALL subscribers. Thank you members for helping make this possible.
This week’s assignment builds on the three movement practices that Bonnie shared with us, and takes inspiration from friend of DrawTogether, choreographer Bill T. Jones. (Dancing = Drawing!)
This assignment asks: How little of your body can you use when you draw, and how much of your body can you use when you draw? And how is the experience different? I recommend reading the instructions all the way through before starting!
Step 1: PREPARE
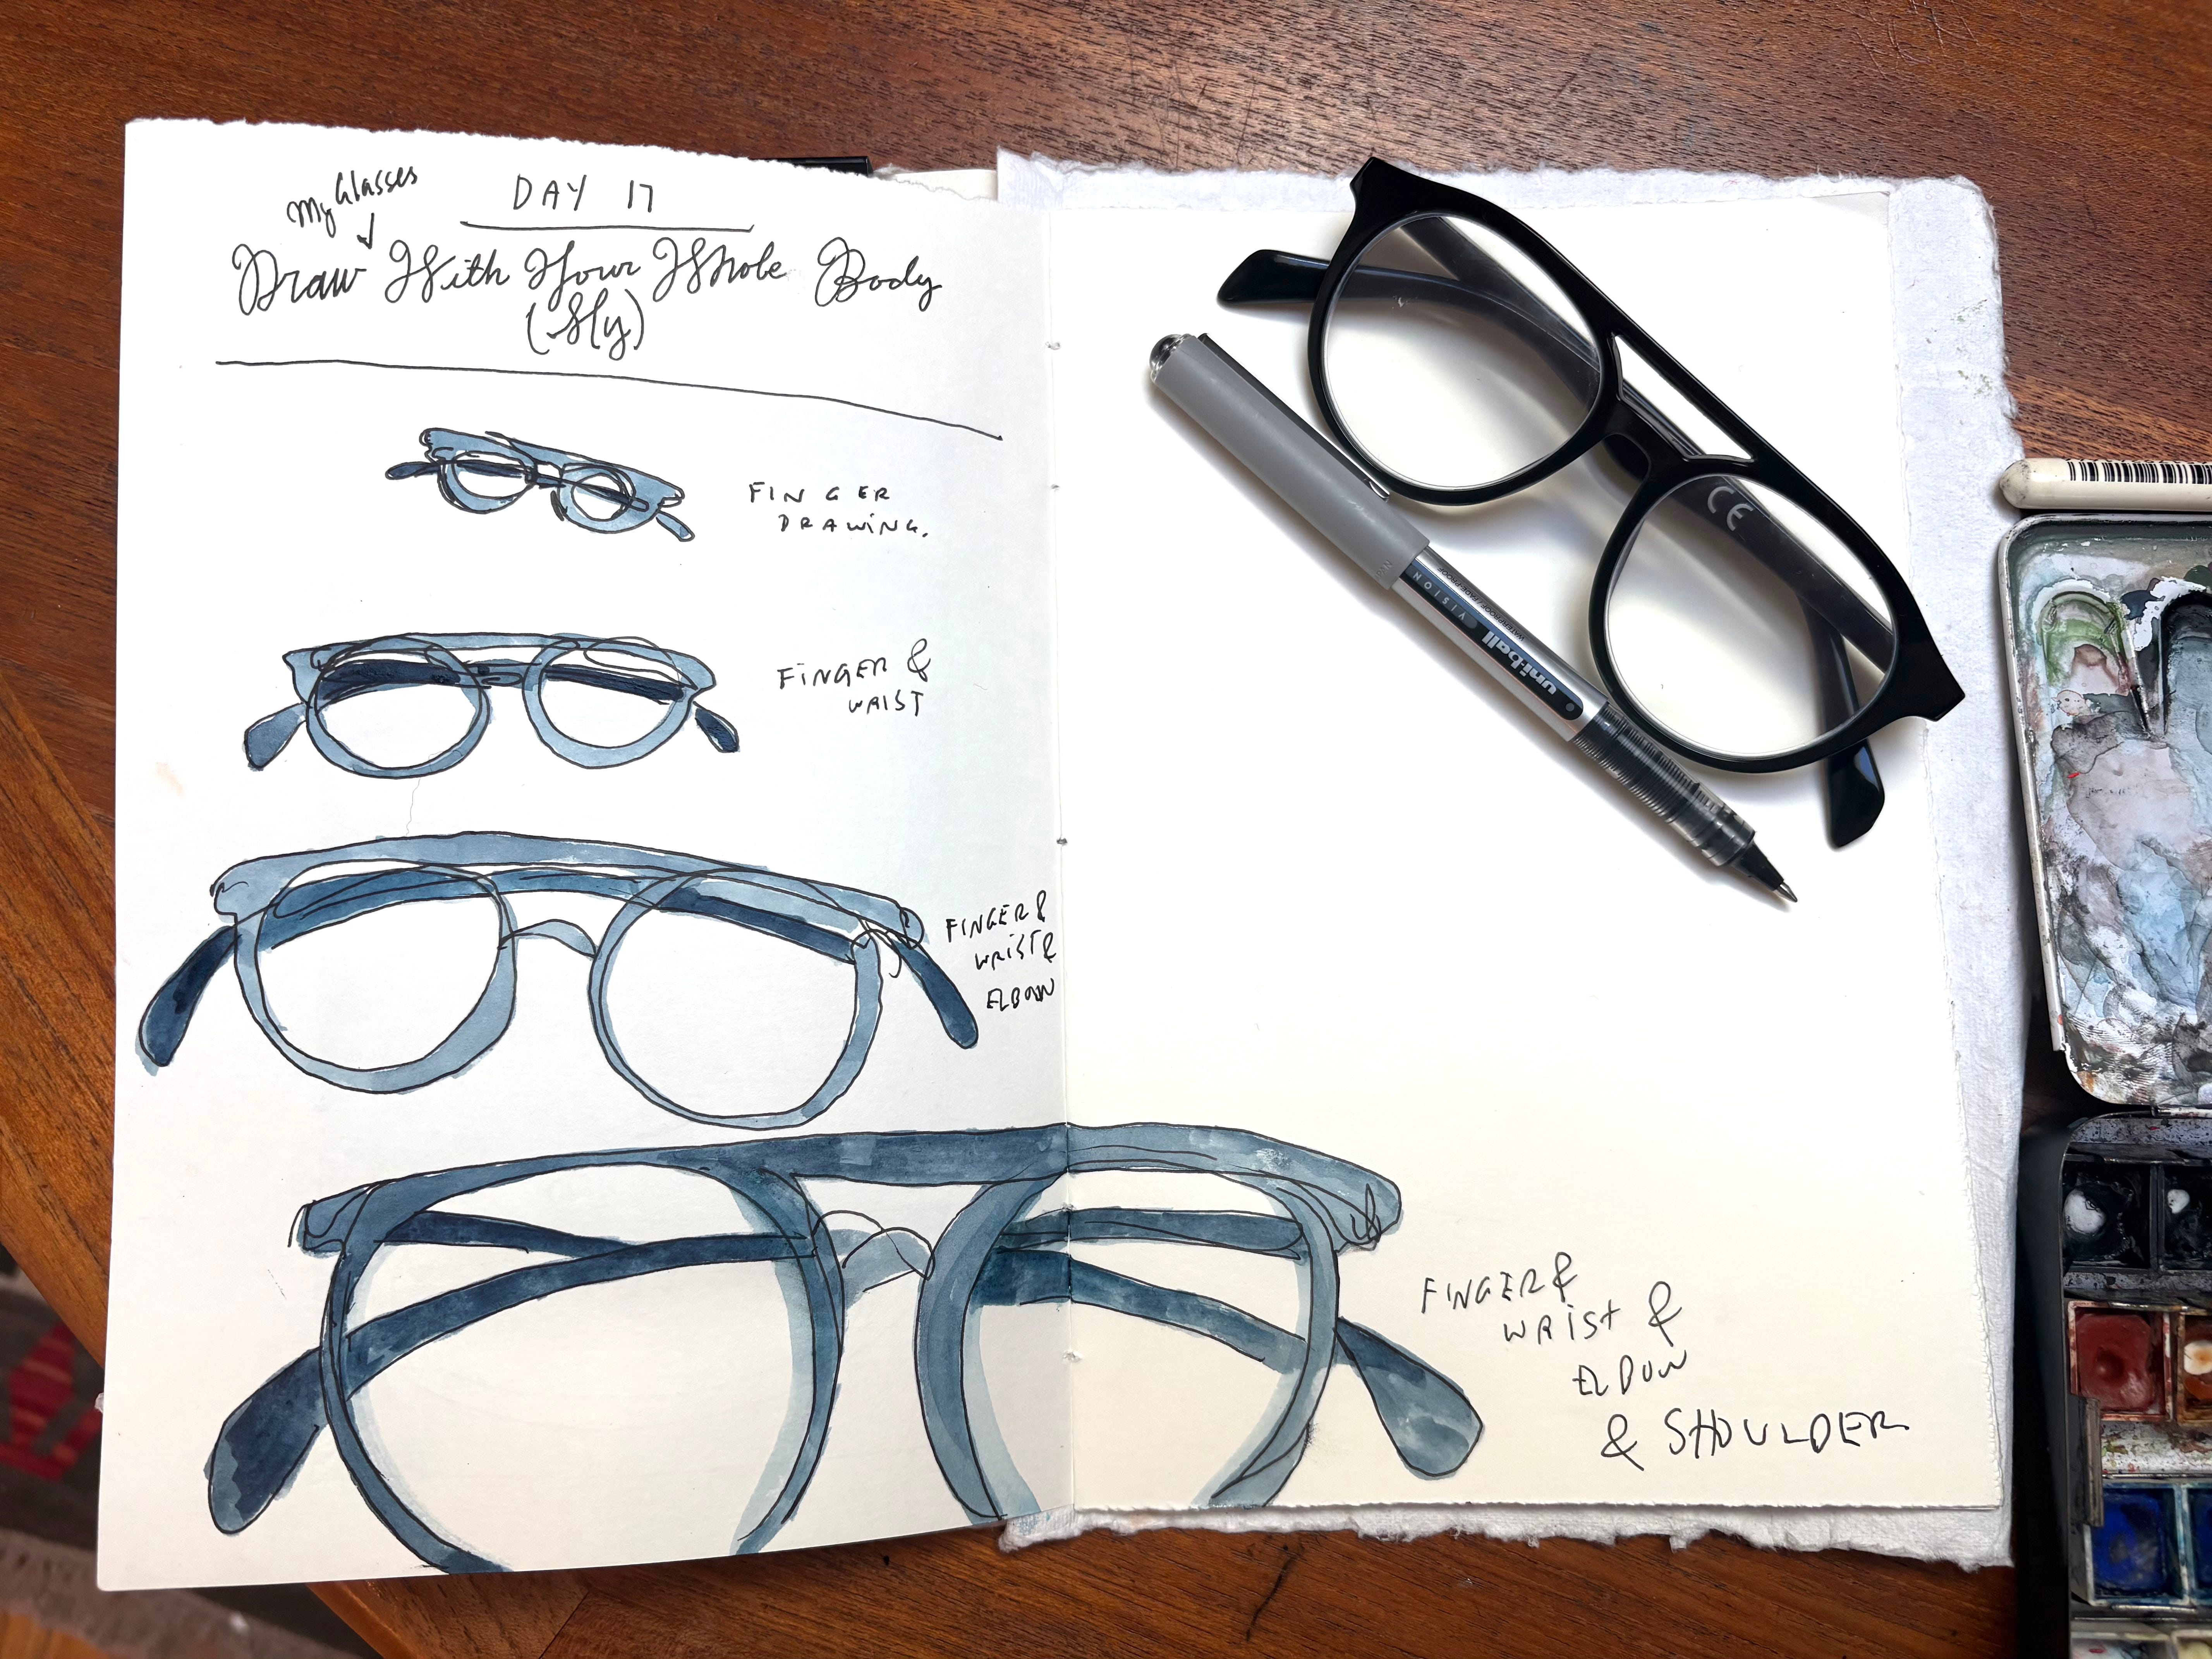
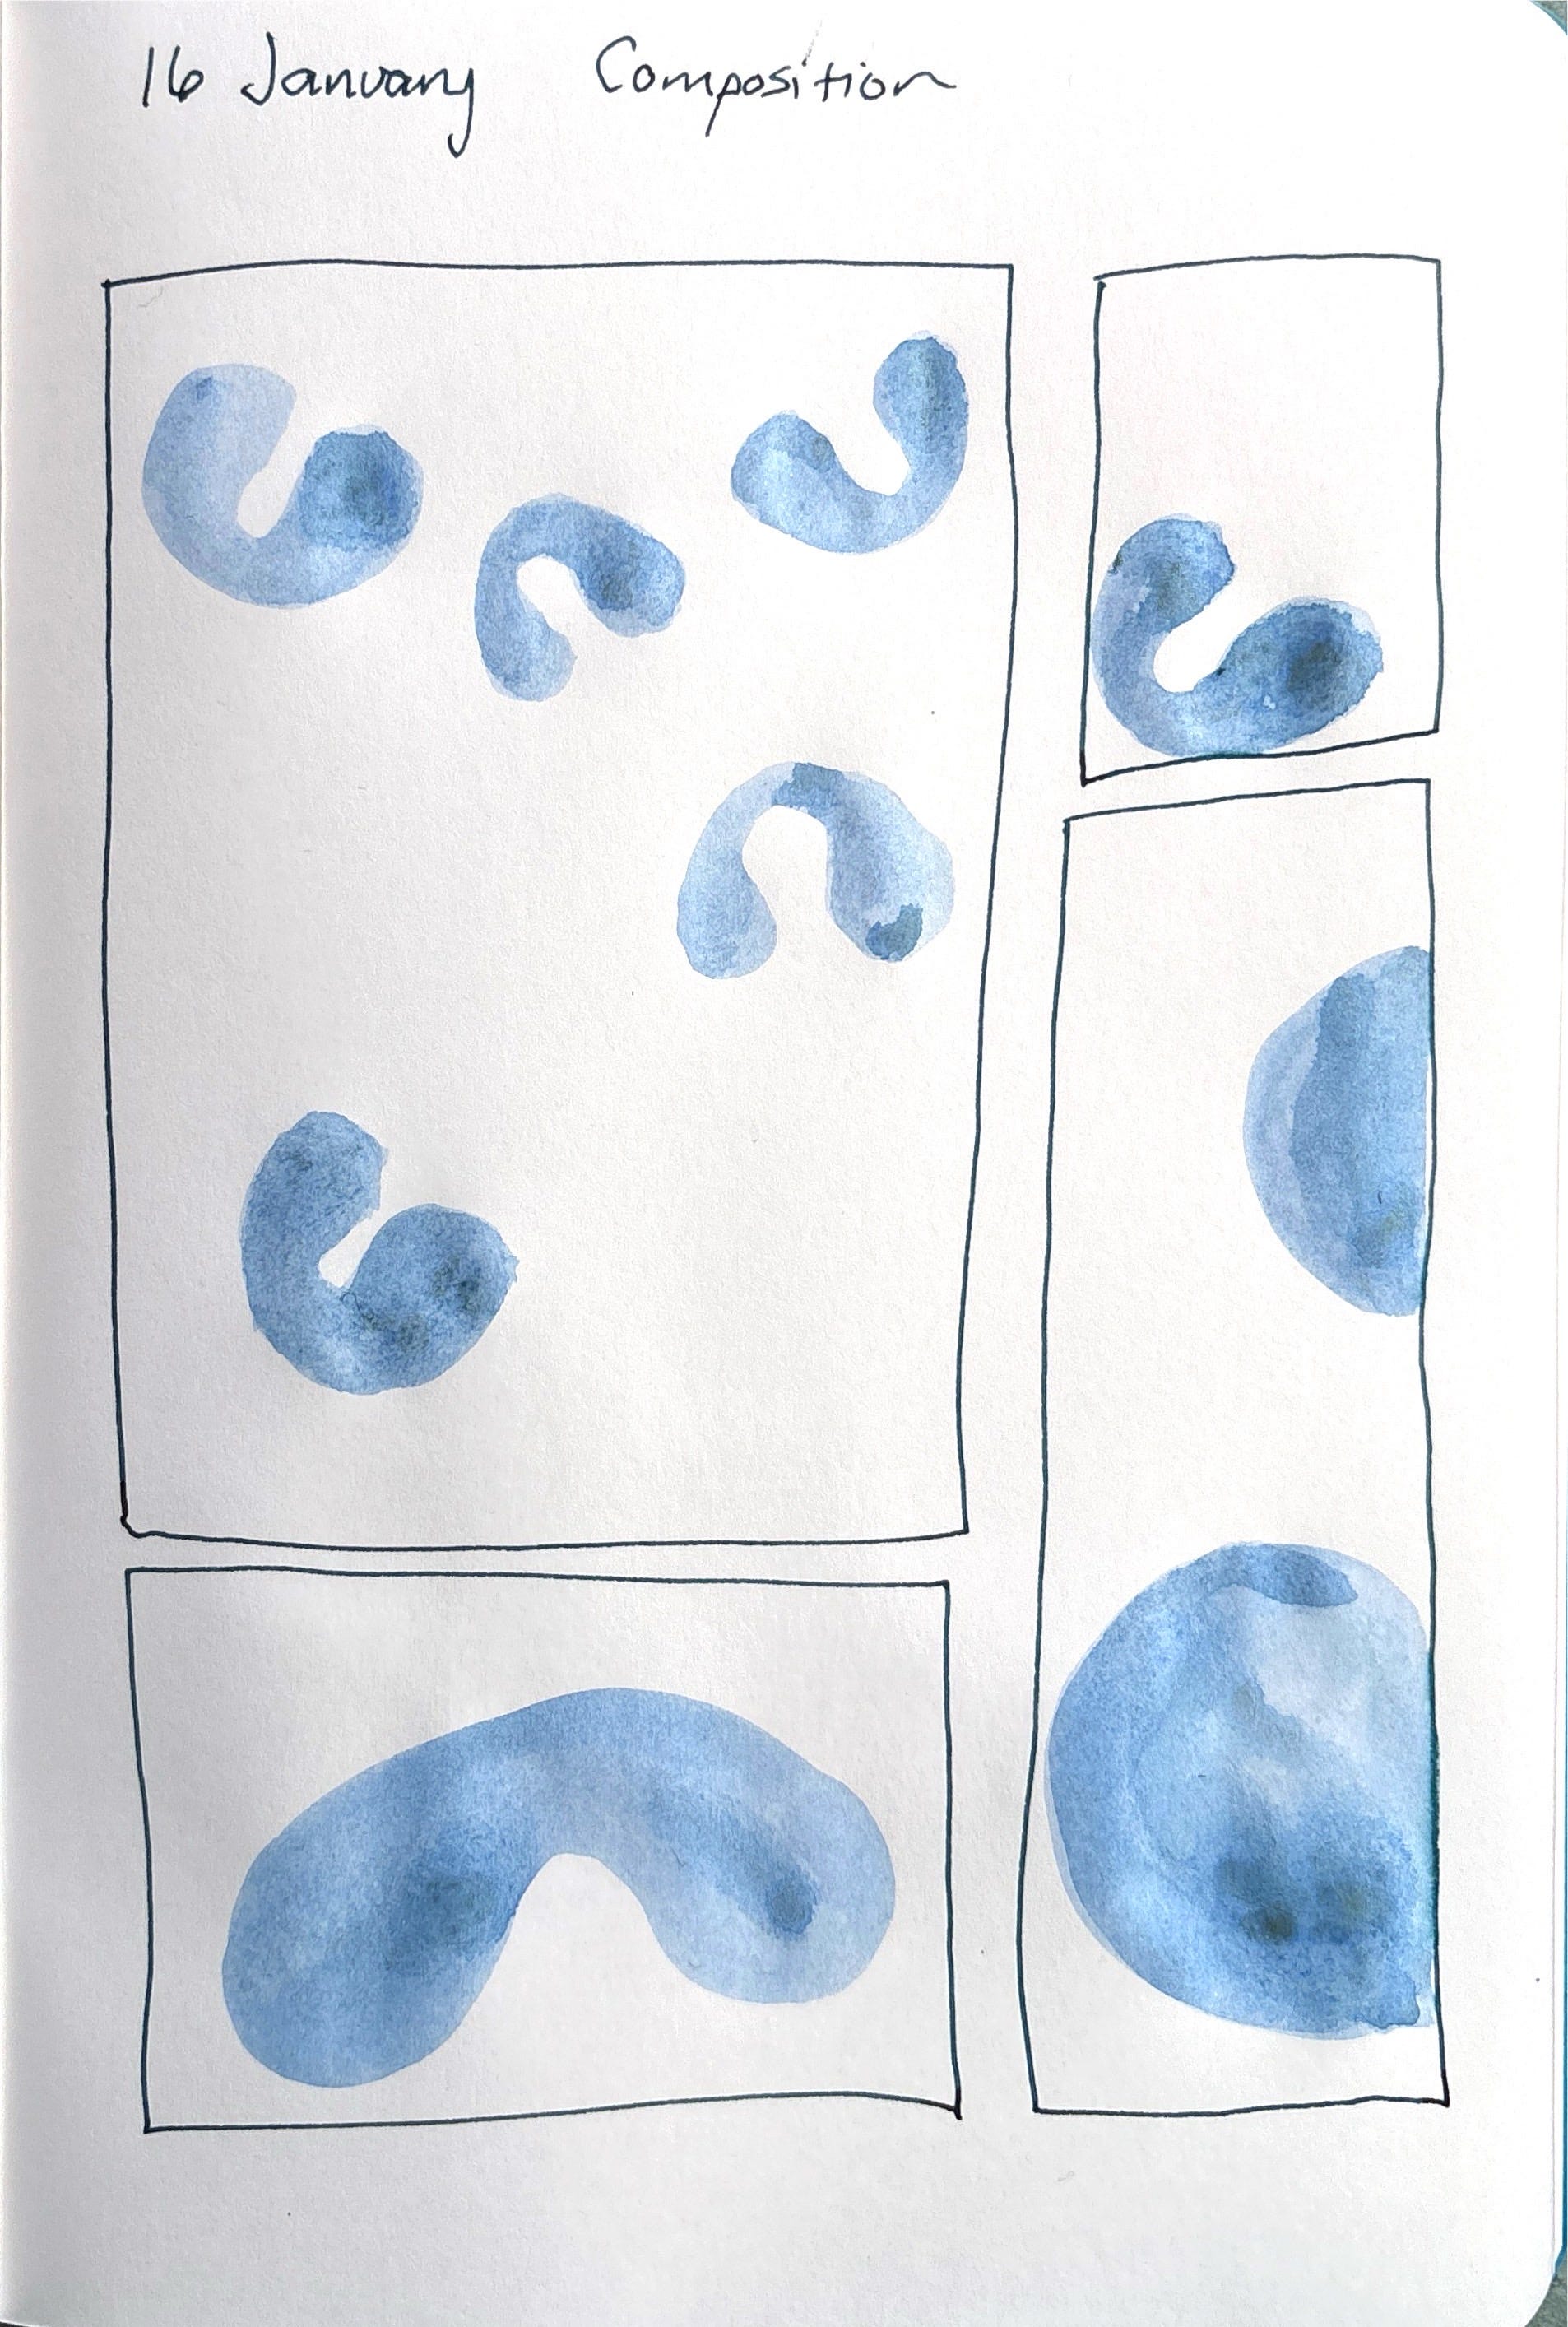
Get as big a piece of paper as you can! You’re going to draw in three stages, and you can draw your drawings next to each other. Because the scale (size!) will be different, you can also draw them on top of each other and color them in different colors like I did above.
Choose a subject. I chose glasses, but yours can be anything that doesn’t move. You’re the one doing the moving today!
Step 2: FINGER DRAW
Rest your drawing wrist on your paper. Pretend it is fused to the paper, so you can only move your fingers. For a minute or two, draw your subject by moving ONLY YOUR FINGERS. Notice that the range of motion is small, so your drawing is going to be small. As you draw, try reaching with your fingers, and moving in all directions. What does it feel like to draw with ONLY YOUR FINGERS? Stop when you are done.
Step 3: ARM DRAW
Think about the first stretch with the towel — now draw the same subject while being aware of the muscles you activated in that stretch. Be aware of your whole arm! You can do this ON TOP or NEXT TO the “finger drawing” you just did.
See how this is different from the finger drawing. What does using your WHOLE arm add to the movement and marks you make? Stop when you are done.
Step 4: FULL BODY DRAW
Now stand up and incorporate your whole body in drawing that same subject! Call upon the experience you had with your body in the last stretch and translate those movements into the art you’re making. Don’t just think about the arm —what about your legs and the sides of your body?!
Step 5: Share your drawings in the chat!
Can’t wait to see what you draw with your WHOLE BODIES.
xoxo
w
GUT GALLERY
It might be useful to consider the eyes' health for people new (or old?) to drawing. Maybe it's just me, I do have somewhat sensitive eyes. Or I might be doing it wrong, but every time I look at something closely, I end up with stressed/tired eyes experiencing pain. Eye exercises and drops help, but maybe some sort of eye muscles need to be built :). Eye sight too might be an area to add to drawer's health. (I've seen seamstresses, knitters etc. making experiencing similar eye challenges.) I am curious to hear what others do w.r.t their eyes :)
Here is the full link. https://www.optometrists.org/vision-therapy/guide-to-vision-therapy/eye-exercises-you-can-do-at-home/